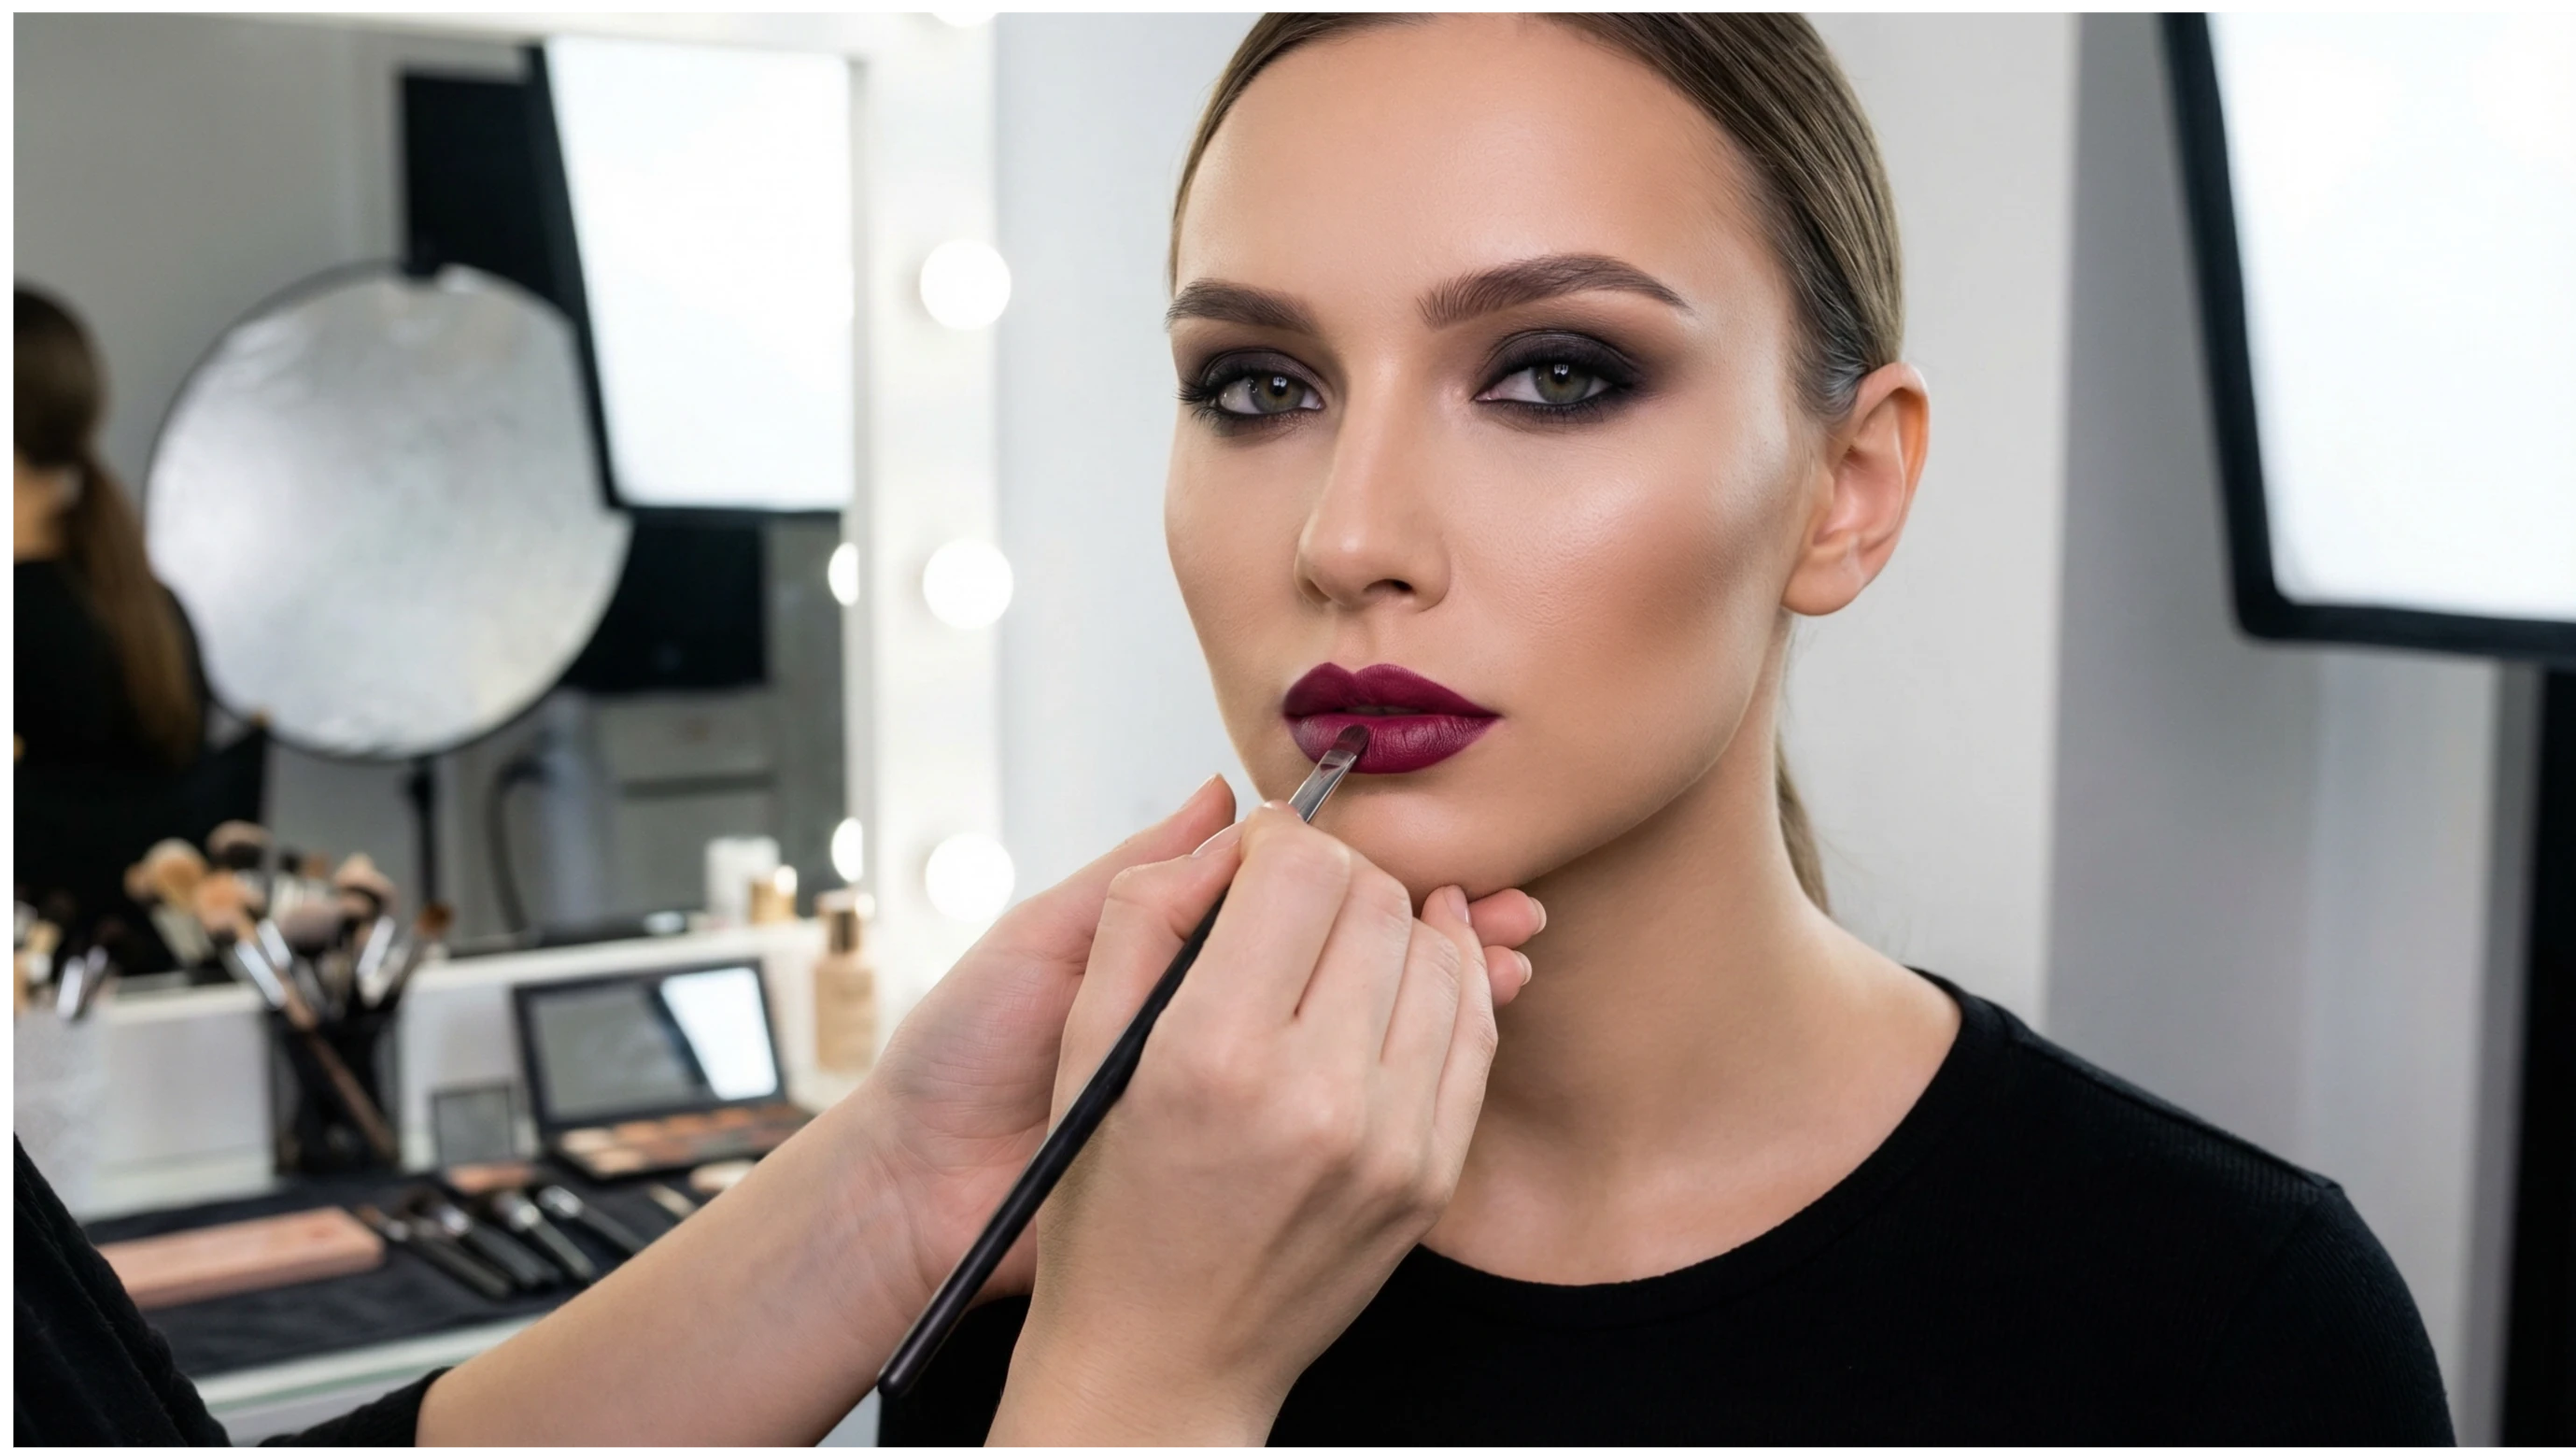
Makeup for photo shoots: a complete guide
· Minettes VIP
If you've ever wondered why your makeup looks perfect in the mirror but different in photos, you're not alone. Makeup for photos is a specialized discipline that requires specific techniques and products to look flawless on camera. In this comprehensive guide, you'll discover everything you need to know to prepare like a pro and shine in your next photoshoot.
Why is Makeup for Photography Different?
Makeup for a photoshoot is fundamentally different from the makeup we use in our everyday lives. The main reason is the way the camera captures light and colors. What appears to be perfect makeup at first glance can look completely different under the bright lights of a photo studio or when captured by a high-resolution camera.
High-resolution cameras are unforgiving. Every imperfection, every pore, every fine line is magnified. That's why makeup for photoshoots requires greater coverage to even out skin tone and neutralize redness, blemishes, or shadows that the camera tends to accentuate. Furthermore, certain products that work perfectly in person can create problems in photographs, such as the dreaded "flashback."
Flashback is that whitish reflection that appears in photos when using a flash. It's mainly caused by foundations containing sunscreen (SPF) or certain translucent powders with reflective particles like silica or mica. These ingredients, while beneficial for the skin on a daily basis, reflect the flash unevenly, creating white patches on the face that ruin the photograph.
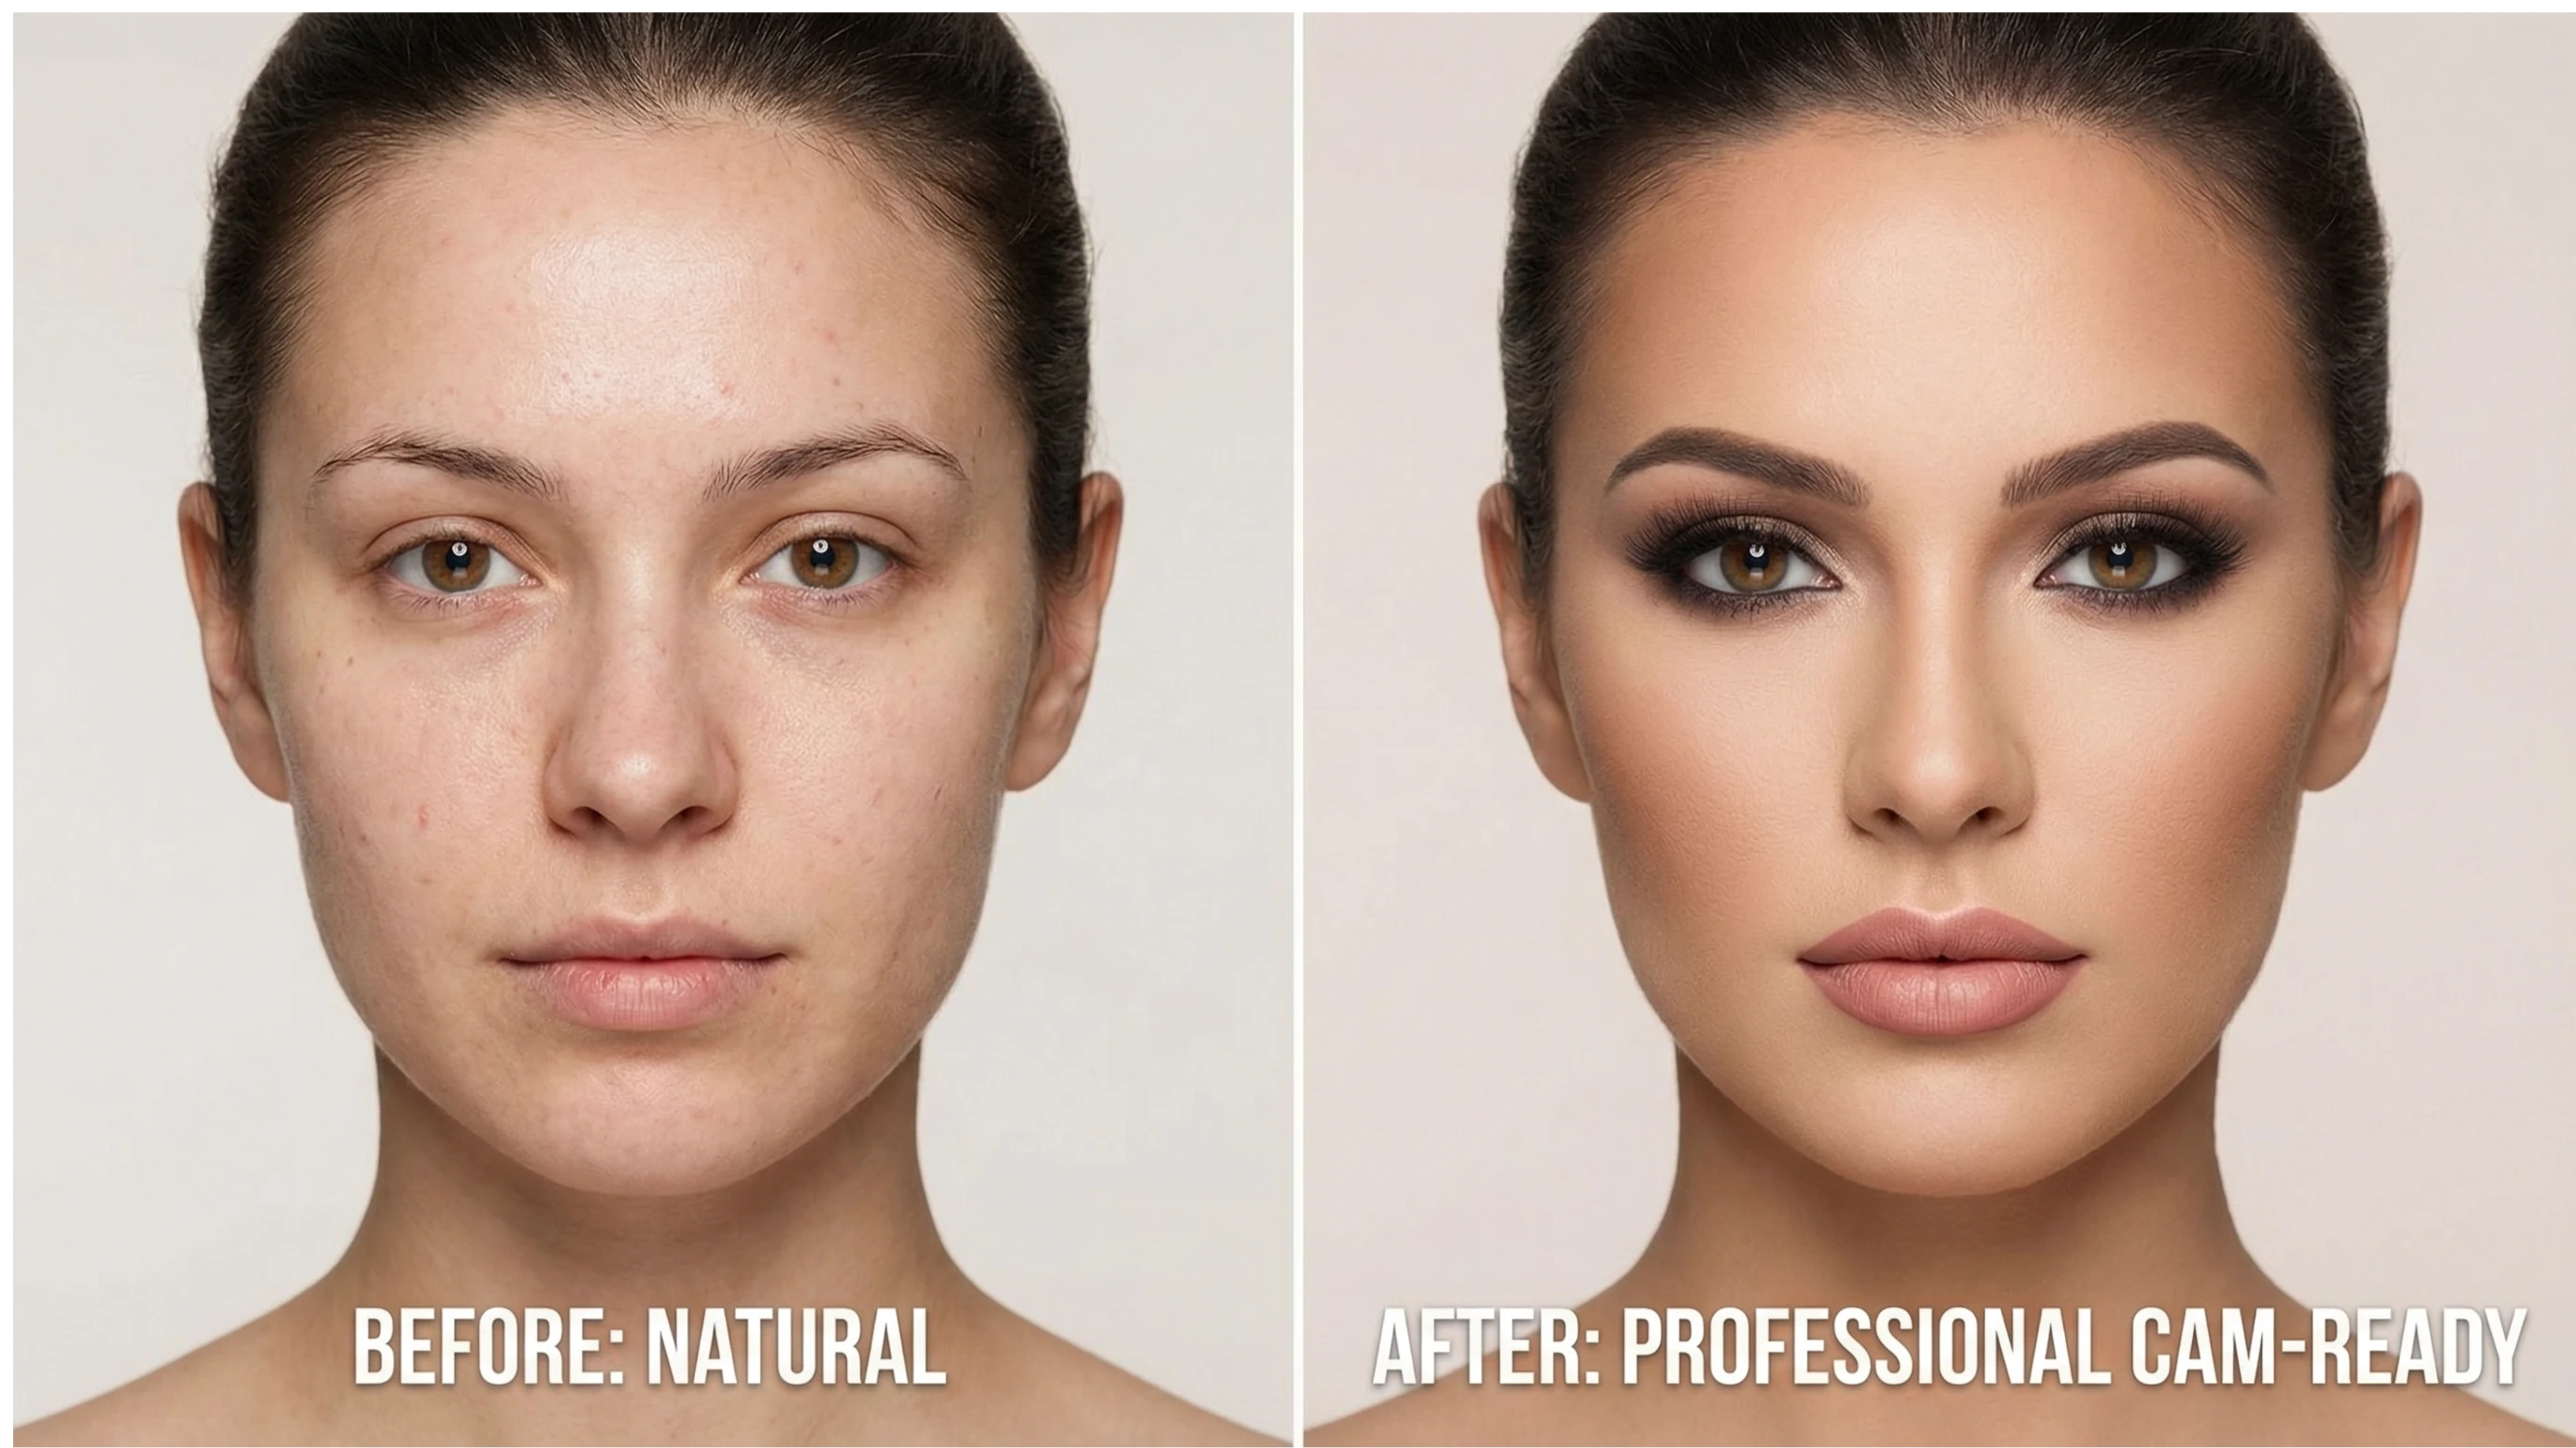
Another key difference is color intensity. In photography, especially with studio lighting, colors tend to appear more muted than in person. That's why makeup for photos is usually more intense and pigmented. What might seem "too much" in the mirror looks perfectly balanced on camera. Blush, contour, and eyeshadow need to be more pronounced to be visible in the final photograph.
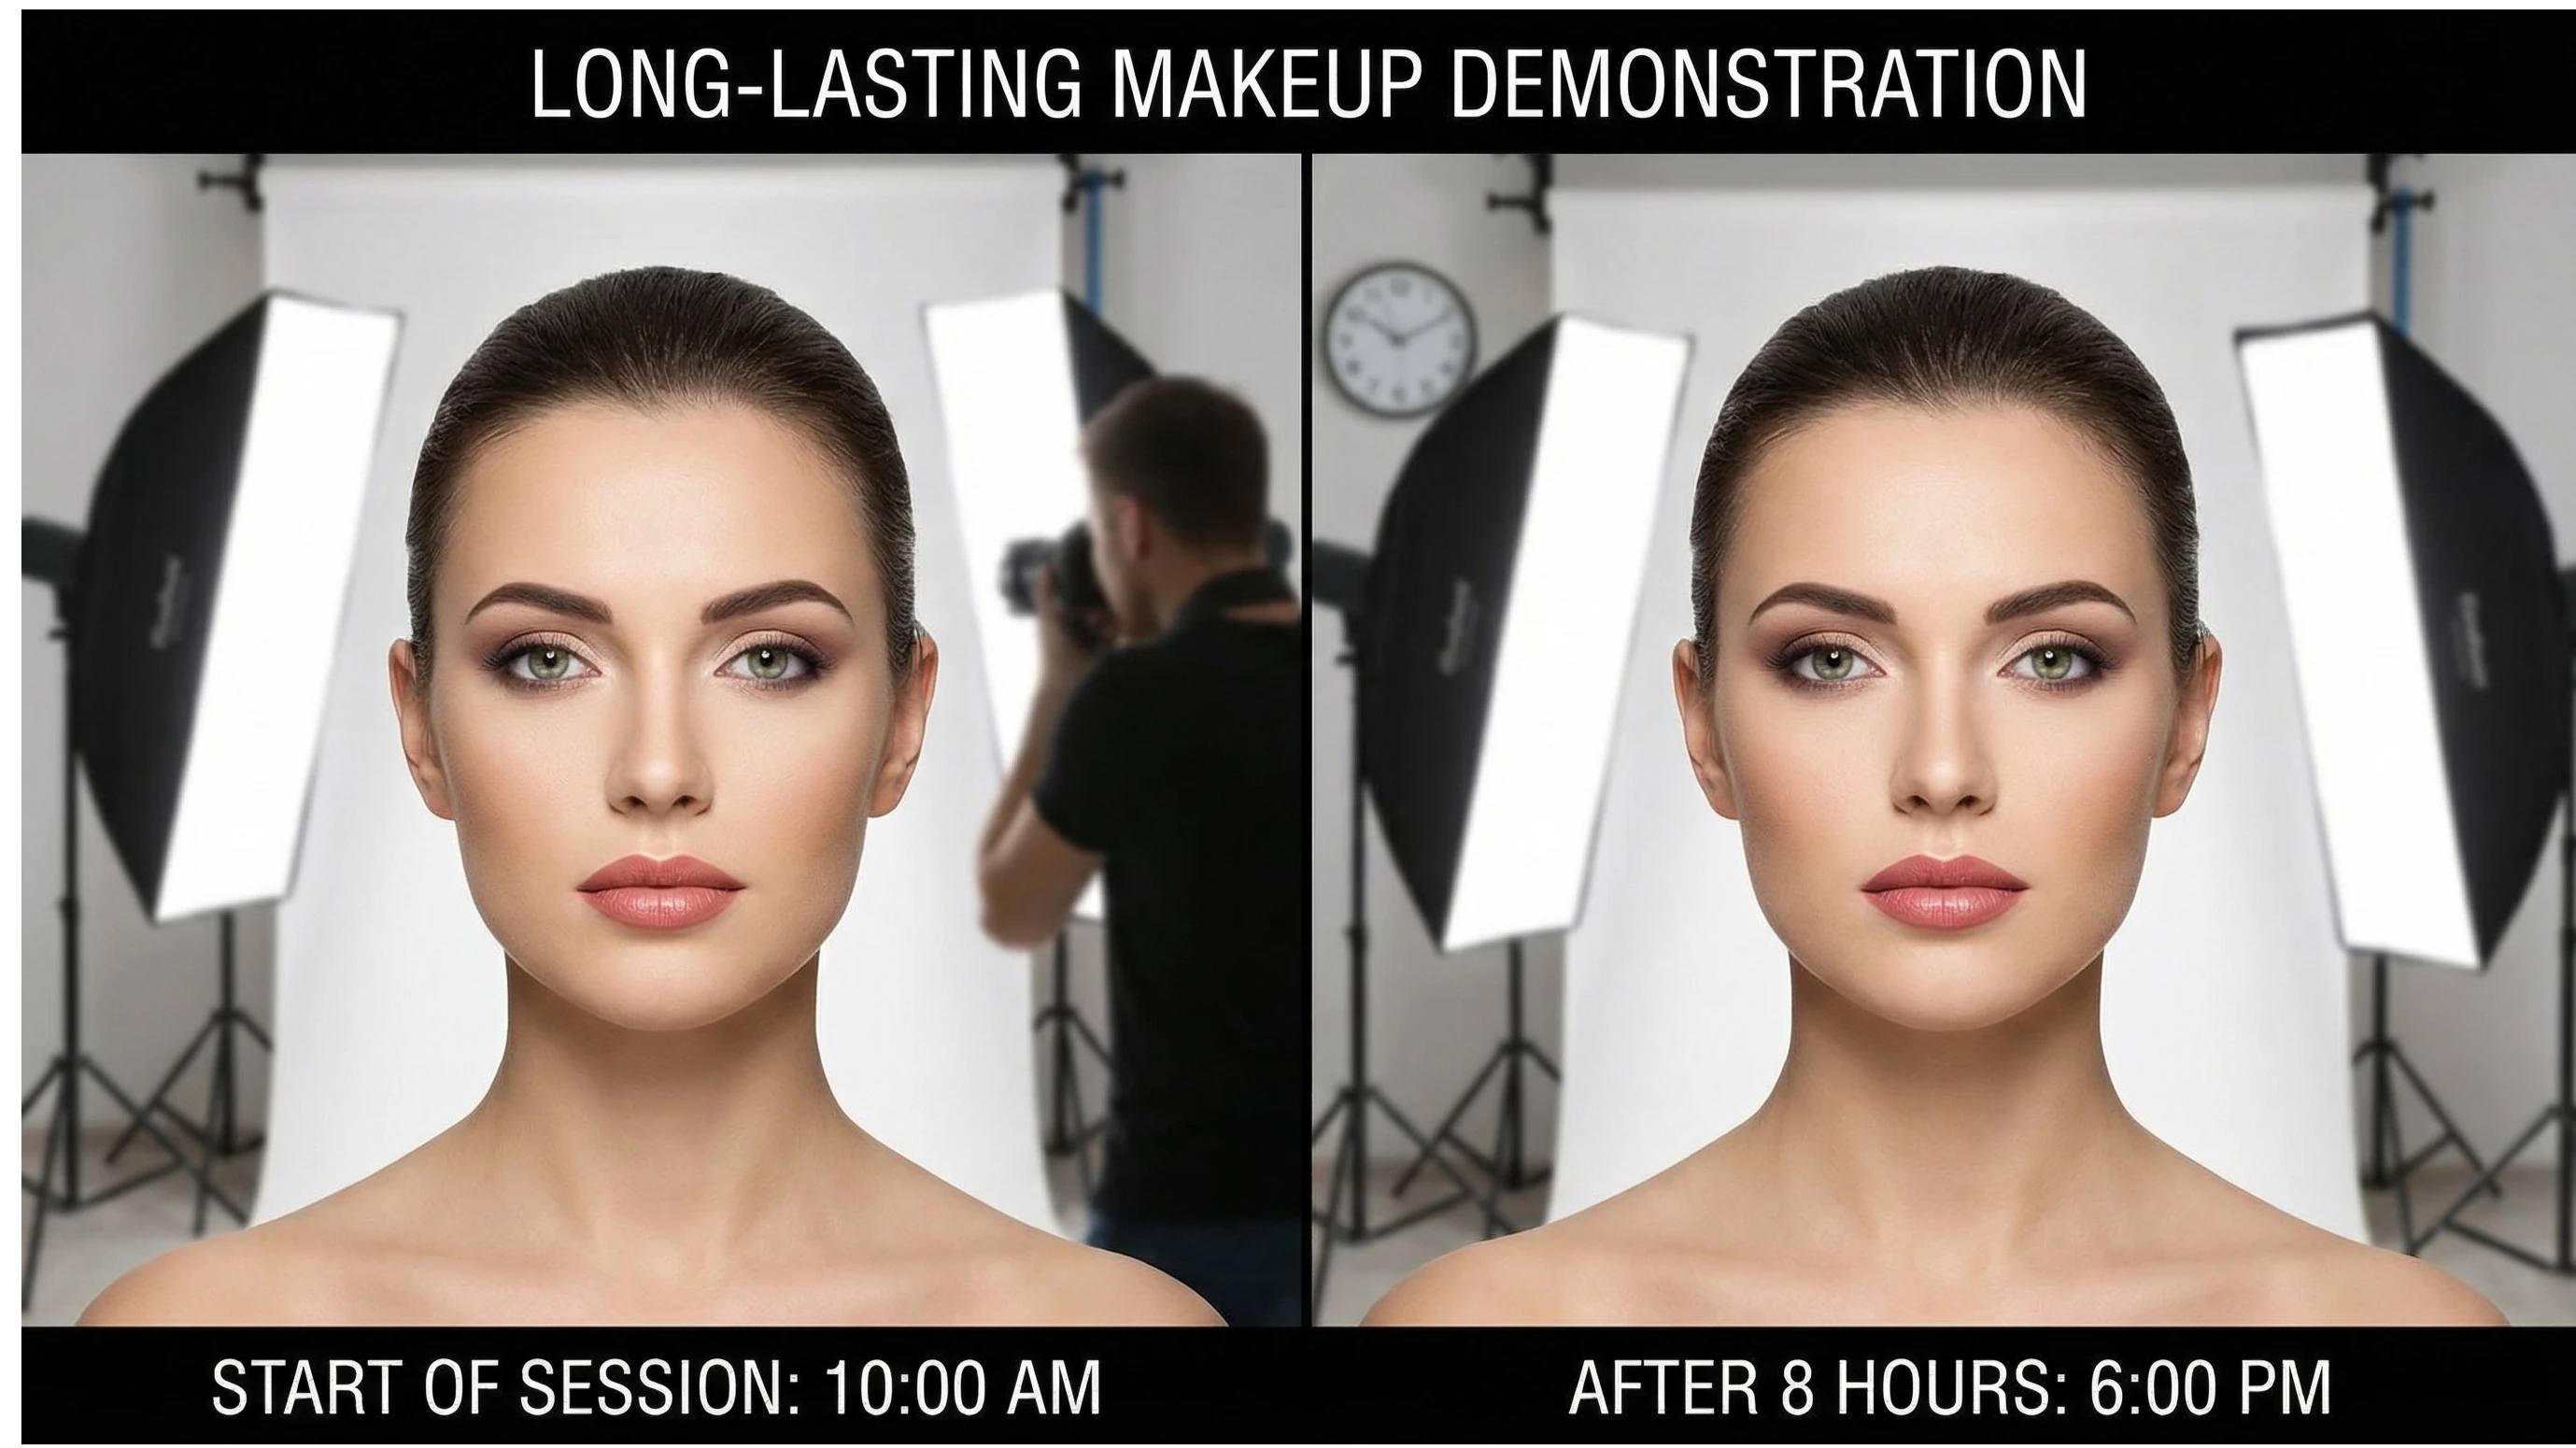
Durability is another key factor. A photoshoot can last several hours, and during that time, makeup will be exposed to the heat of studio lights, constant movement, and, in some cases, varying environmental conditions. Makeup for a photoshoot must be resistant, long-lasting, and able to maintain its flawless appearance without the need for constant touch-ups.
Recommended Products and Brands for Impactful Makeup
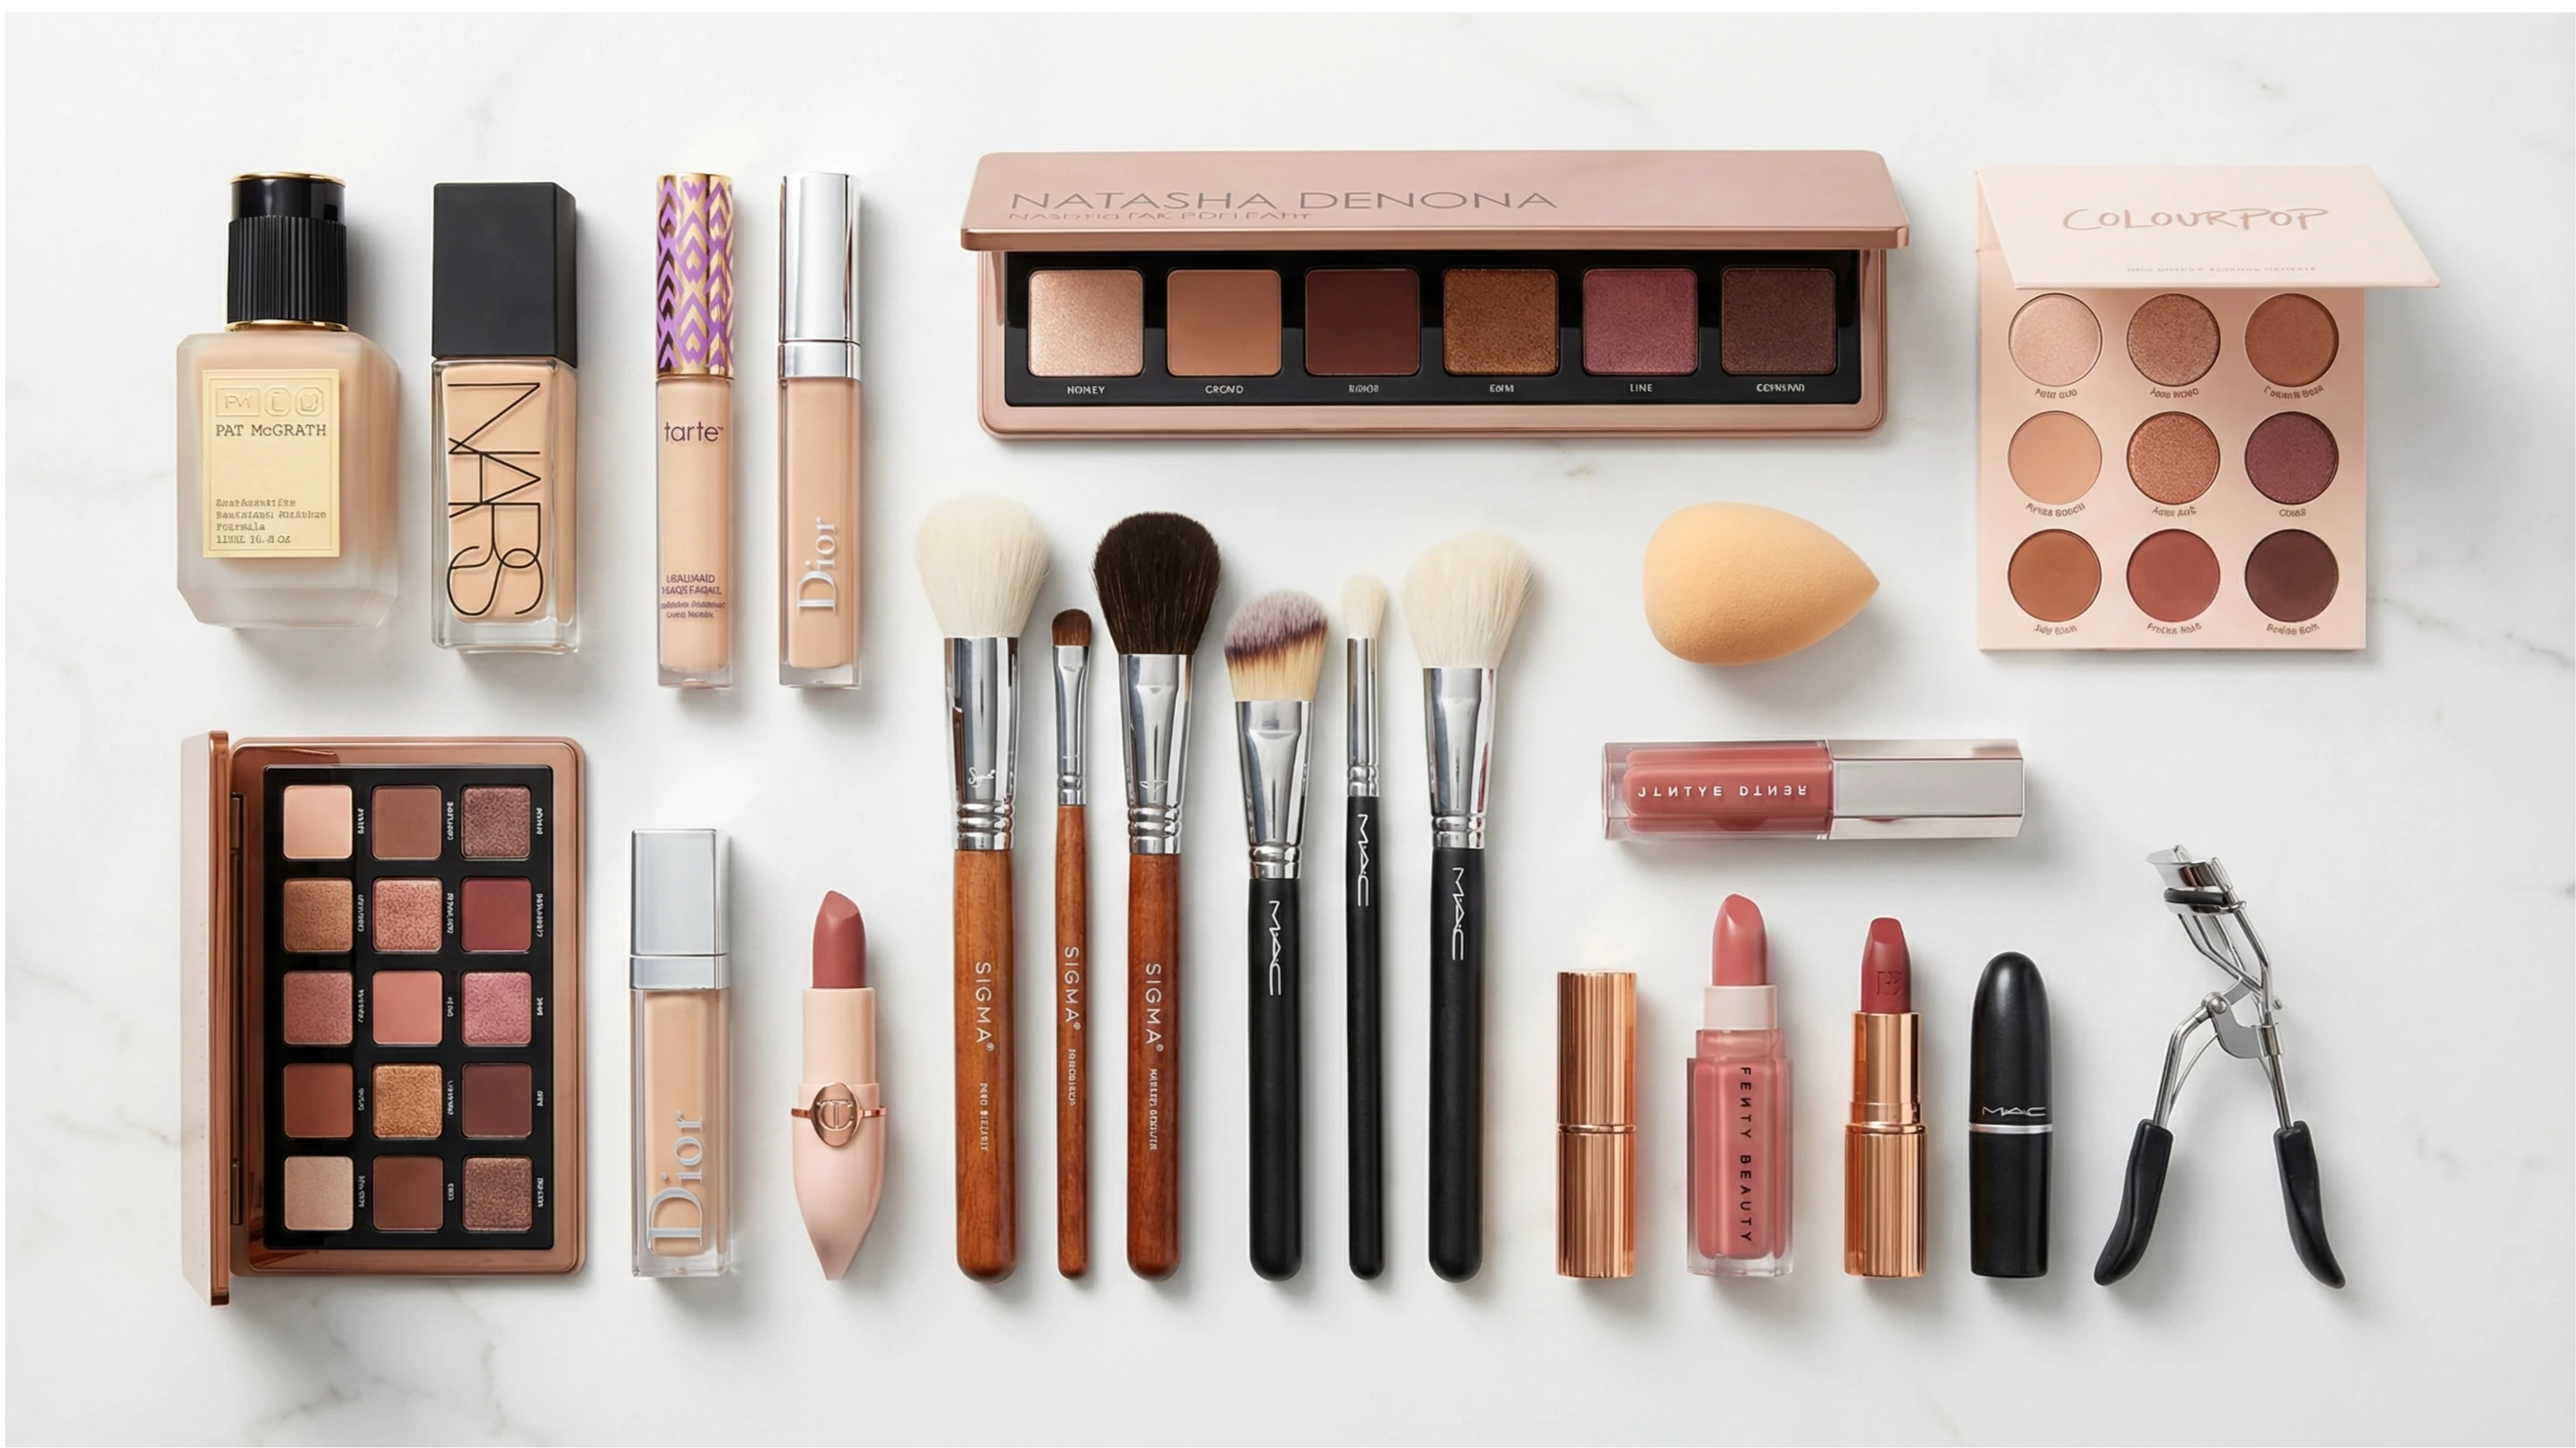
Choosing the right products is essential for achieving professional makeup for a photoshoot. It's not about using more product, but about selecting the right formulas that interact well with light and the camera. Here's a detailed guide to products and brands that are a sure bet:
Product Type | Recommended Brands (High Range) | Recommended Brands (Mid Range) | Key Features |
Foundation | Pat McGrath Labs, Giorgio Armani, YSL Beauty, Charlotte Tilbury | Maybelline, L'Oréal, Revlon, MAC | High coverage, matte or semi-matte finish, no SPF or minimal SPF, long lasting |
Corrector | MAC, Estée Lauder, NARS, Tarte | Maybelline, NYX, LA Girl, ColourPop | High coverage, does not crease, neutralizes dark circles and shadows |
Translucent Powder | Laura Mercier, Fenty Beauty, Huda Beauty | RCMA, Coty Airspun, Maybelline Fit Me | It sets makeup, controls shine, and doesn't cause flashbacks. |
Contour Palette | Anastasia Beverly Hills, Kat Von D, Fenty Beauty | NYX, Wet n Wild, Morphe | Easy to blend, natural tones, matte |
Eyeshadow | Natasha Denona, Pat McGrath Labs, Viseart | Morphe, ColourPop, Juvia's Place | Preferably matte, highly pigmented, long-lasting |
Eyeliner | Stila, Kat Von D, MAC | Maybelline, NYX, L'Oréal | Waterproof, accurate, doesn't run |
Mascara | Lancôme, Dior, Benefit | Maybelline, L'Oréal, CoverGirl | Waterproof, volumizing, smudge-proof |
Lipsticks | MAC, Charlotte Tilbury, NARS | Maybelline, L'Oréal, Revlon | Long-lasting, matte or semi-matte, transfer-proof |
Makeup Setting Spray | Urban Decay, MAC, NYX | elf, Milani, Wet n Wild | It seals all makeup, increasing its durability. |
Pro Tip: Invest in a good foundation and concealer. They're key to flawless skin on camera. For the rest of your makeup, there are excellent, more affordable options that work just as well.
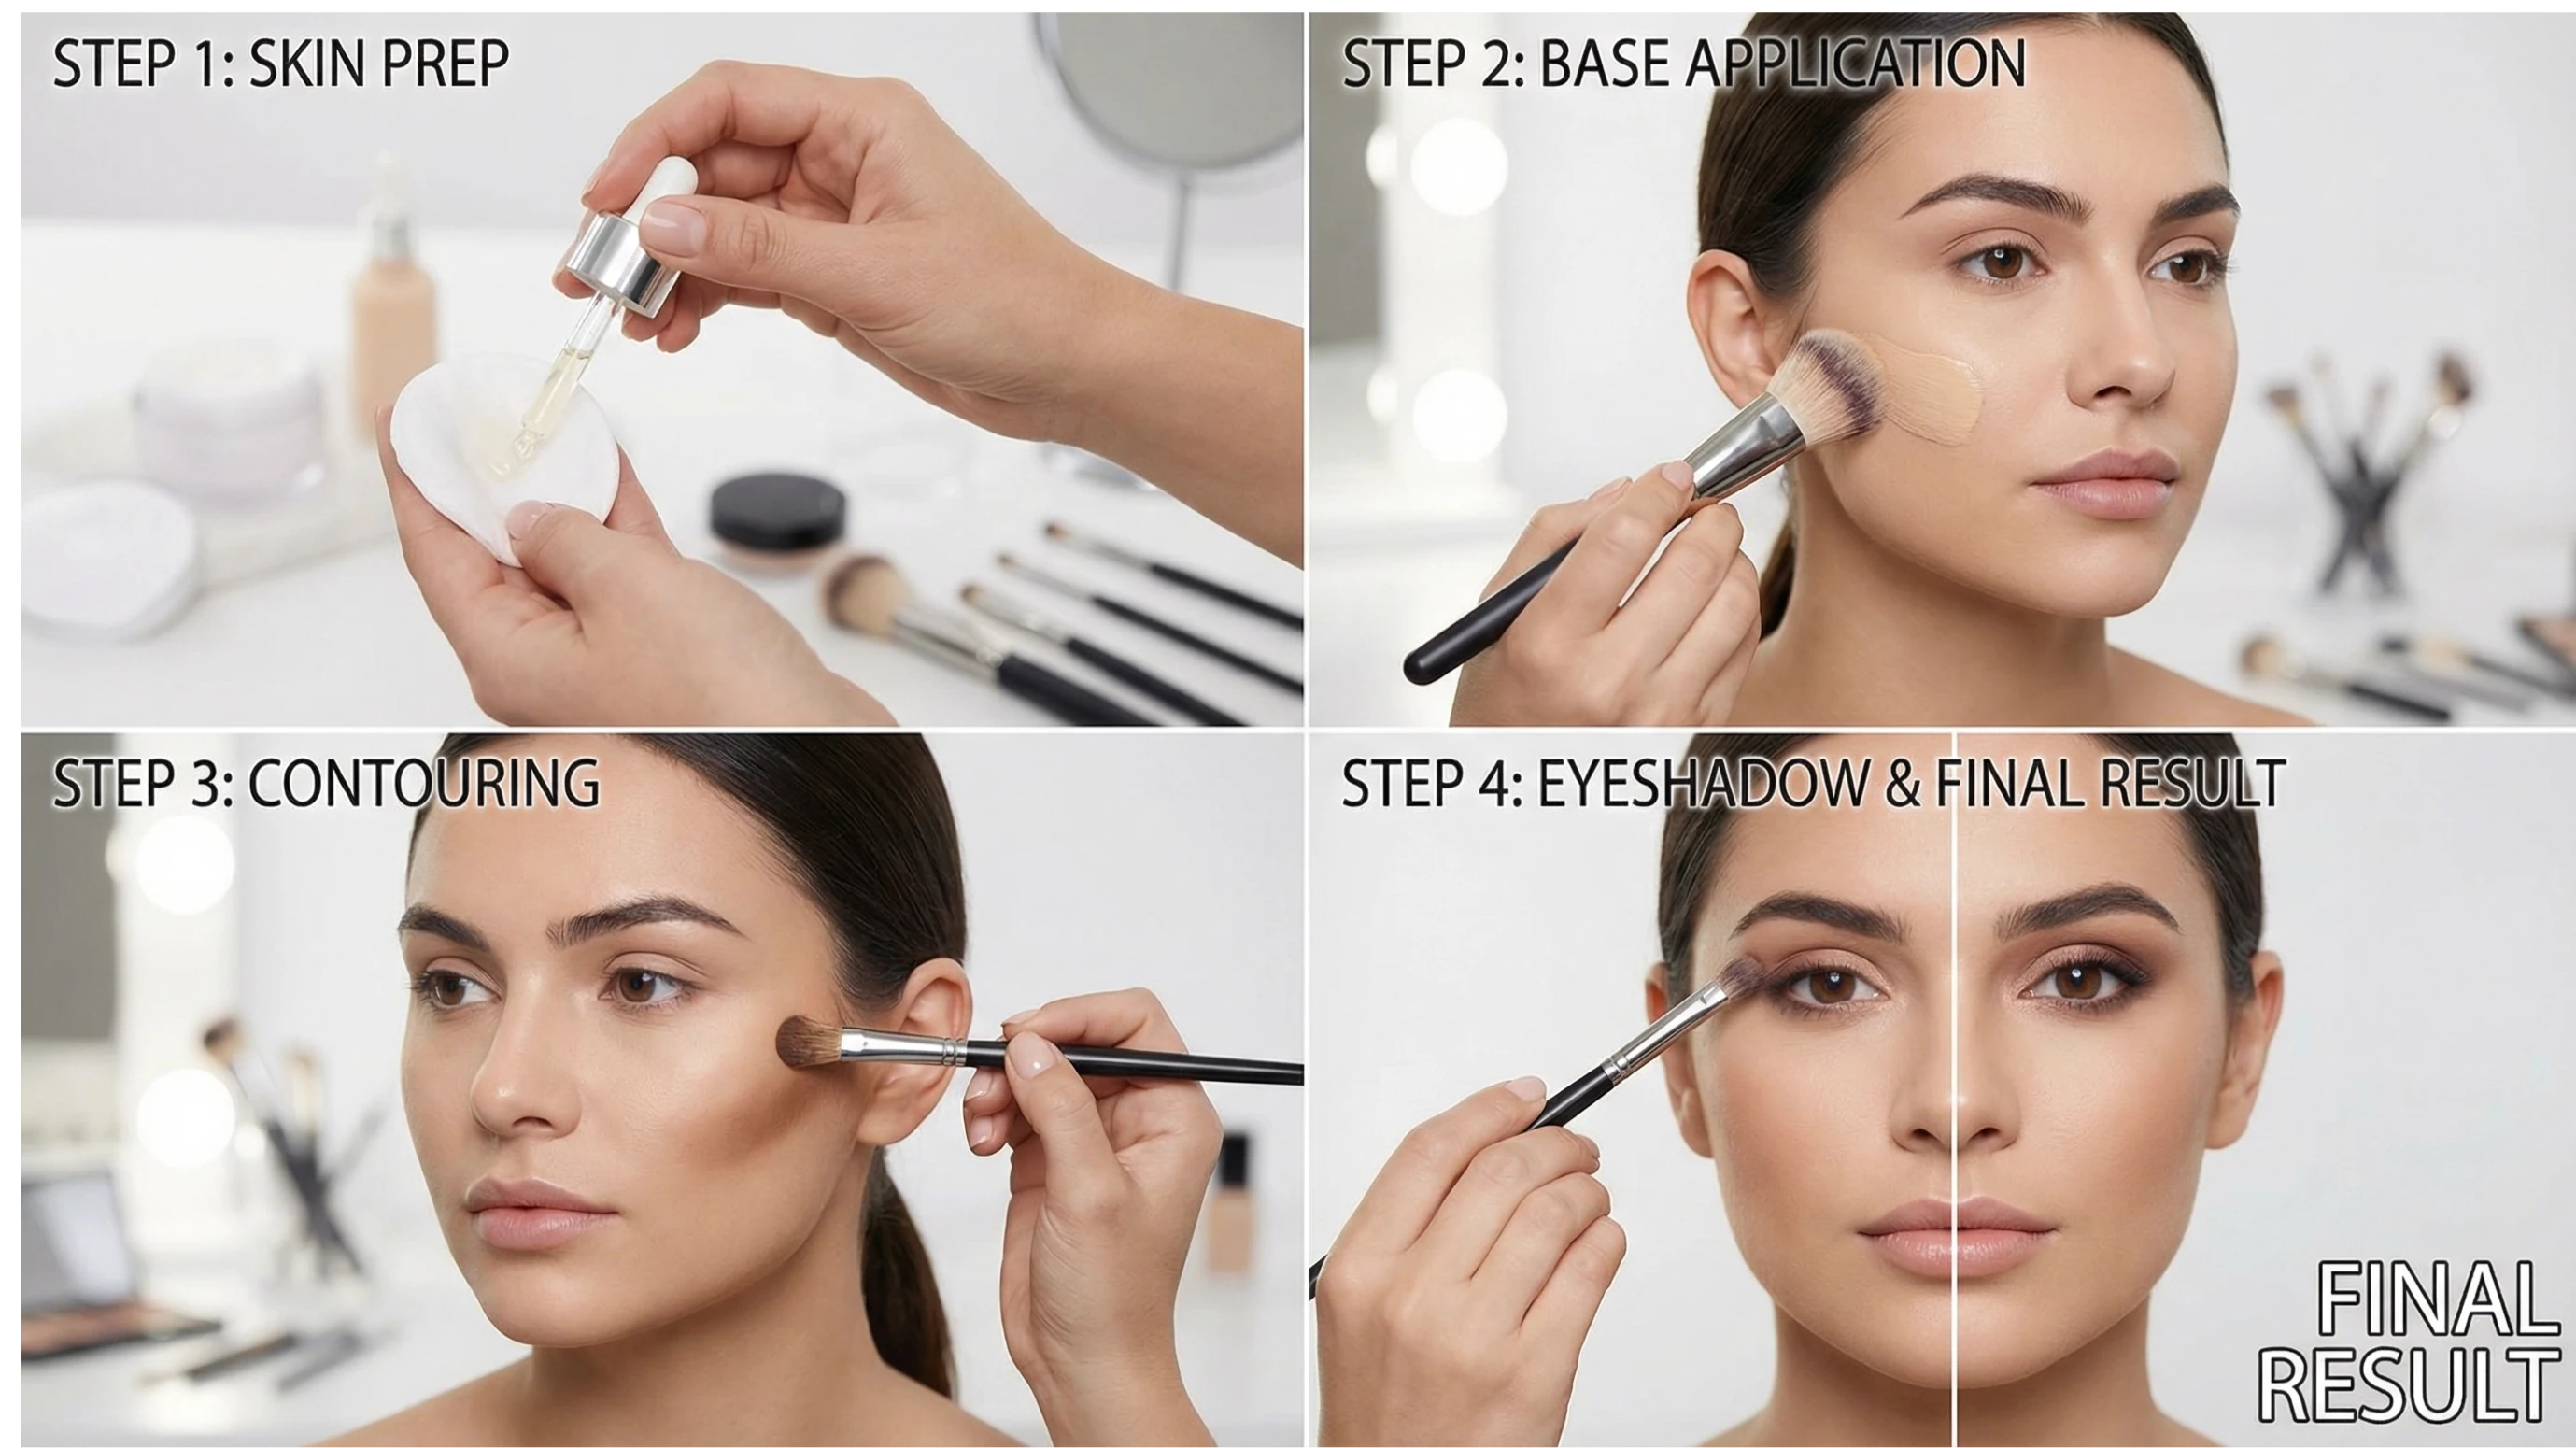
Step-by-Step Application Techniques for a Professional Finish
Good makeup for a photoshoot depends not only on the products but also on the application technique. Every step is crucial to achieving a flawless result that looks perfect both in person and on camera. Follow this professional step-by-step guide:
Step 1: Skin Preparation
Proper skin preparation is the foundation of any good makeup look. Well-prepared skin allows makeup to adhere better, last longer, and look more natural. Start with a deep cleanse to remove any makeup residue, oil, or impurities. Apply a toner to balance your skin's pH and prepare it for the next steps.
Follow with a hydrating serum that provides nutrients and moisture to the skin. Wait a few minutes for it to fully absorb before applying a light moisturizer. It's important that the hydration is sufficient but not excessive, as too much moisture can cause makeup to slip.
Finish your makeup routine with a primer. This product is essential for photoshoots because it creates a barrier between your skin and makeup, minimizes pores, controls shine, and ensures your makeup lasts longer. There are specific primers for different needs: brightening primers for dull skin, mattifying primers for oily skin, hydrating primers for dry skin, and color-correcting primers to neutralize redness.
Step 2: Applying Foundation
Foundation is the canvas on which you'll build your entire look. For photography, you need a high-coverage foundation that evens out your skin tone without looking heavy or artificial. Apply a moderate amount of product (less is more; you can always add more layers if needed) and blend it from the center of your face outwards.
You can apply foundation with a brush, a sponge, or even your fingers, depending on the finish you want. Brushes provide fuller coverage and a polished finish. Sponges (especially Beauty Blenders) give a more natural, blended finish. Fingers are ideal for warming the product and achieving a more seamless application.
It's crucial to blend your foundation well, especially along the jawline, to avoid a "mask" effect. Don't forget to apply foundation to your neck and ears as well to ensure an even tone across the entire visible area. In photographs, any difference in tone will be immediately noticeable.
Step 3: Correction and Lighting
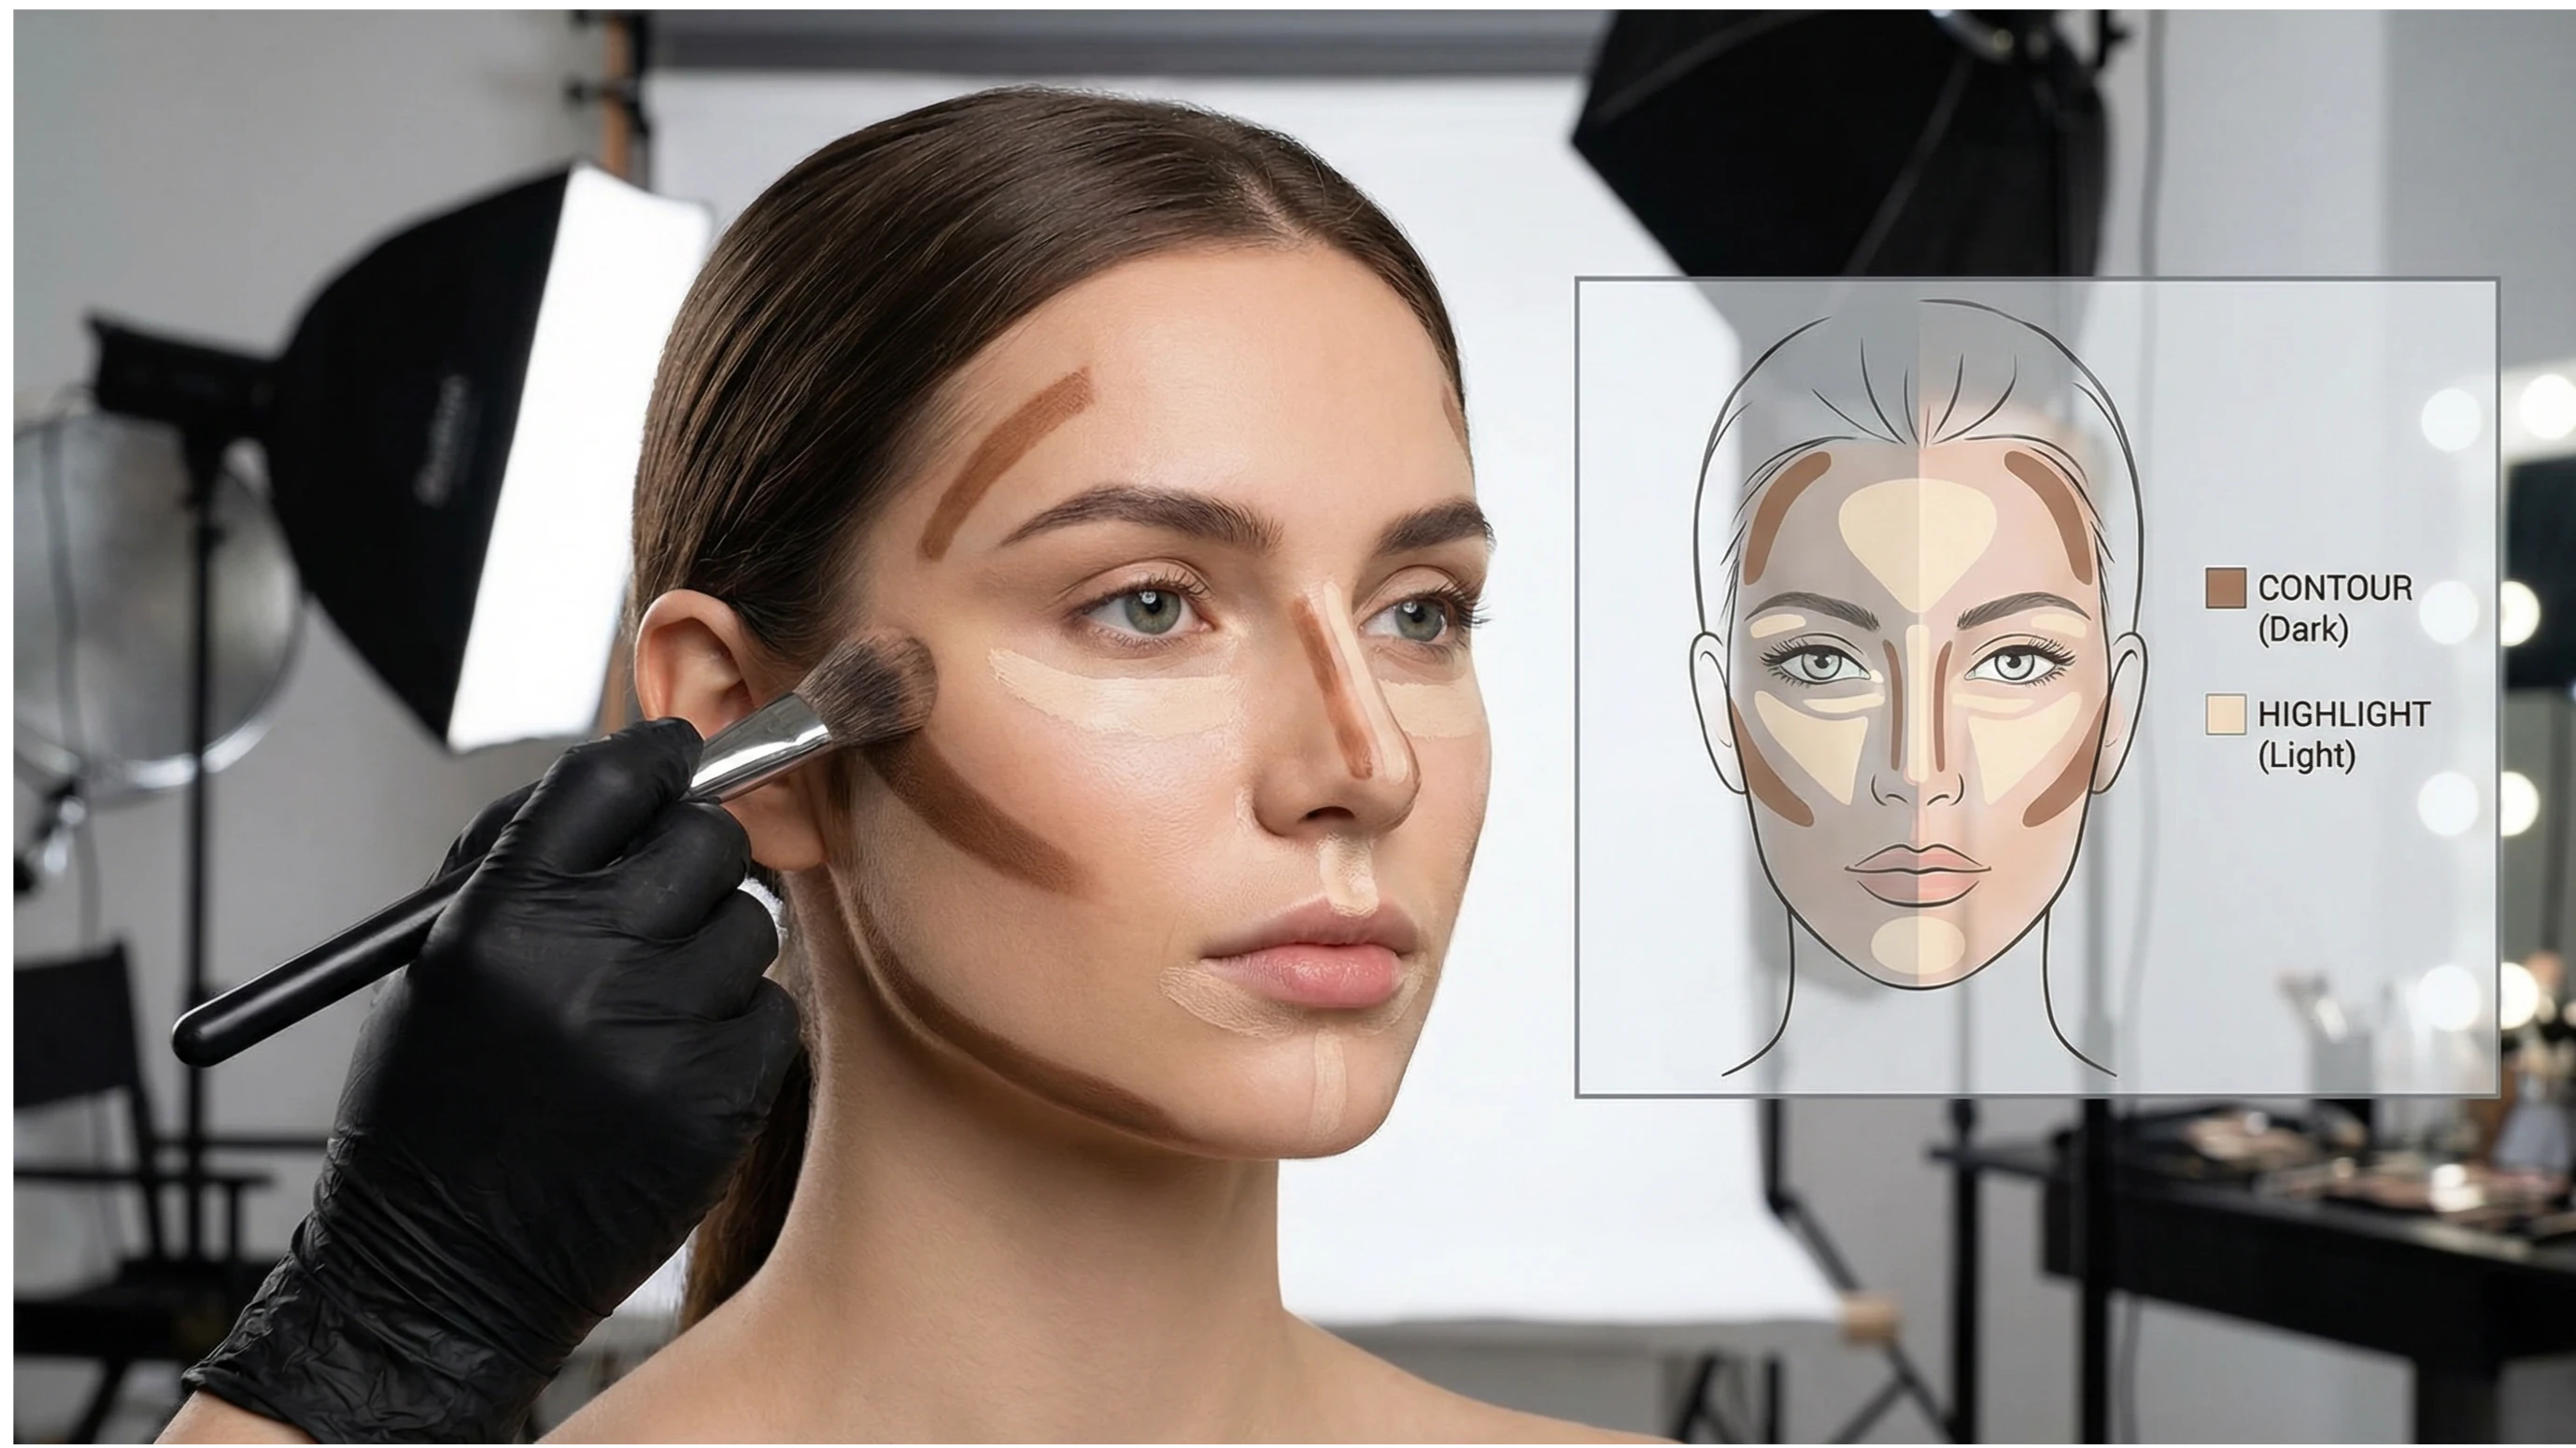
Concealer is your best ally for neutralizing dark circles, blemishes, redness, and any imperfections that your foundation hasn't completely covered. For dark circles, apply concealer in an inverted triangle shape under your eyes. This not only covers dark circles but also brightens the entire area and creates a lifting effect.
Use a concealer one or two shades lighter than your foundation to brighten your face. Apply it to the bridge of your nose, your cupid's bow (above your upper lip), the center of your forehead, and your chin. These are the areas that naturally catch the light, and highlighting them creates dimension and depth in your face.
Blend the concealer with gentle taps using the tip of your ring finger (which exerts less pressure) or a small sponge. Do not rub it in, as this can disturb the foundation you've already applied and create an uneven finish.
Step 4: Contouring and Strategic Lighting
Contouring is essential in photo makeup because it restores dimension to the face, which foundation then unifies. The camera tends to flatten features, so contouring helps create shadows and definition.
Apply a dark shade (two or three shades darker than your skin) to the areas you want to hollow out or define: under the cheekbones (from the ear towards the mouth, without reaching it), on the temples, on the sides of the nose (to slim it), on the jawline (to define it) and on the sides of the forehead (to visually reduce its size).
Blend the contour well with circular motions to avoid harsh lines. The goal is to create natural shadows, not dark lines. Then, apply a powder or cream highlighter to the areas you already highlighted with concealer: the tops of your cheekbones, the bridge of your nose, your cupid's bow, the center of your forehead, and your chin.
Step 5: Sealing with Translucent Powder
Translucent powder is essential for sealing all the work you've done so far and controlling shine during the photo shoot. However, it's important to apply it correctly to avoid flashback.
Use a large, fluffy brush to apply a thin layer of translucent powder all over your face, paying special attention to the T-zone (forehead, nose, and chin), which tends to be shinier. If you have dry skin, you can skip the powder on your cheeks and apply it only to the areas that tend to be oilier.
A popular makeup technique for photoshoots is "baking" or "cooking." This involves applying a generous layer of translucent powder to the areas you want to highlight (under the eyes, bridge of the nose, center of the forehead, chin) and leaving it on for 5-10 minutes while you continue with the rest of your makeup. Then, you remove the excess with a brush, revealing perfectly set, shine-free skin.
Step 6: Eyes of Impact
The eyes are the focal point of any portrait, so it's important that they are well-defined and stand out in the photograph.
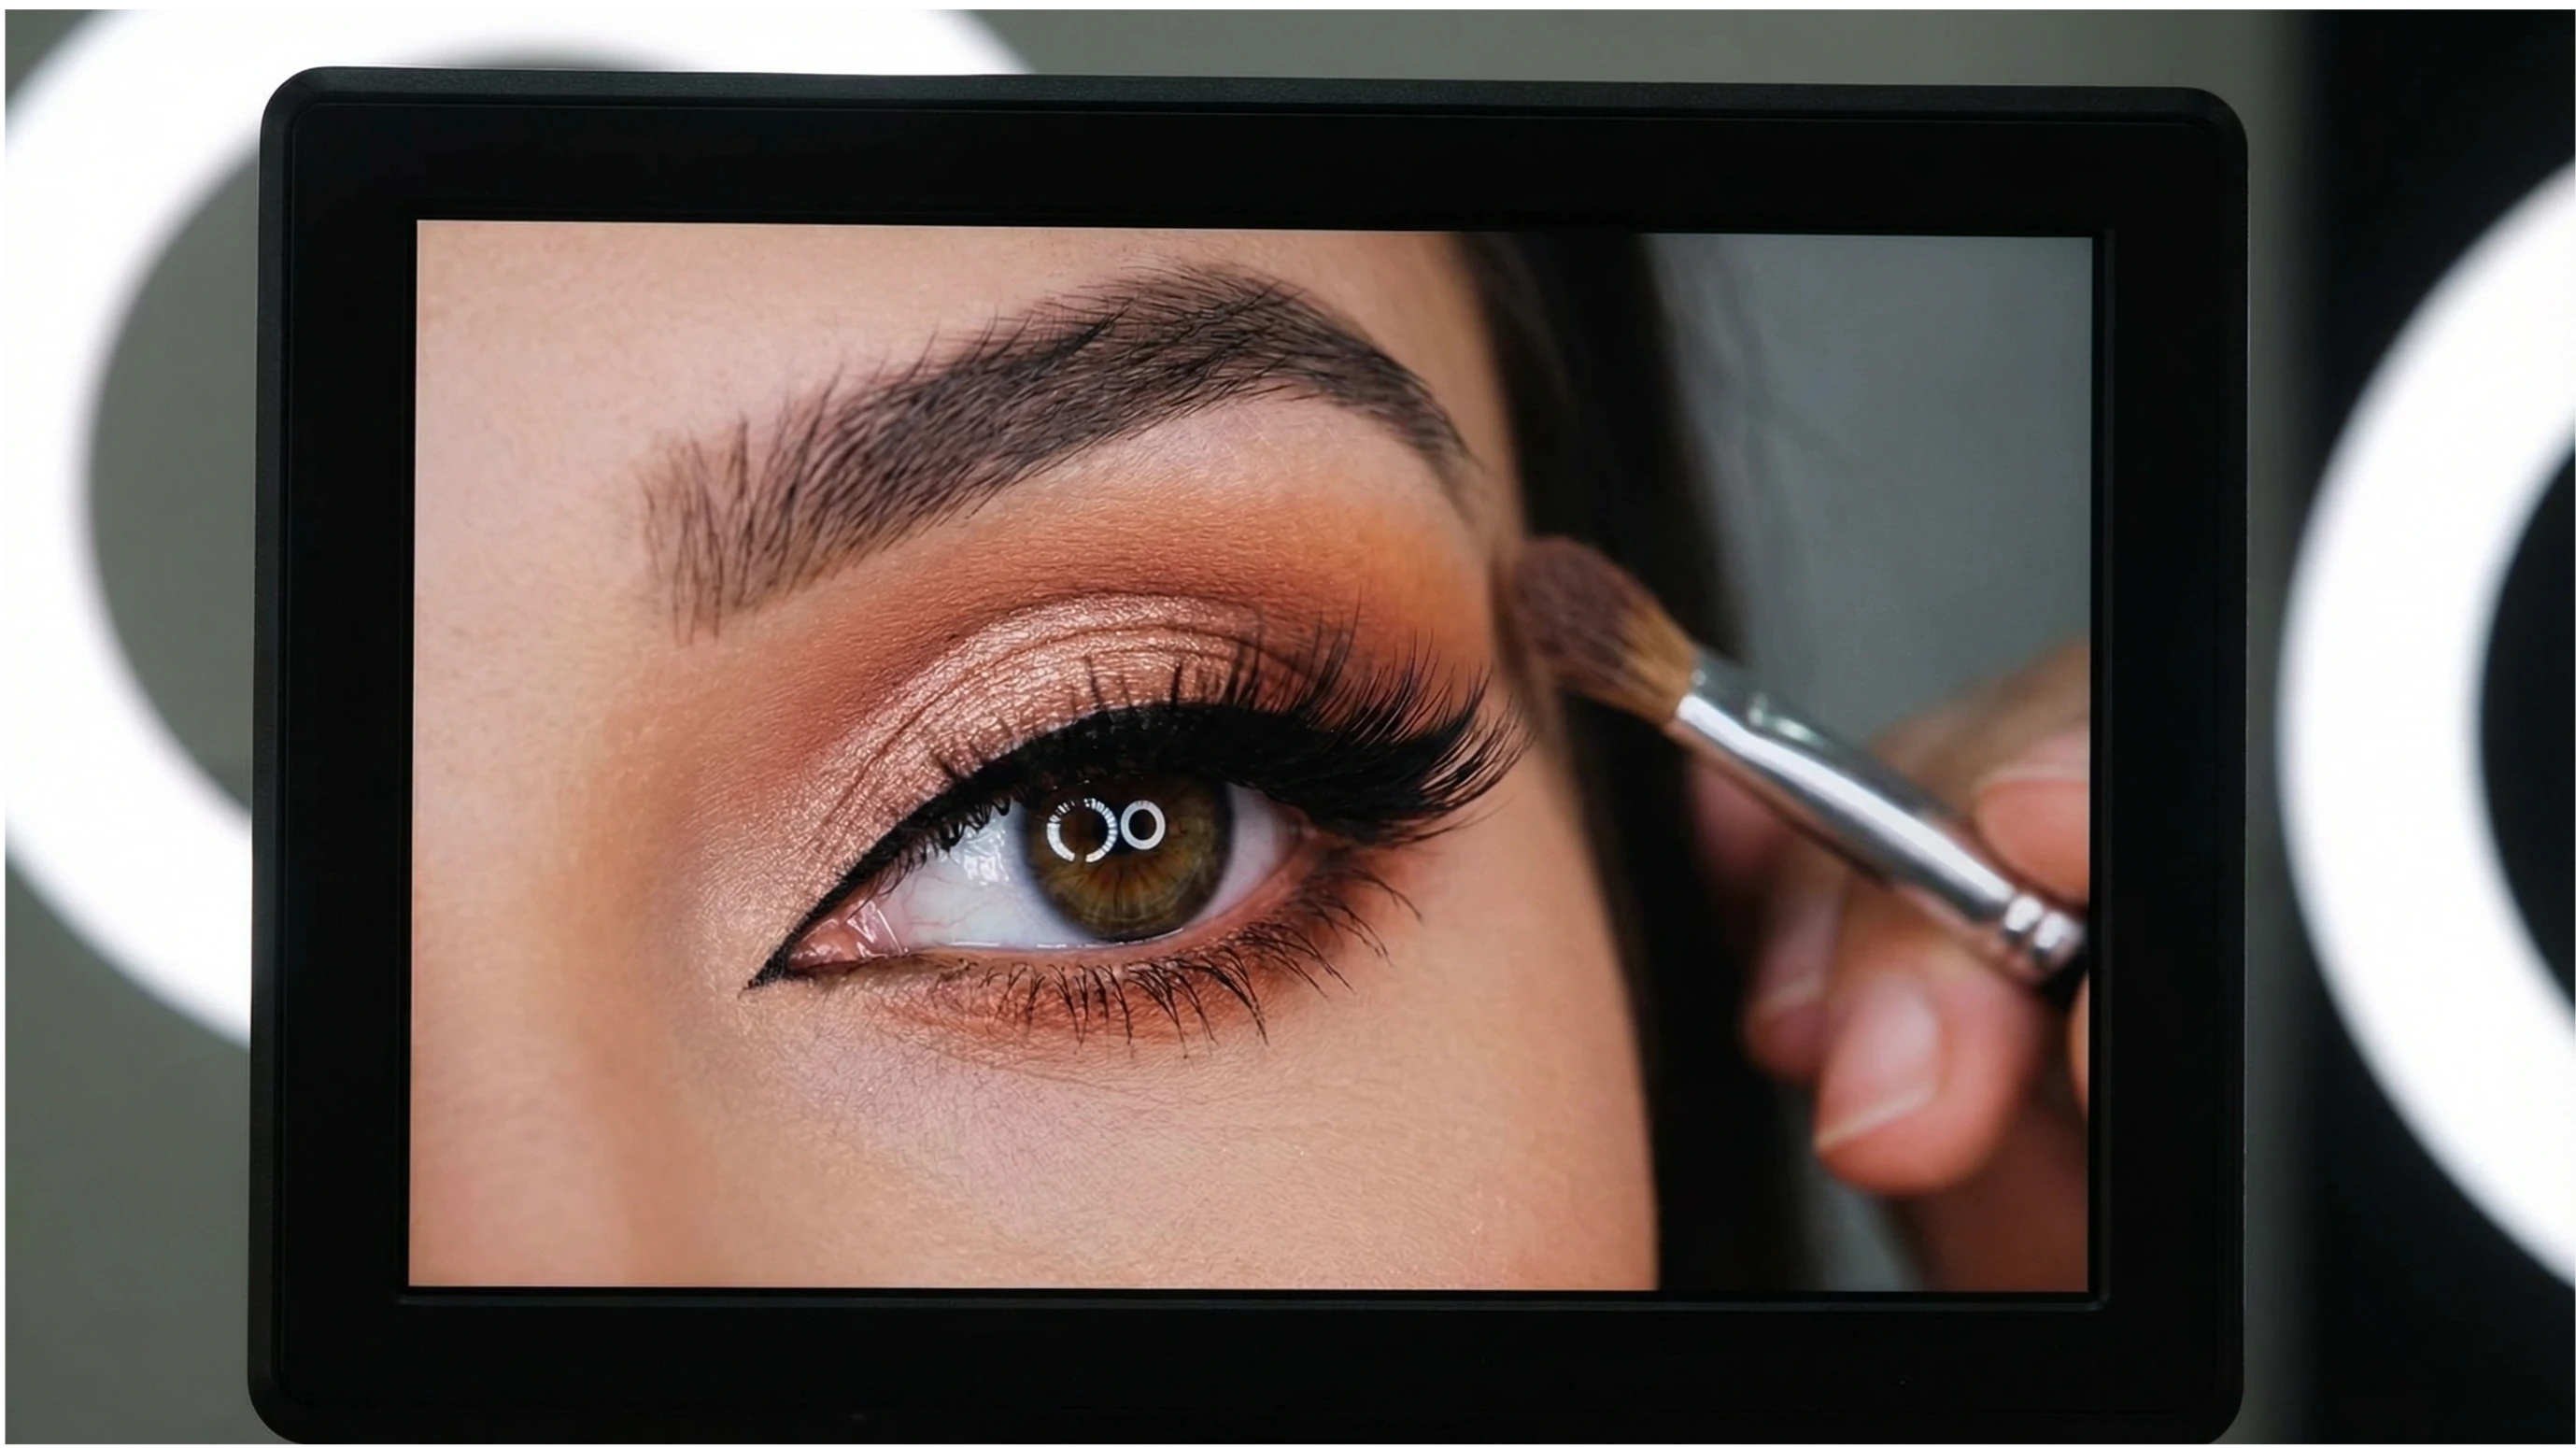
Start by applying an eyeshadow base or primer all over your eyelid. This helps the eyeshadow adhere better, last longer, and appear more pigmented. Then, apply a matte neutral shade all over your mobile eyelid as a base color.
To create depth, apply a darker shade to the crease of your eye (the natural crease of your eyelid) and blend it well upwards. This creates the illusion of larger, more defined eyes. You can add an even darker shade to the outer corner of your eye for a more dramatic effect.
Highlight the inner corner of your eye (tear duct) with a light shade or highlighter to brighten your eyes. Also apply a light shade under your brow bone to define its shape.
Eyeliner is crucial. Precise eyeliner along the upper lash line defines the eye and makes lashes appear fuller. You can create a classic eyeliner look or a cat-eye for a more dramatic effect. Be sure to use a long-lasting or waterproof eyeliner so it doesn't smudge under bright lights.
Finish with several coats of mascara, both on your upper and lower lashes. For an even bigger impact, consider using false eyelashes. Well-defined lashes are essential in photography, as they frame the eyes and create a very photogenic effect.
Don't forget your eyebrows. Well-defined, full eyebrows frame your face and are essential for photo makeup. Use a pencil or powder to fill in any sparse areas and define the shape with a setting gel.
Step 7: Blush and Dimension
Blush restores the natural color to the face that foundation may have neutralized. In photography, it's important to apply more blush than you would normally use, as the camera tends to wash out colors.
Apply blush to the apples of your cheeks (smile to find them) and blend upwards towards your temples. Choose a shade that complements your skin tone: peach or coral for fair skin, pink or mauve for medium skin, and berry or plum for dark skin.
Step 8: Perfect Lips
Lips are another important focal point in photography. To make them look perfect, start by exfoliating them and applying a lip balm to moisturize them. Then, remove any excess balm with a tissue.
Line your lips with a lip pencil in the same shade as the lipstick you're going to use. This defines the shape, prevents the lipstick from bleeding, and increases its longevity. Fill in your entire lip with the pencil as well to create a base.
Apply the lipstick with a brush for greater precision, or directly from the tube if you prefer. For a longer-lasting finish, apply one coat, blend with a tissue, apply translucent powder, and then apply a second coat of lipstick.
Matte or semi-matte shades are ideal for photography because they don't reflect light unevenly like very glossy lipsticks. However, if you prefer a shinier finish, opt for a long-lasting gloss.
Step 9: Makeup Setting Spray
The final step, and one of the most important, is to set all your makeup with a setting spray. This product creates an invisible film over your makeup that keeps it in place for hours, even under bright studio lights.
Hold the spray about 20-30 cm away from your face and spray in a "T" or "X" shape to cover the entire area. Let it air dry; do not touch it or dry it with a tissue.
Makeup according to the type of photo shoot
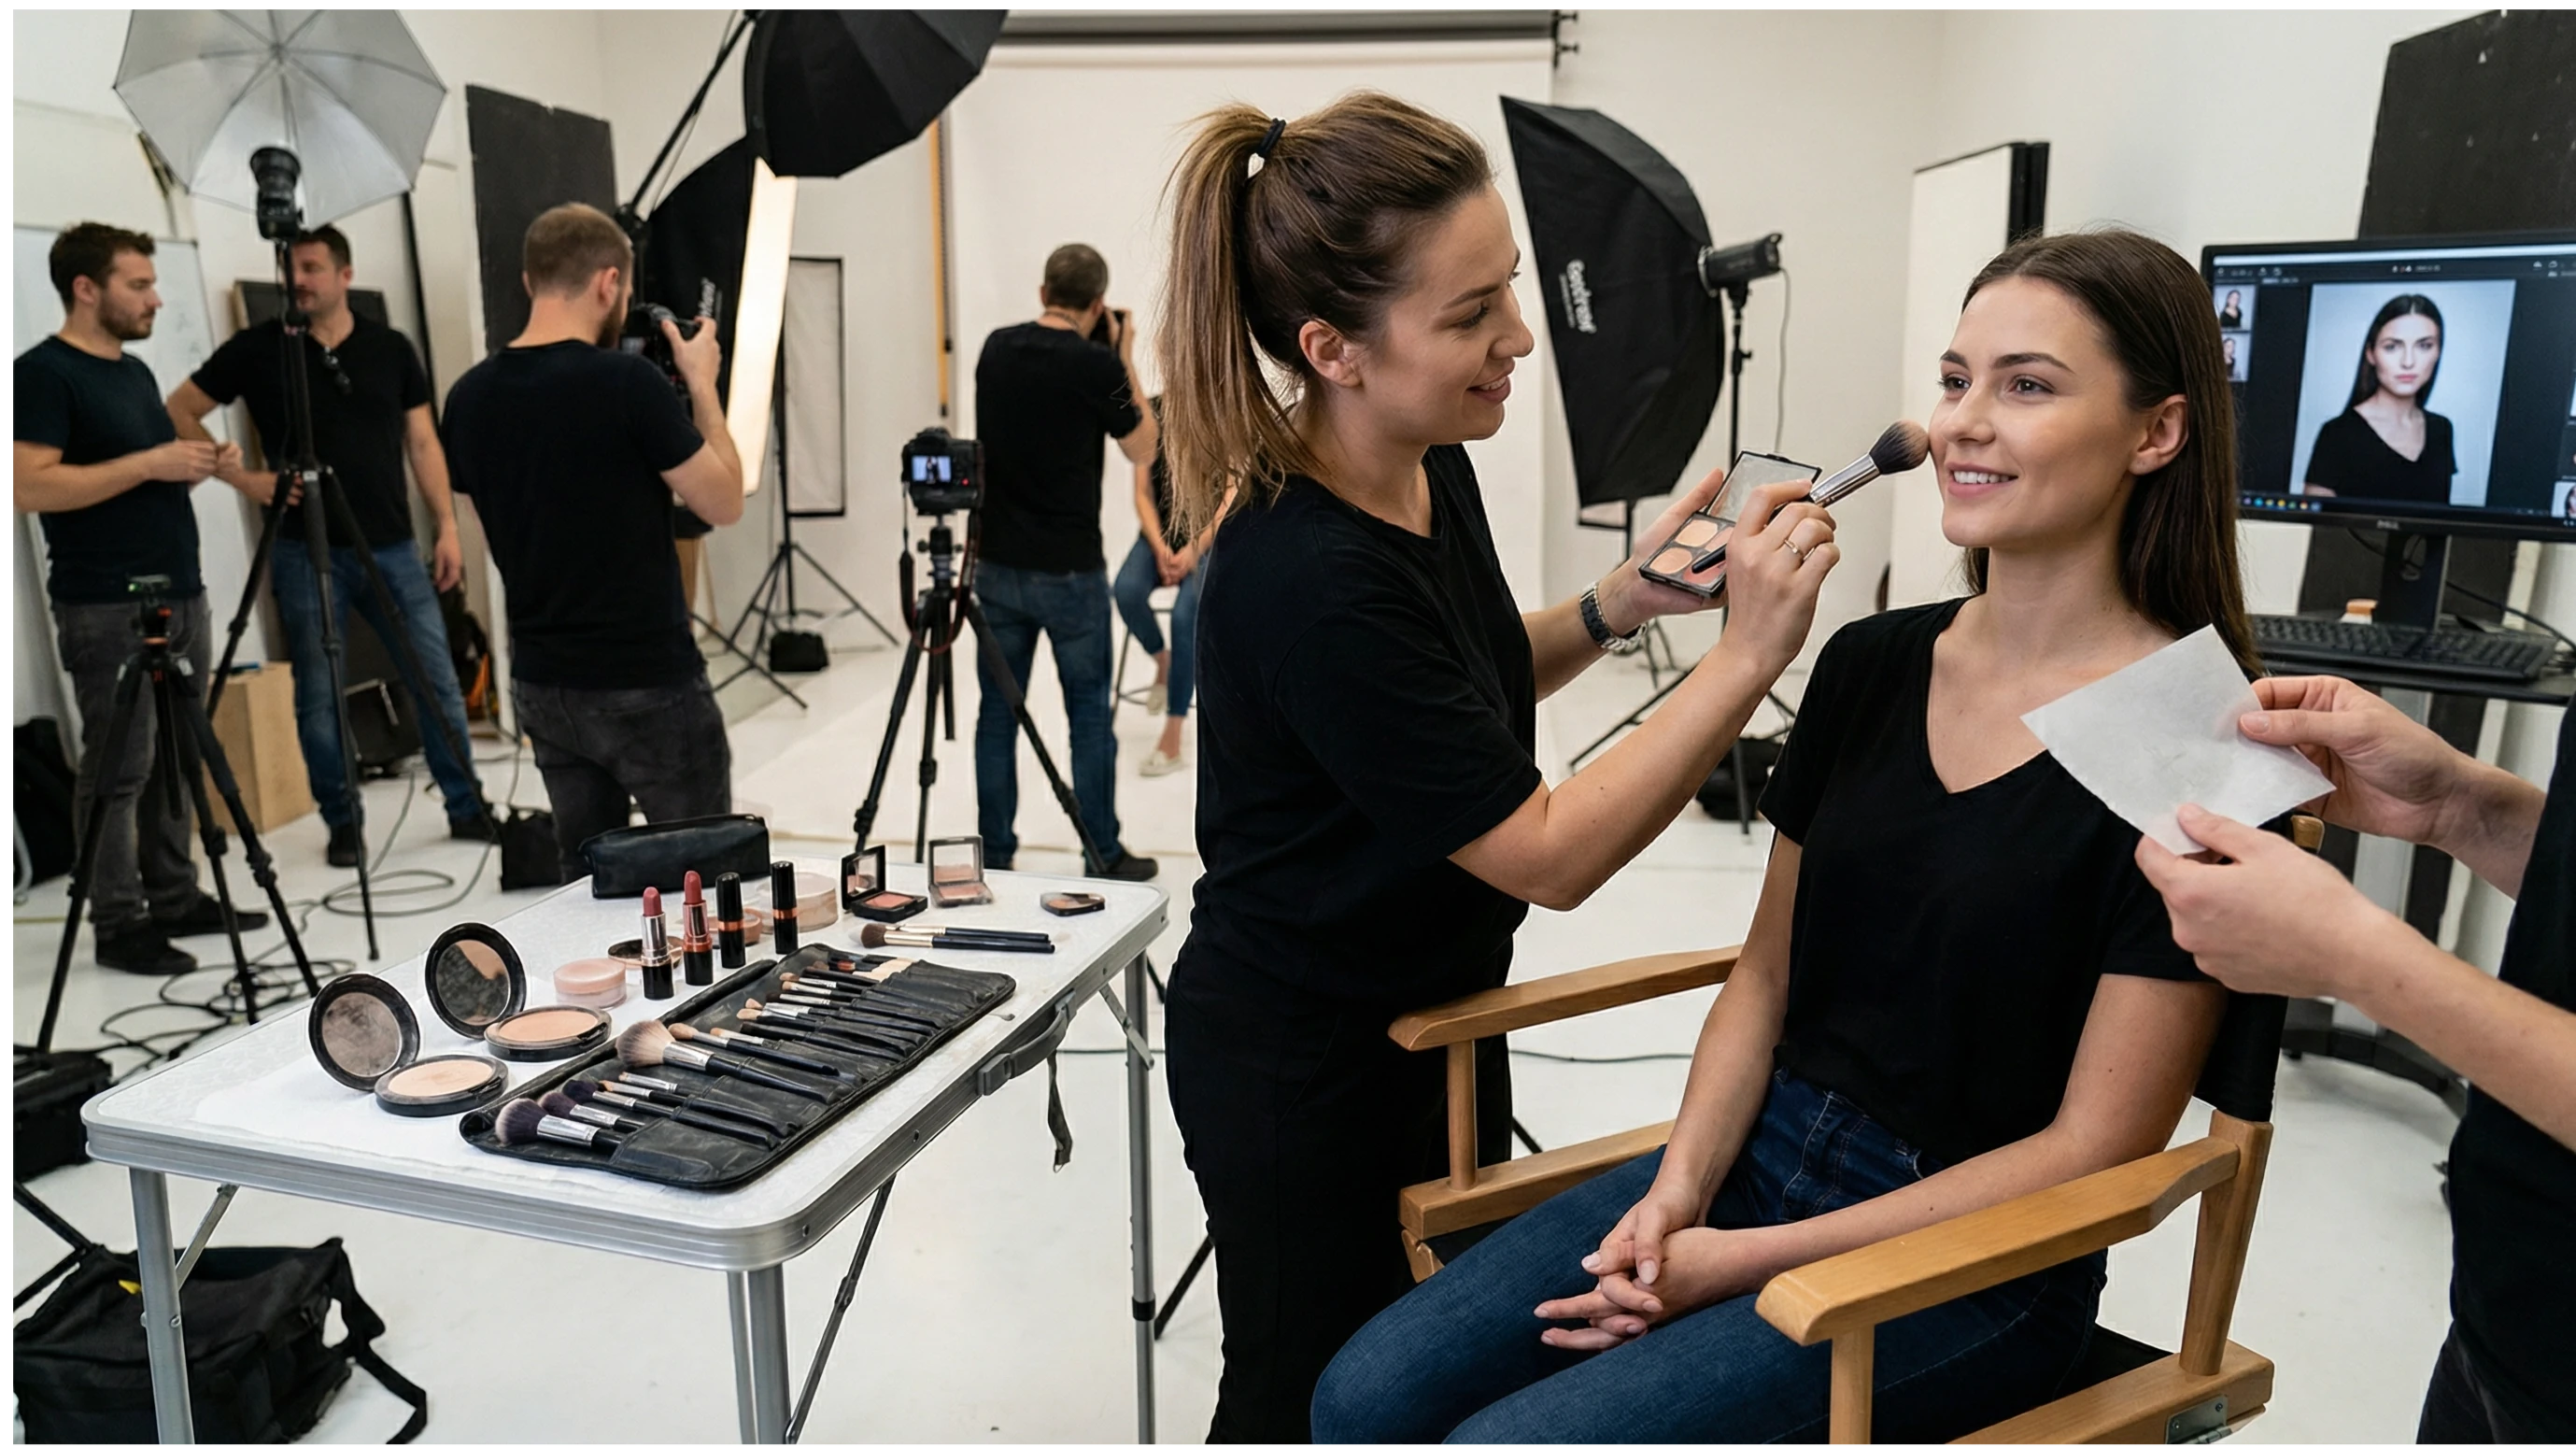
Not all photoshoots are the same, and your makeup should be tailored to the style and purpose of each one. Here's how to adjust your makeup depending on the type of shoot:
Boudoir Session
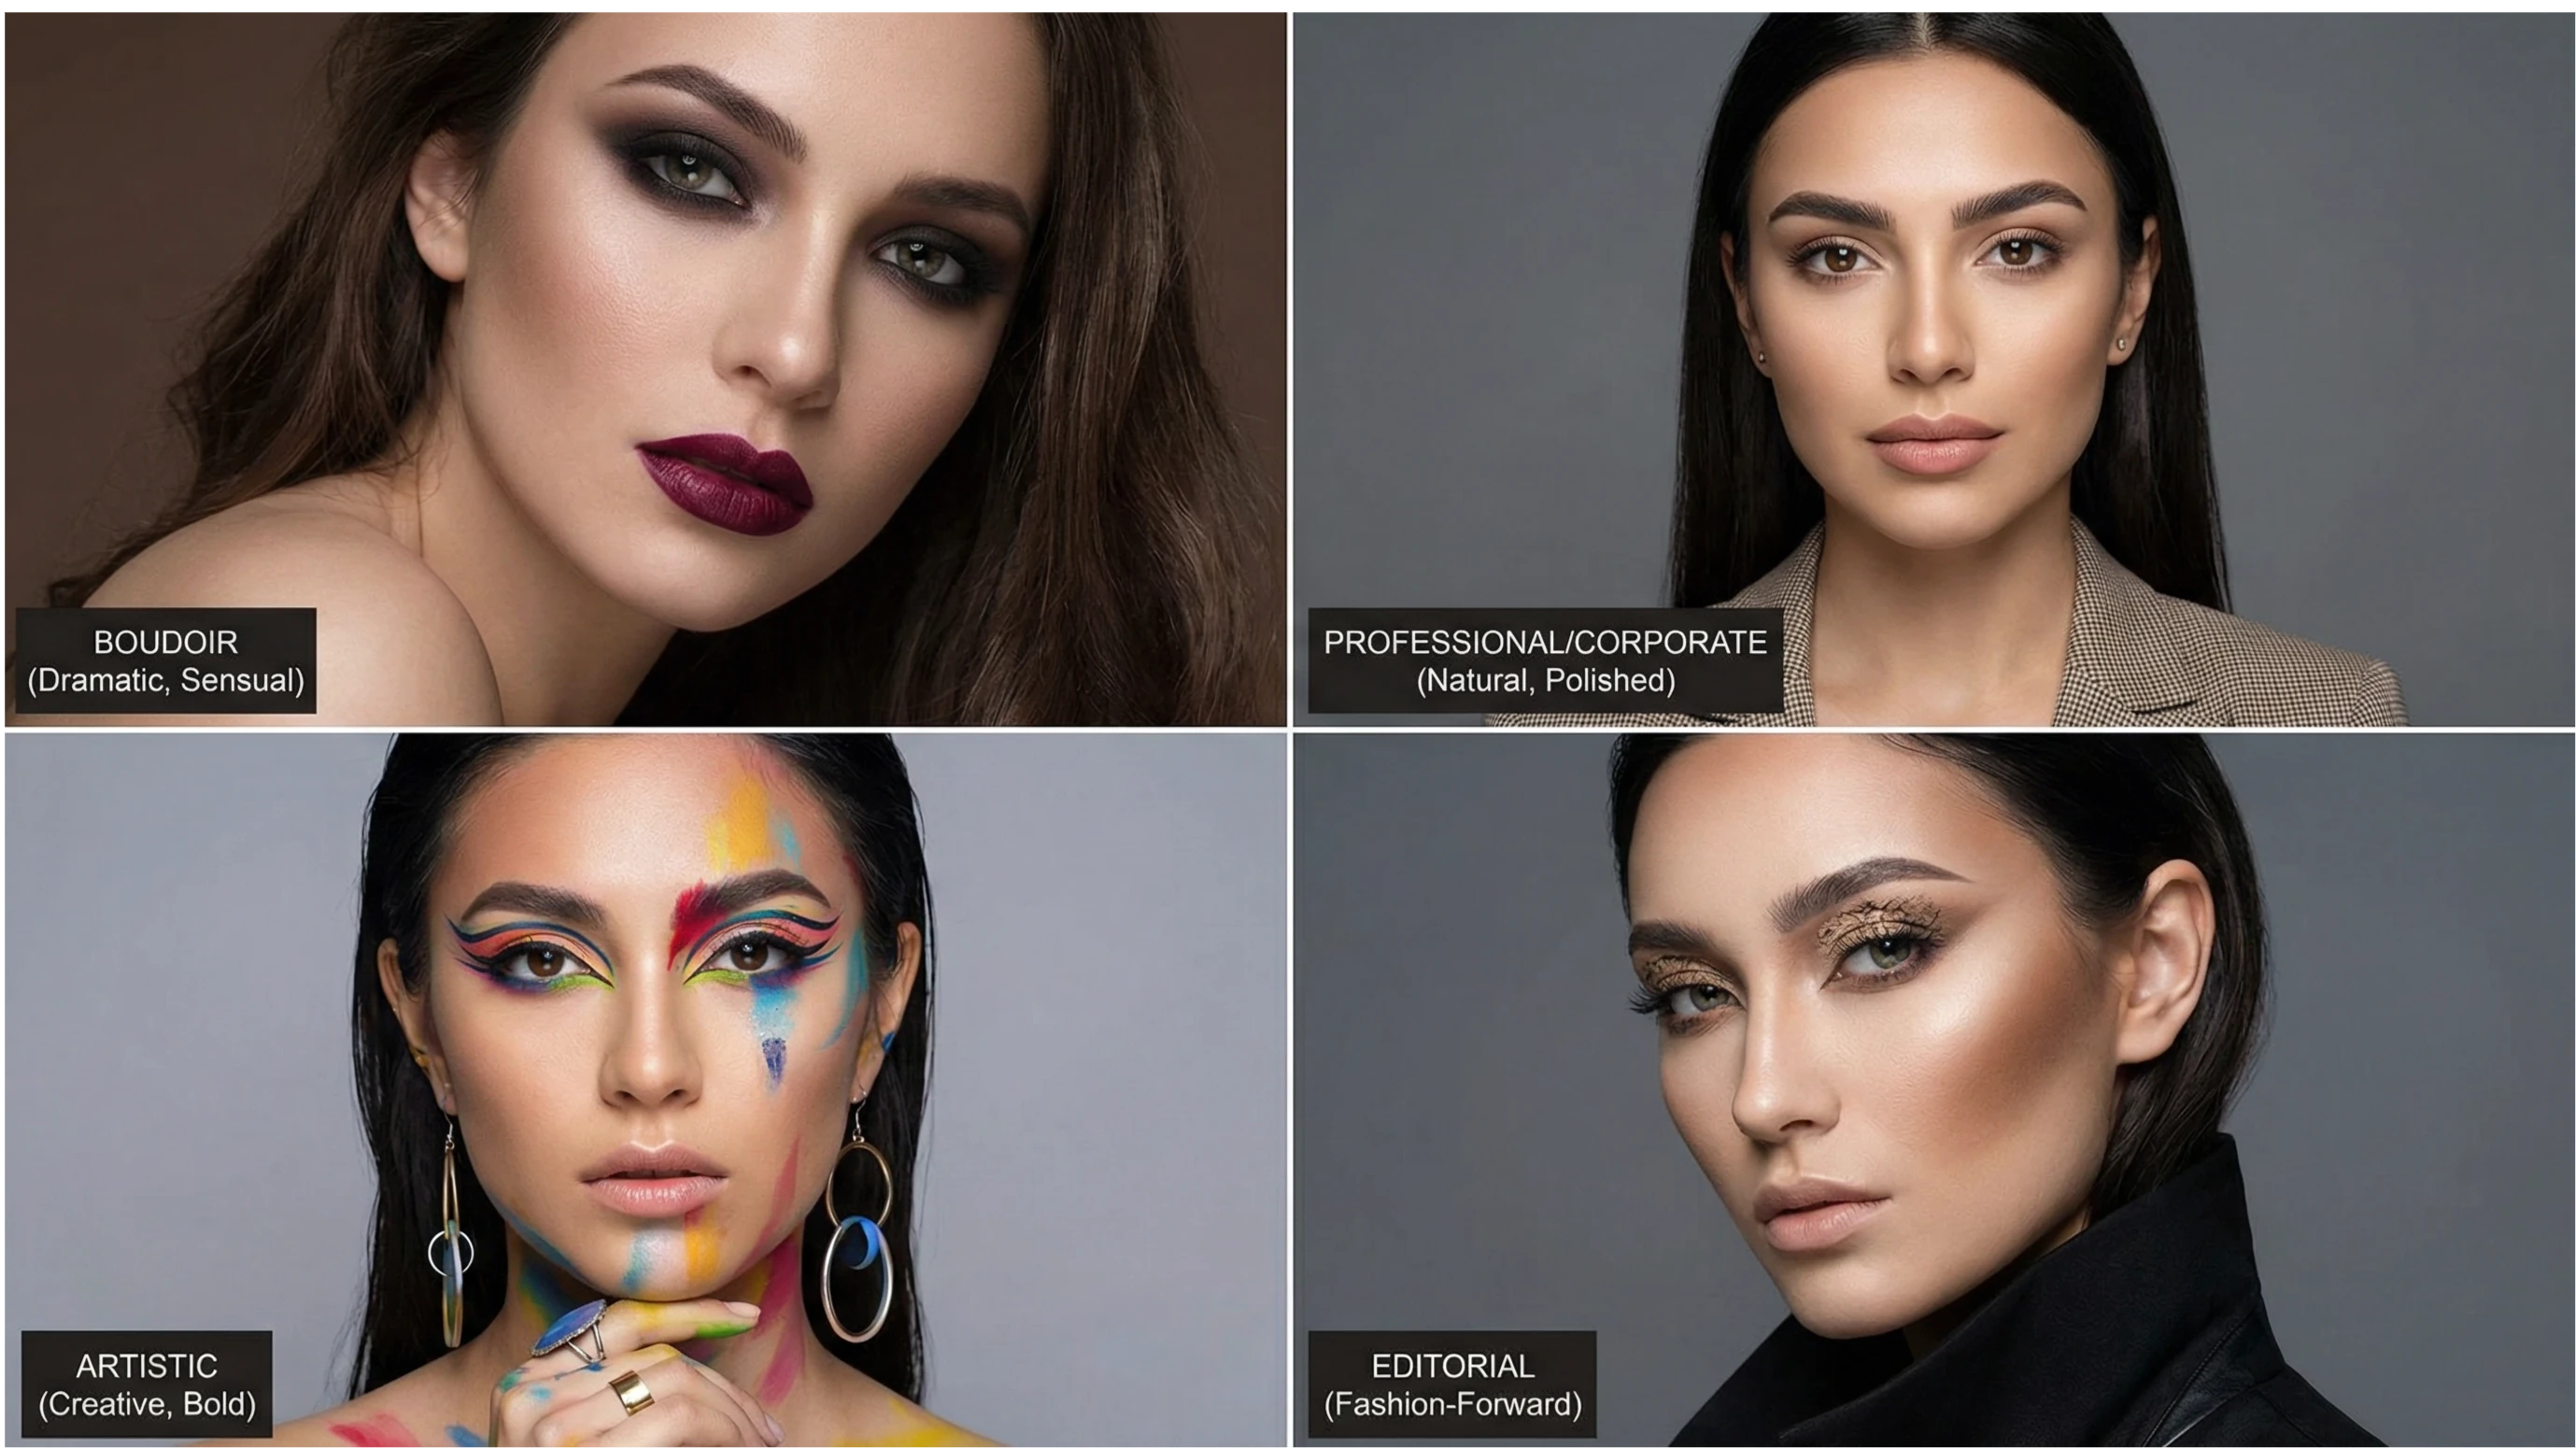
This type of session aims for a sensual, sophisticated, and glamorous look. The makeup should be more dramatic and seductive. Smoky eyes in shades of gray, brown, or even black are often chosen, with a defined eyeliner and very voluminous or false eyelashes.
Lips are the focal point of this style. Intense shades like red, burgundy, plum, or dark nude are ideal. The finish can be matte for a more modern look, or satin for a more classic and sensual touch.
The contouring should be more pronounced to create a defined and dramatic facial structure. The blush can be more intense, in pink or peach tones, applied strategically to highlight the cheekbones.
Artistic or Creative Session
Here, creativity knows no bounds. Makeup for artistic photos can be an extension of the artwork itself, using vibrant colors, unusual textures, abstract designs, special effects, and body painting techniques.
It's the perfect opportunity to experiment with colors you wouldn't normally use, like blues, greens, purples, golds, or silvers. You can play with different textures: matte, metallic, glitter, holographic. The possibilities are endless.
In this type of session, the makeup can be minimalist and conceptual, or extremely elaborate and theatrical. The important thing is that it complements the artistic concept of the session and creates a strong visual impact.
Professional or Corporate Portrait
The goal of this type of session is to convey professionalism, confidence, and approachability. Makeup should be neat, natural, and understated, without any distracting or overly flashy elements.
Neutral tones are used all over the face: beiges, browns, and soft grays. The skin should look flawless but natural, without excessive contouring or highlighting. The eyes are defined with matte eyeshadows in earth tones and subtle eyeliner. The lashes are lengthened and defined, but without exaggeration.
Lips should be kept in neutral or nude tones, avoiding very dark or vibrant colors. The finish should be matte or semi-matte. The goal is for the makeup to be subtle but for the person to look polished, rested, and professional.
Fashion or Editorial Session
Makeup in this type of session is a fundamental part of the styling and should complement the clothing, accessories, and overall concept of the shoot. It can range from a completely minimalist and natural look to avant-garde and bold styles.
It's important to work in coordination with the stylist and photographer to ensure the makeup aligns with the creative vision. The colors should coordinate with the clothing collection's palette. The finish should be professional and editorial-quality, with attention to every detail.
In fashion, makeup for photoshoots can be very graphic, with defined lines, blocks of color, geometric effects, or monochromatic looks. The key is for it to be visually striking and to tell a story alongside the other elements of the shoot.
Common Mistakes to Avoid in Photographic Makeup
Even with the best products and techniques, there are common mistakes that can ruin the final result. Here are the most frequent ones and how to avoid them:
Use foundation with SPF: As we mentioned, SPF can cause flashback. If you'll be under studio lights or using flash, avoid foundations with sun protection or use one with a very low SPF.
Excessive translucent powder: Applying too much powder can create white patches in photos. Use a light layer and blend well. Do flash tests before the shoot.
Makeup that's too light or too dark: Choosing a foundation shade that doesn't match your natural skin tone will create a noticeable contrast in photos. Always test your foundation on your jawline and make sure it blends seamlessly with your neck.
Not blending the outline well: Harsh outlines look artificial on camera. Blend, blend, and blend again until the transitions are seamless.
Overly bright eyeshadows: Glitter and very satiny shadows can reflect light unevenly and make eyelids look greasy. Opt for matte shadows or those with a very subtle shimmer.
Forgetting skin preparation: If the skin is not well hydrated, makeup will look dry, cracked, and unnatural, especially in high-resolution photographs.
Avoid touch-ups during the session: Makeup can deteriorate over time, especially under hot lights. Always carry blotting paper, translucent powder, and lipstick for quick touch-ups.
Get ready to shine in your next session
Now that you know all the secrets of makeup for photos, you're ready to dazzle in your next photoshoot. Remember, the key is preparation, choosing the right products, and applying the correct techniques so your natural beauty shines through in front of the camera.
At Minettes, we believe every woman has a unique beauty that deserves to be celebrated and captured in the best possible way. Our team of professionals will guide you through every step of the process, from makeup preparation to the photoshoot, so you feel comfortable, confident, and radiant.
Do you want to have a photographic experience that highlights the best of you? Are you ready to look amazing both in person and on camera?
Apply to our casting call and let us be part of your story!