Lighting in artistic photography: professional techniques
· Minettes VIP
Master Lighting in Artistic Photography: A Complete Technical Guide
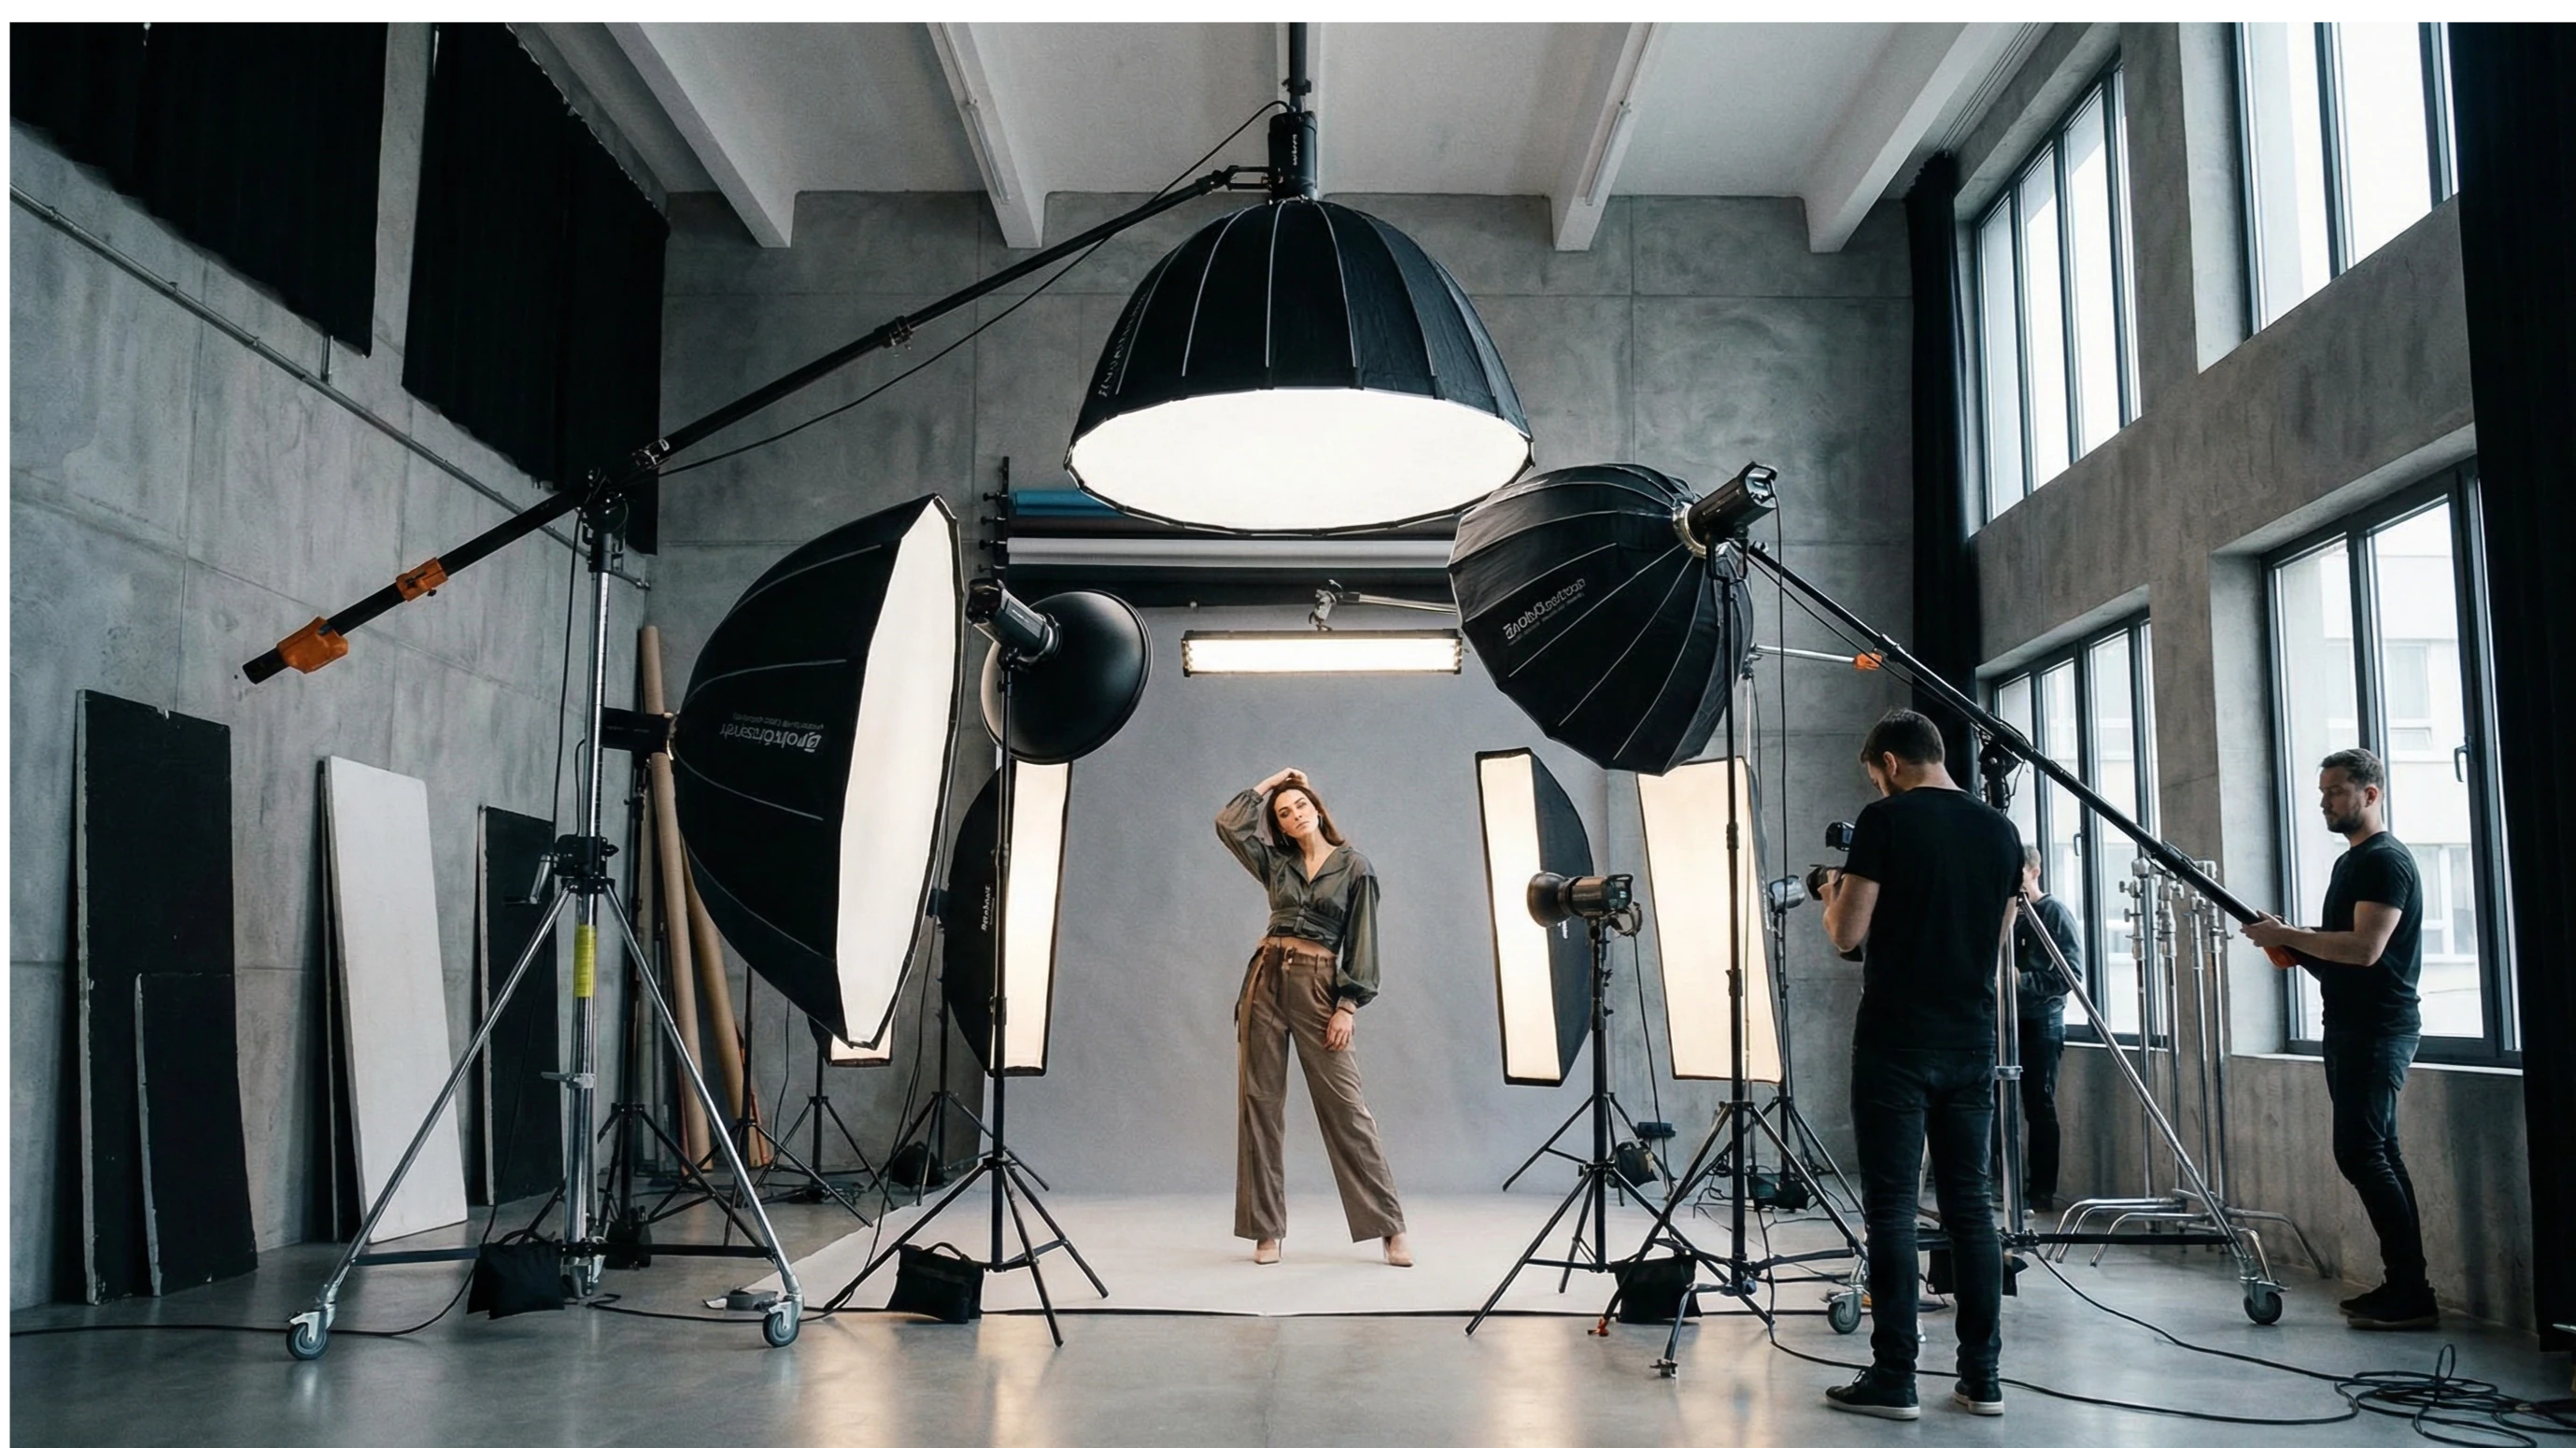
At the heart of every striking photograph, from an intimate portrait to a cutting-edge fashion composition, lies a fundamental and often underestimated element: lighting. The word "photography" comes from Greek and literally means "drawing with light." This etymology reveals a profound truth: light is not merely a technical requirement for the camera to capture an image; it is the brush with which the photographer paints, sculpts, and shapes reality. Mastering lighting in artistic photography is what distinguishes an amateur from a true visual artist.
At Minettes, we understand that lighting is the soul of photography. It's the silent language that evokes emotions, creates atmospheres, defines textures, and guides the viewer's eye. This post is a comprehensive technical guide designed to demystify the art of lighting, offering photographers and models the conceptual and practical tools to transform their images from ordinary to extraordinary.
1. The Critical Importance of Lighting
Lighting affects every aspect of an image. Its quality (hard or soft), direction, intensity, and color determine the mood, three-dimensionality, texture, and overall impact of the photograph. Inadequate lighting can flatten a subject, obscure important details, or create an atmosphere that contradicts the intended message. Conversely, masterful lighting can transform an mundane scene into a work of art.
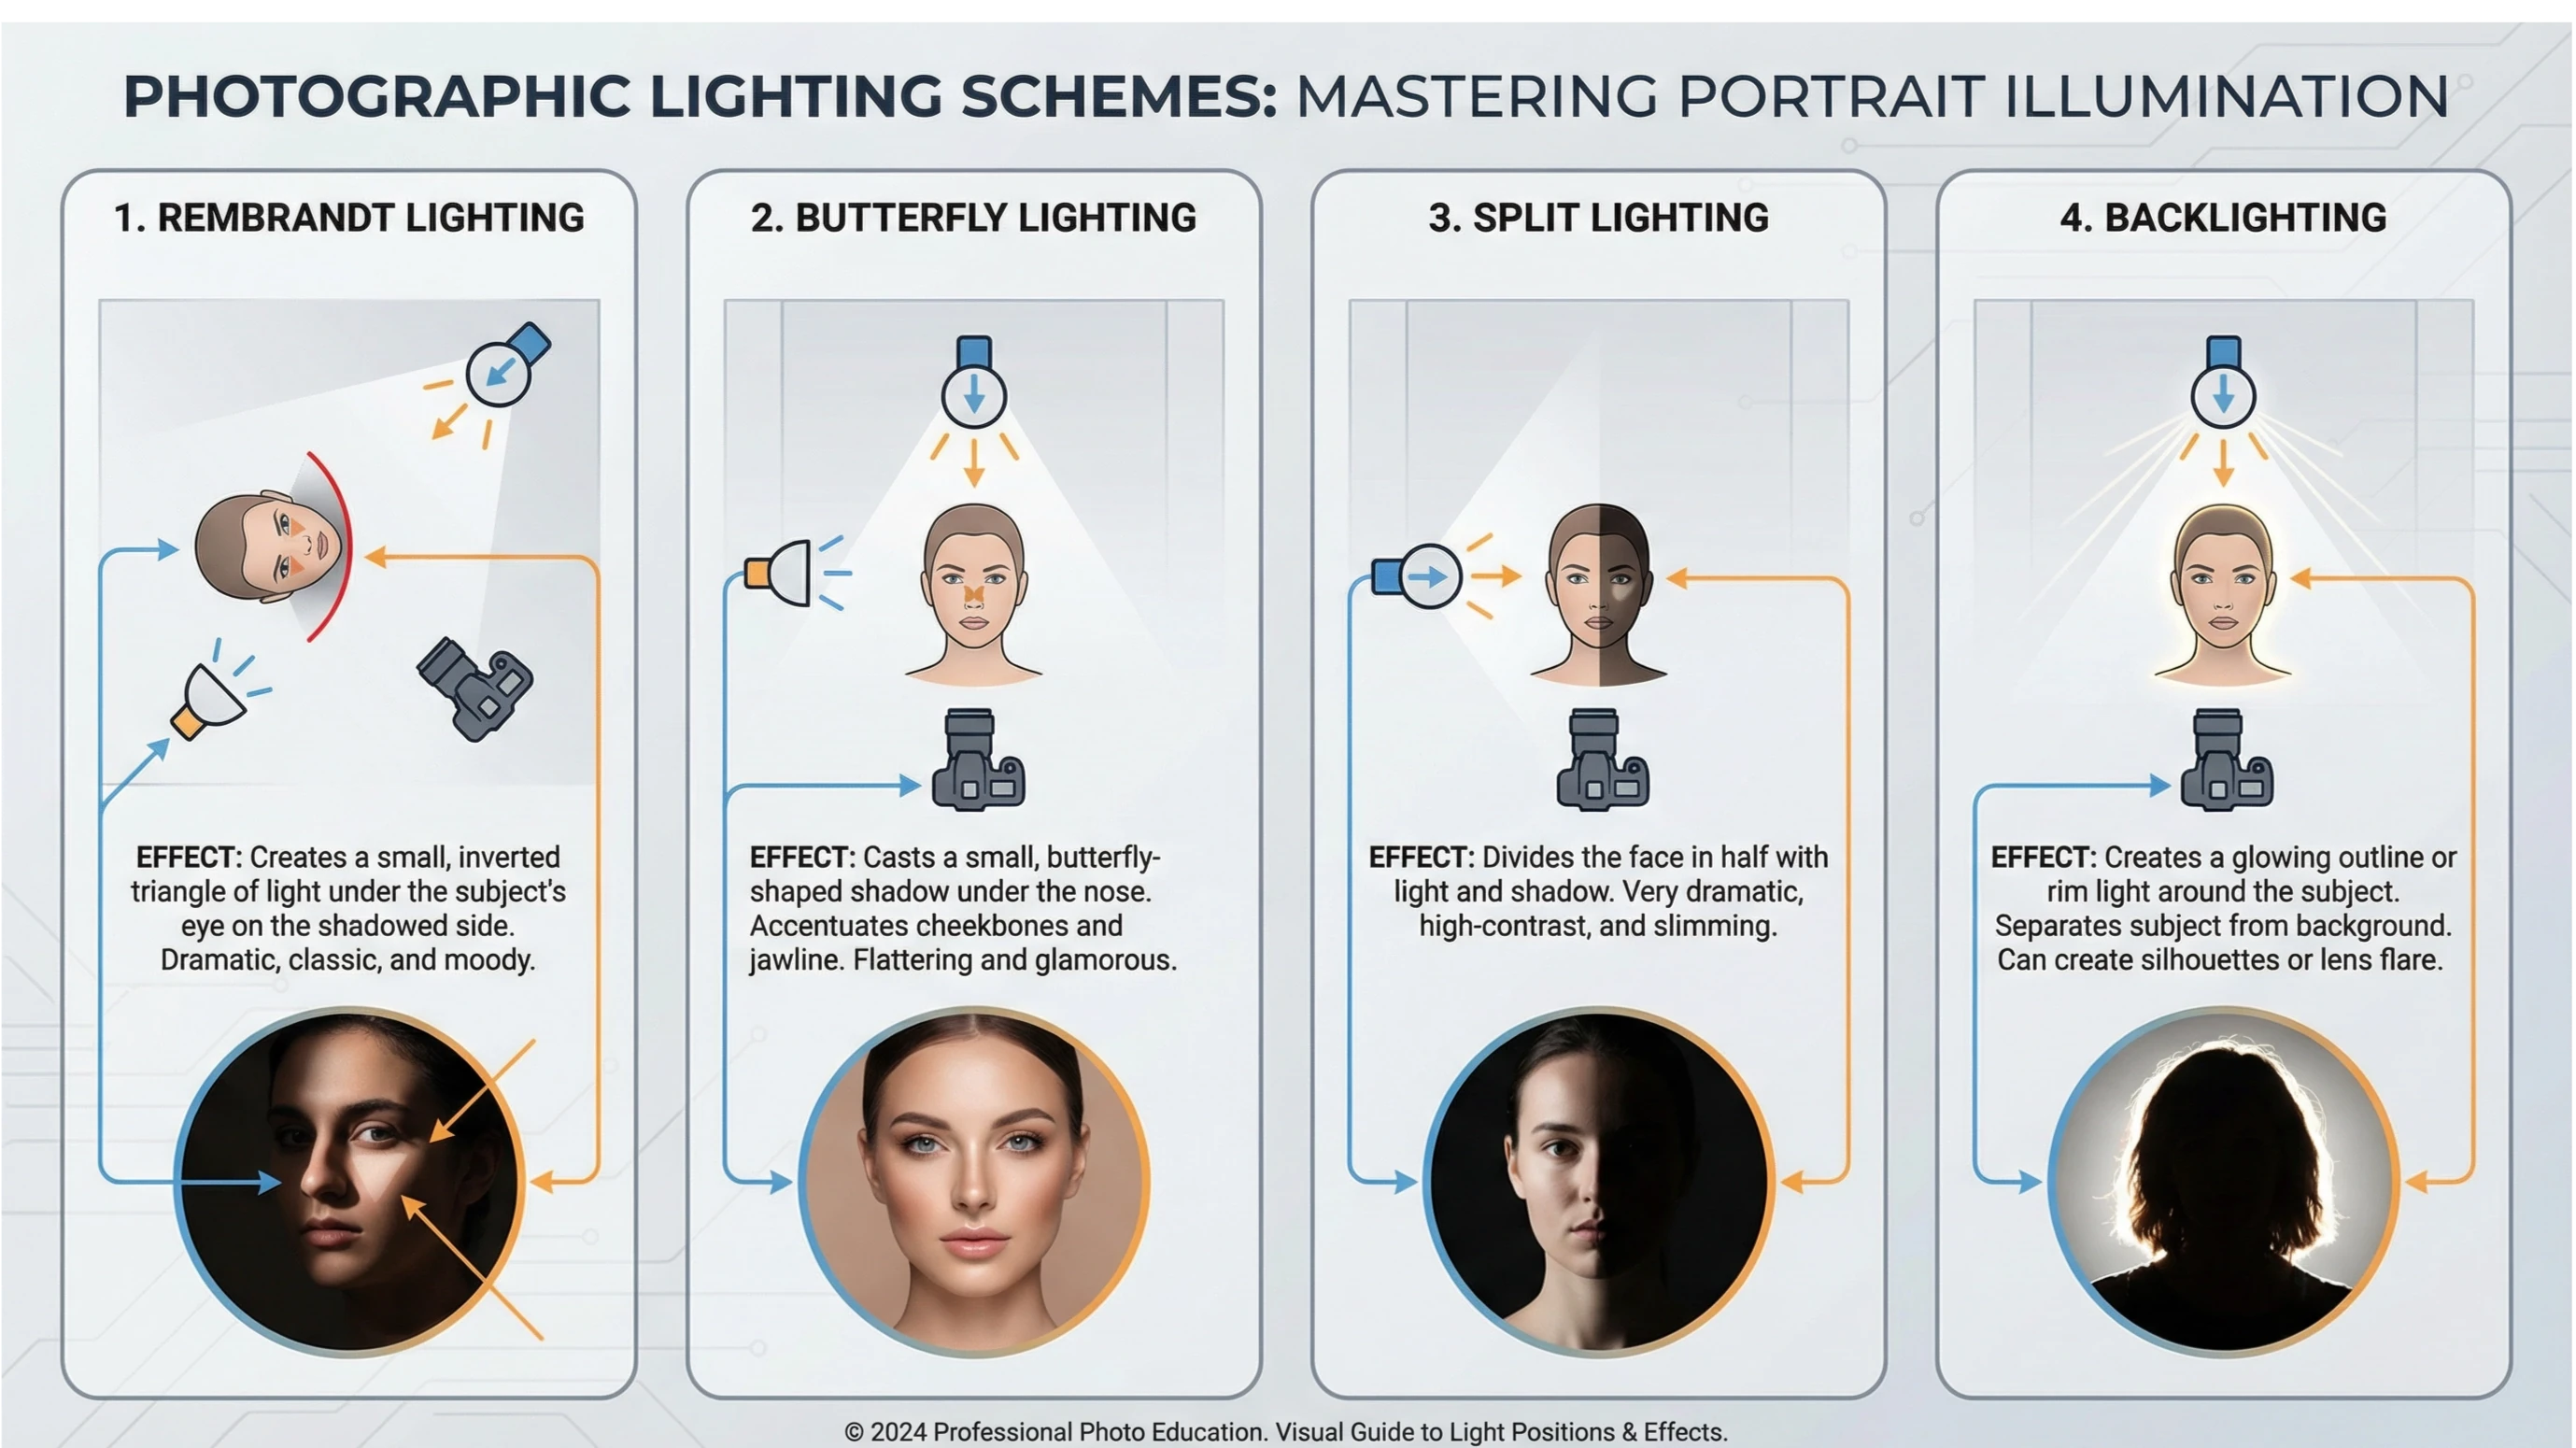
Regardless of the type of light, its hardness, intensity, or color, the direction from which it falls on our subject will greatly influence the final result of our portrait. After many years of experimenting with light, experts have developed different lighting schemes that can help us convey different feelings in our portraits. In this post, I wanted to compile the most commonly used ones so you can keep them in mind when creating your own portrait photographs.
2. Types of Lighting: The Photographer's Arsenal
Every photographer has at their disposal an arsenal of light sources, which can be classified into three main categories.
Natural Light
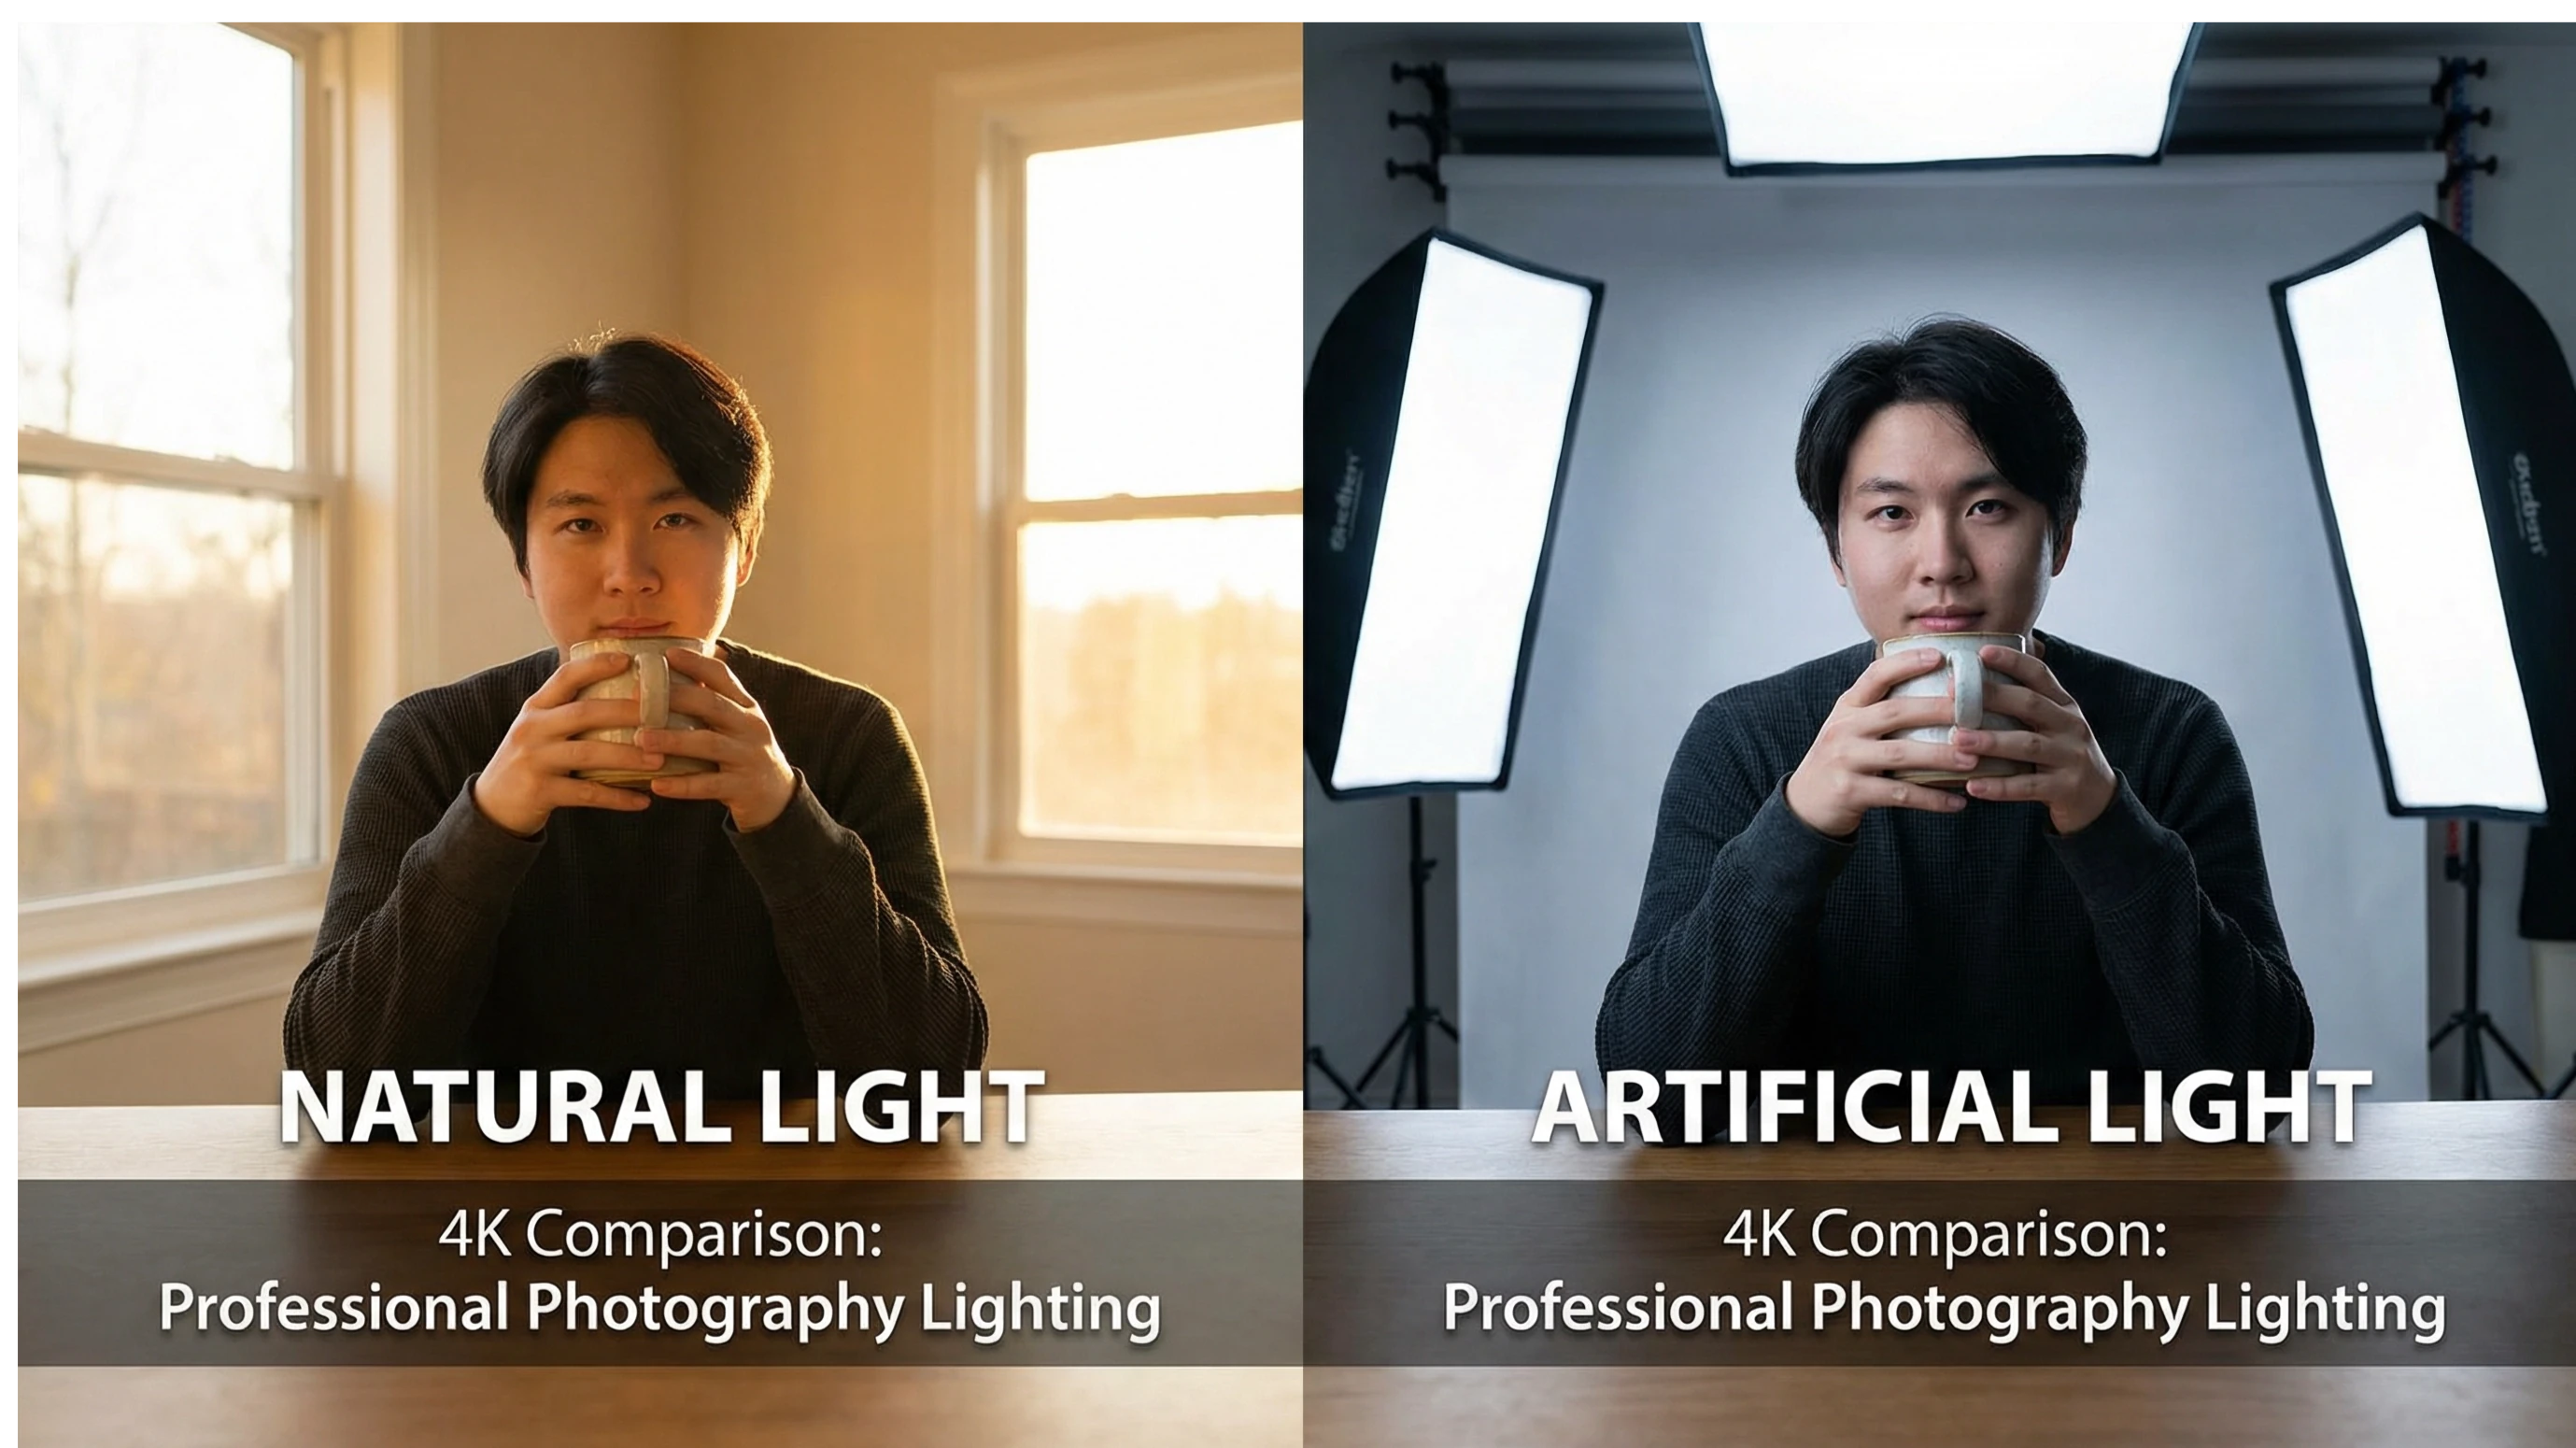
It's the light that comes from the sun. It's free, readily available, and, when used correctly, produces unparalleled beauty. Natural light can be direct (sunlight on a cloudless day) or diffused (cloudy day). Diffused natural light is especially flattering because it creates soft shadows with a gradual transition between light and shadow. However, its main challenge is the lack of control. It constantly changes depending on the time of day, the season, and the weather conditions.
Artificial Light
This category includes flashes, studio strobes, and continuous lighting (such as LED panels or tungsten bulbs). The main advantage of artificial light is complete control. The photographer can decide the position, intensity, color, and quality of each light source, allowing for limitless creativity. Flashes are devices that connect to the camera and use the camera's metering system. They can usually be combined with other units around the scene to produce multiple light sources. They are flexible because they can be positioned from any angle, any direction, and almost any distance from the subject.
Mixed Light
An advanced and increasingly popular technique is the combination of natural and artificial light. For example, using a window as the main light and a flash or reflector as fill light to soften shadows. This technique allows you to achieve a natural look while still having the control and polish of studio lighting.
3. Soft Light vs Hard Light: The Quality of Light
One of the most important distinctions in lighting in artistic photography is the difference between soft light and hard light.
Soft Light
Different light sources have different qualities. These qualities are most noticeable in the shadows produced in photographs. Diffused light creates fewer shadows with a softer distinction between light and shadow. This is soft light. While it originates from a single source, the light spreads in many directions from that source. This is another way of saying it's non-directional. An overcast day is an excellent example of soft light. It can be a very desirable look for many images and is generally preferable to hard light.
If you're trying to soften the light on your subject, you can use a diffuser. If you're shooting with a flash, many have diffuser boxes that you can attach. These white plastic pieces diffuse the light and soften shadows. One of the important photographic lighting techniques in soft-light photography is using bounce flash. By directing your flash at a larger object, you effectively create a flash from that object. You can use a wall or ceiling in front of your subject, which effectively diffuses the light hitting them. Professional photographers working with models often use what's known as a beauty box. These are large light setups that scatter a lot of light on the subject but still produce a soft, luminous appearance.
Hard Light
Hard light comes from directional light sources, such as spotlights, direct flash, or sunlight. Shadows are very harsh, and there's a significant difference between light and dark areas. In portraits, this results in a sharp, angular look, which isn't usually what clients want. Hard light has its place in photography, but it often lends a moody or dark feel to your images. It's ideal for highlighting textures, creating drama, and conveying intense emotions.
4. Classic Lighting Schemes: The Language of Light
Throughout the history of painting and photography, artists have developed tried-and-tested lighting schemes to achieve specific effects. Understanding these schemes is like learning the vocabulary of the language of light.
Comparative Table of Classical Lighting Schemes
Lighting Scheme | Main Light Position | Effect and Characteristics | Ideal for |
Rembrandt | 45° lateral and slightly elevated | Create a triangle of light on the shaded cheek. It adds volume and classic drama. | Portraits with depth and character. |
Side Light (Split) | 90° lateral | It illuminates exactly half of the face, creating high contrast and drama. | Highlight textures, create powerful and mysterious portraits. |
Butterfly | Frontal and elevated | It creates a small, butterfly-shaped shadow under the nose. It softens the features. | Beauty and fashion photography, glamorous portraits. |
Loop Lighting | Similar to Rembrandt but more frontal | The shadow on the nose creates a small "loop". It's a very flattering and versatile design. | Most types of portraits. |
Backlight | Behind the subject | It creates a halo of light around the subject, separating it from the background and creating a silhouette. | Ethereal portraits, silhouette photography, highlighting hair. |
Clamshell | Two headlights, one above and one below | It eliminates almost all facial shadows, creating a very soft and even light. | Beauty photography, headshots and macro. |
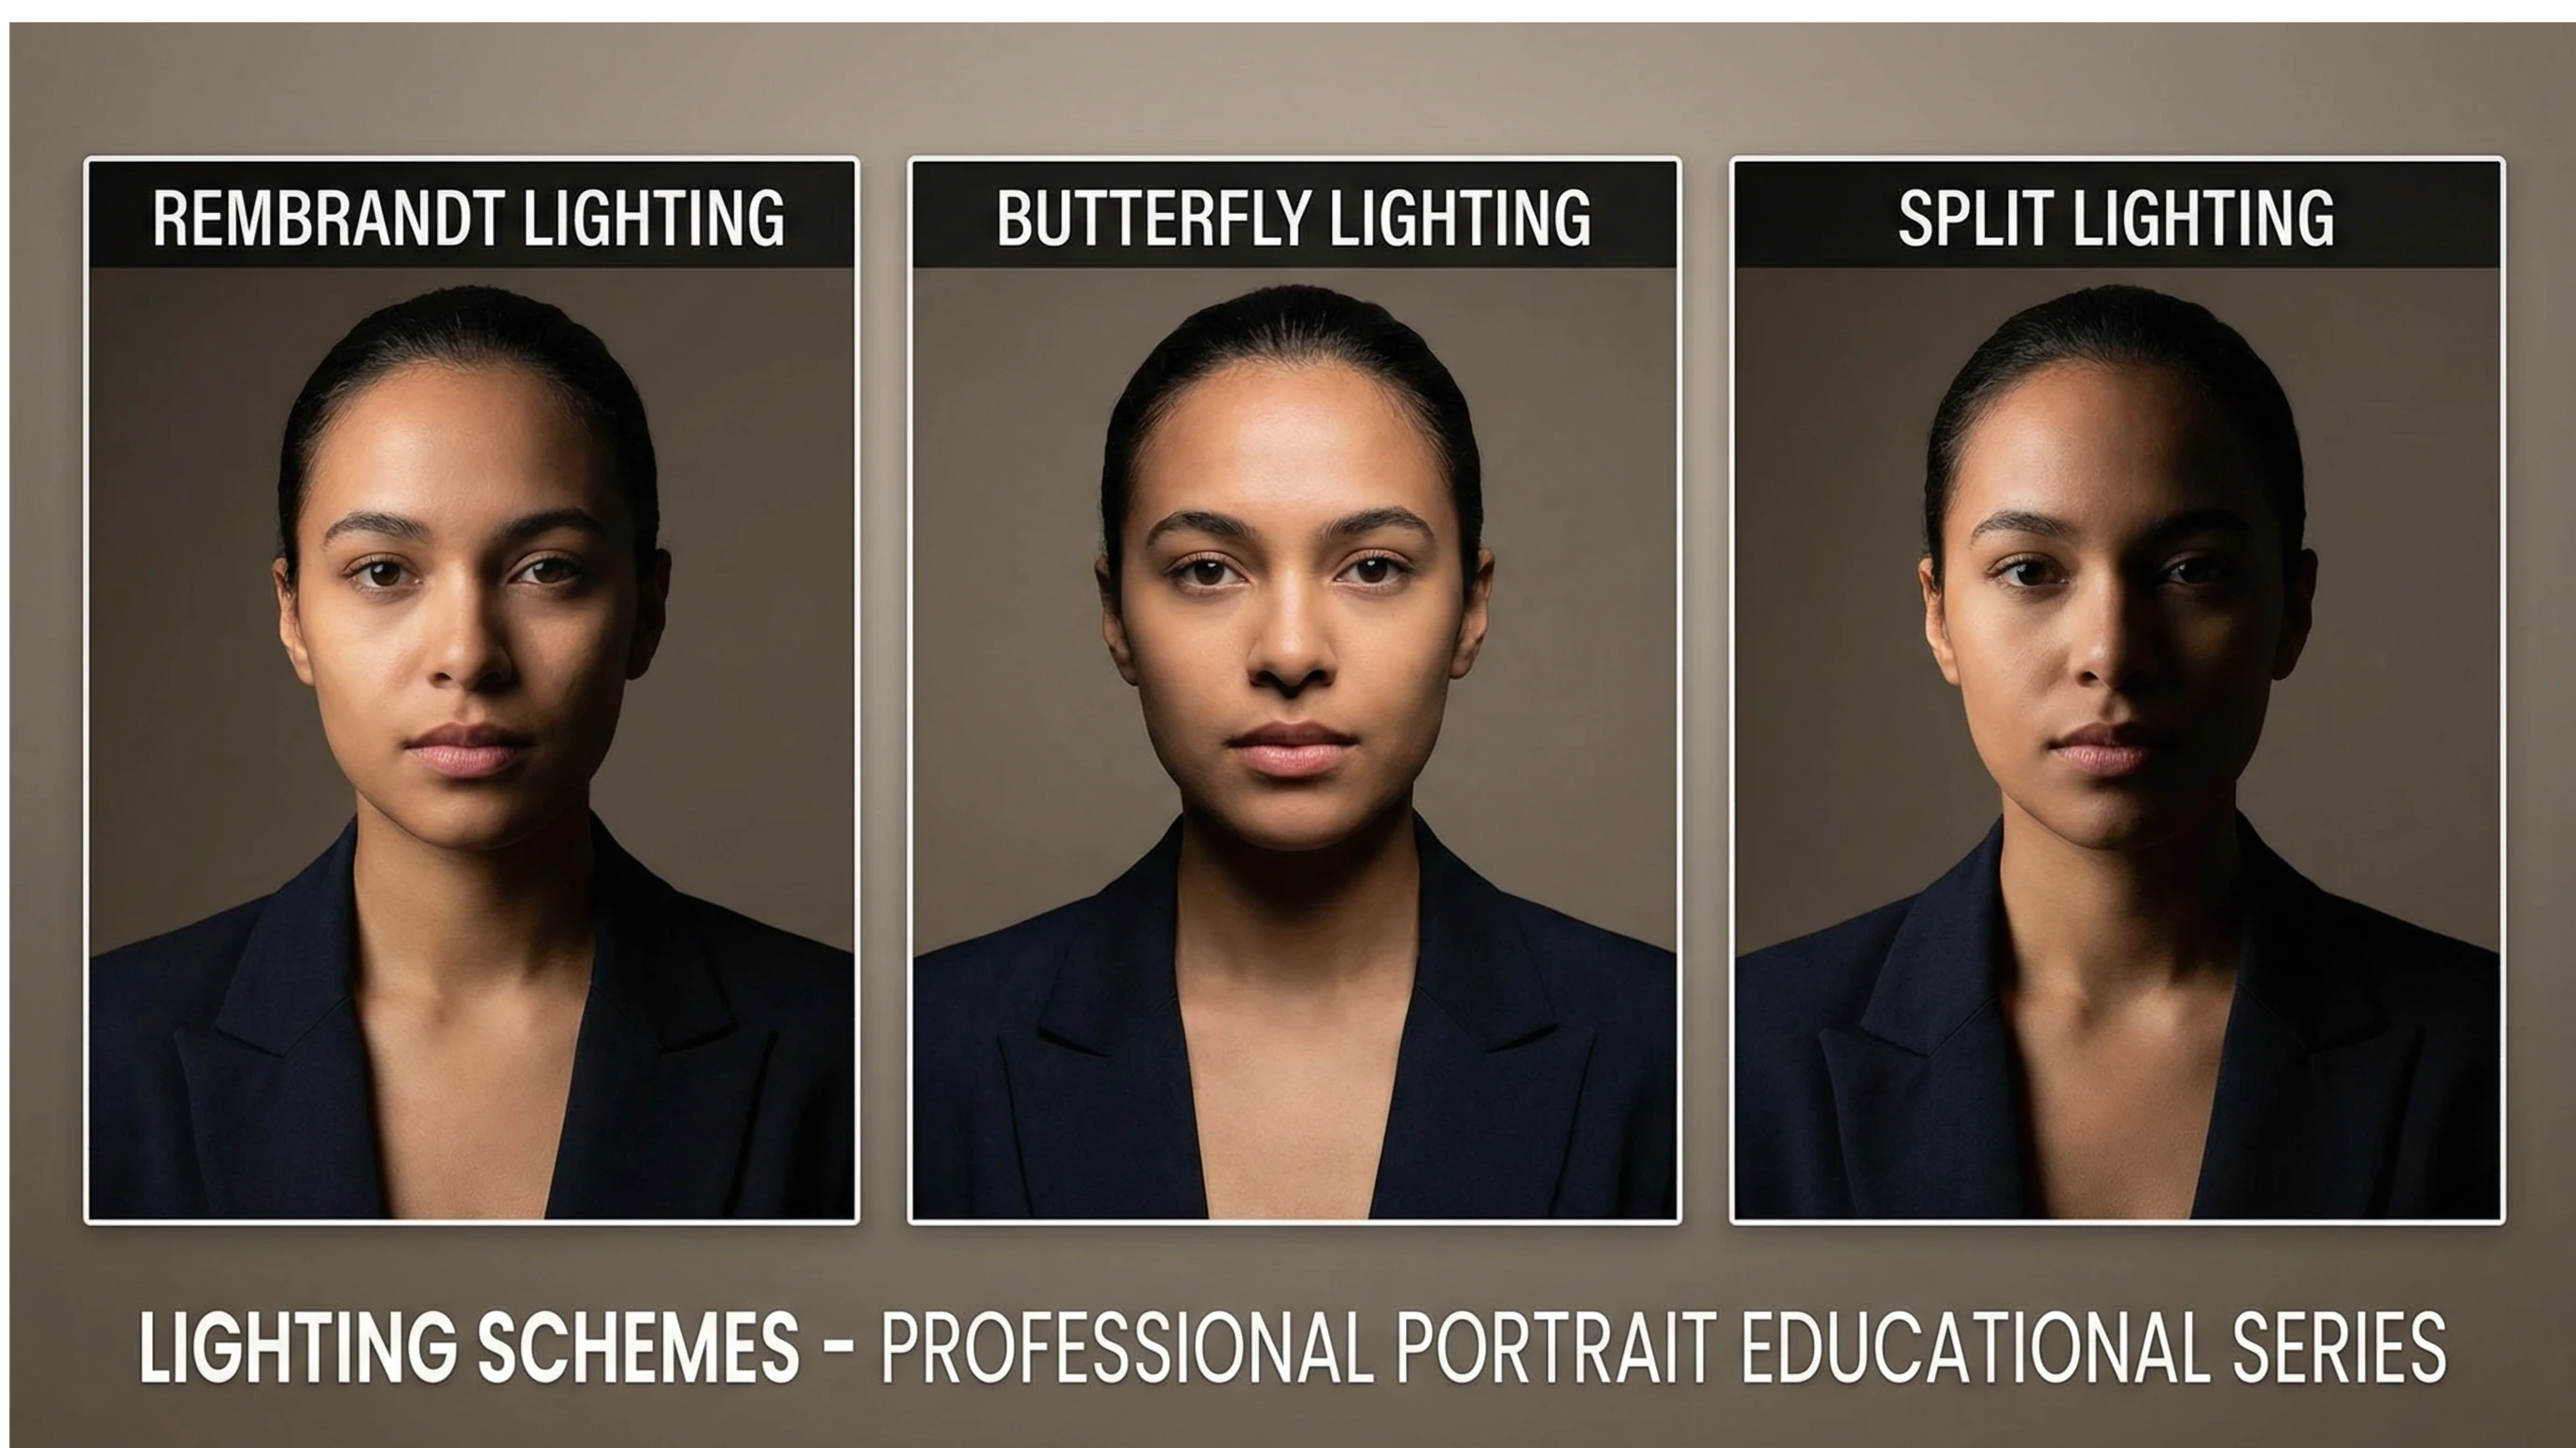
Rembrandt Lighting (Light at 45°)
The Rembrandt lighting technique involves positioning a light source at a 45-degree angle to the subject's nose, so that the shadow cast by the nose creates a triangle of light on the shadowed cheek. It is named after the Rembrandt technique because it mimics the lighting the famous painter used in his paintings. Because the light falls diagonally on the face, this type of lighting is very flattering, as the shadows appear gradually, defining the features without exaggerating them, resulting in a well-balanced portrait.
Side Light (Light at 90°)
Side lighting is positioned at a 90-degree angle to the subject's nose, meaning it's directly to their side. This type of lighting greatly enhances textures and creates sharp shadows, resulting in portraits with a powerful and dramatic impact. This effect is further amplified by using hard light. This setup is particularly useful if the main focus of your photograph is to highlight and emphasize a texture, such as the wrinkles of an elderly person or the muscles of a well-defined body.
Butterfly Lighting
The Butterfly lighting setup is one of the most popular for fashion and beauty portraits. The light source is positioned frontally, but slightly above the subject's head. This type of lighting, especially when using diffused light, is very flattering to the face because it softens the features, making them appear more delicate and refined. It's called "Butterfly" because of the butterfly-shaped shadow it creates just below the nose. It's worth noting that this lighting is designed for close-up portraits or even tighter shots.
Backlight
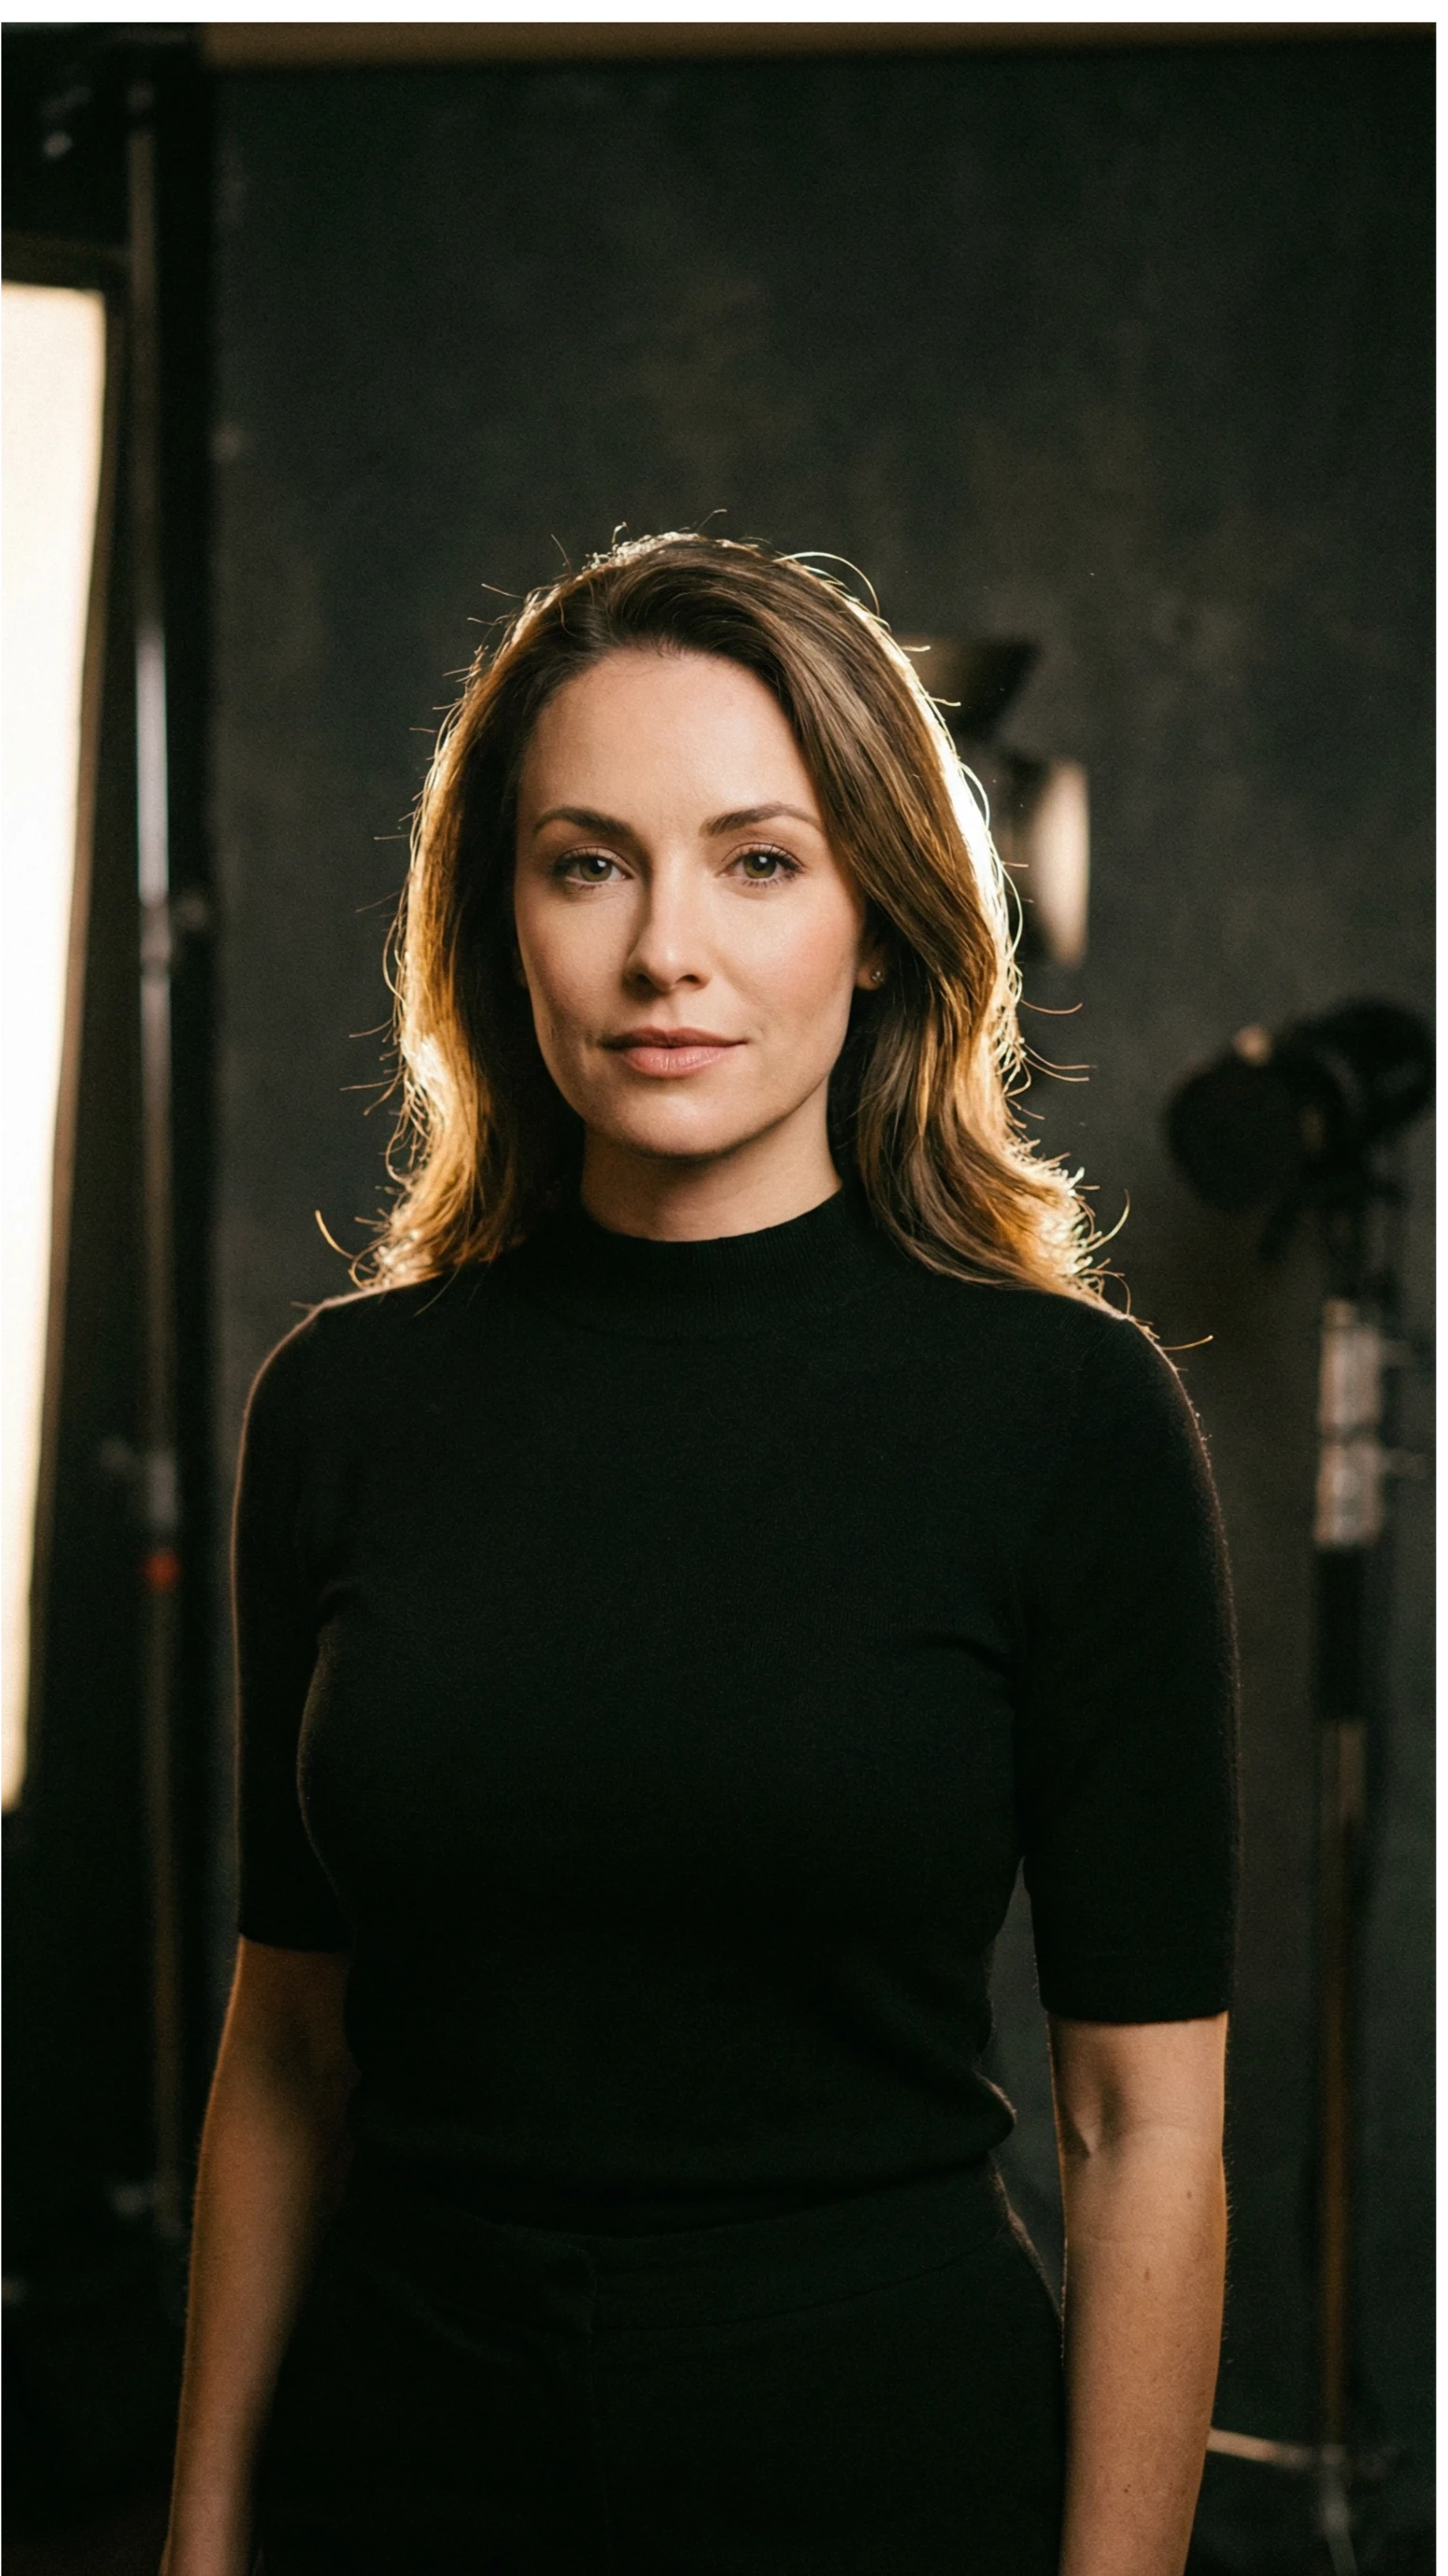
To create a backlight, position the light source directly behind your subject. This will enhance their outline, their silhouette. You can also position the backlight diagonally behind them to highlight only one part of their silhouette. This setup offers two options: one is to correctly expose your subject, allowing the backlight to give them a dreamlike quality; the other is to underexpose your subject, revealing only their black silhouette outlined by the backlight.
5. Three-Point Lighting Configuration
The most common lighting setup in professional photography is three-point lighting. This technique uses three light sources to create depth, dimension, and a professional look.
Components of Three-Point Lighting
1.Key Light:
The most important light source
It provides the main lighting for the subject.
Generally the brightest
It is placed at a 45° angle to the subject
2. Fill Light:
It softens the shadows created by the main light.
Less intense than the main light
It can be a reflector or a secondary light.
It is placed on the opposite side from the main light
3.Backlight:
Illuminate the background or the subject's hair
Separate the subject from the background
Create depth and dimension
It is placed behind the subject
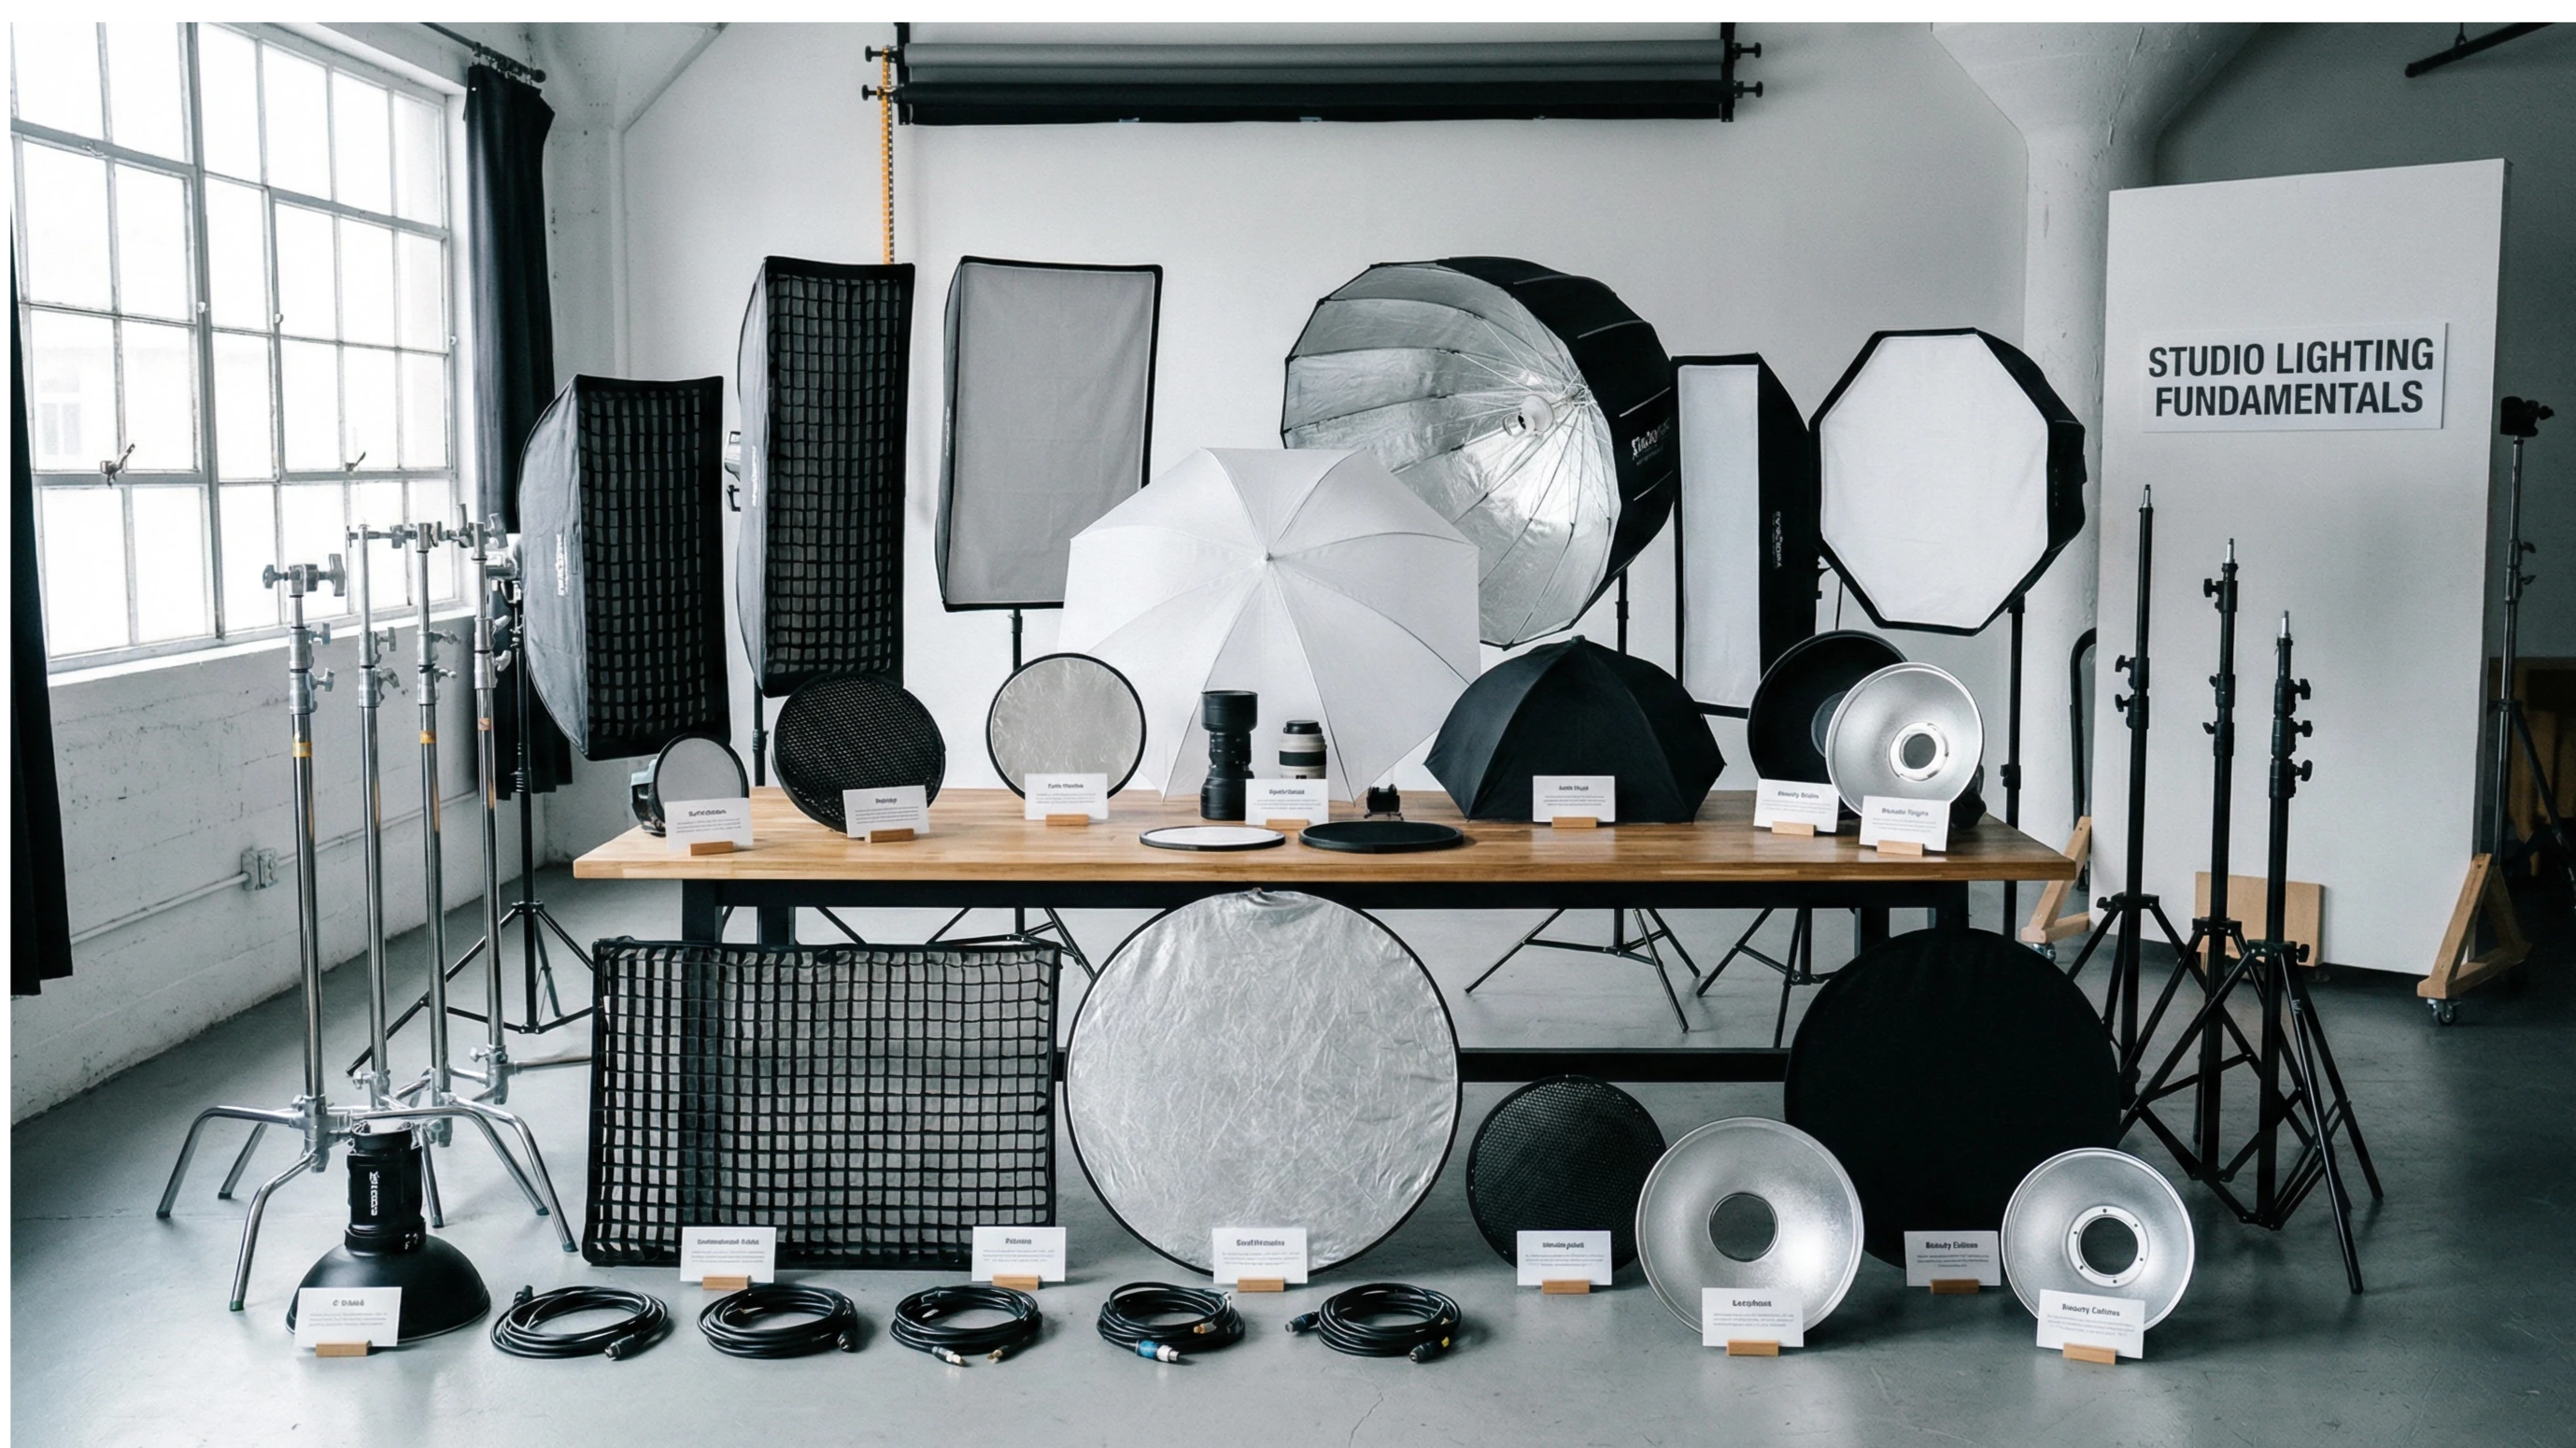
Complete arsenal of professional light modifiers: softboxes, umbrellas, reflectors and grids
6. Light Modifiers: Essential Tools
To manipulate light, photographers use a variety of tools called light modifiers. These accessories transform the quality, direction, and intensity of light.
Softboxes and Umbrellas
Softboxes and umbrellas diffuse flash light, making it softer and more enveloping. Softboxes come in different shapes (square, rectangular, octagonal) and sizes. The larger the softbox relative to the subject, the softer the light.
Reflectors
Reflectors bounce light to fill in shadows. They come in different colors:
•White: Soft, neutral light
•Silver: Brighter and more contrasted light
•Golden: Warm light, ideal for portraits with warm skin tones
•Translucent: Works as a diffuser
Grids (Honeycombs)
Grids or honeycomb panels concentrate light into a narrower beam, giving more control over where it hits. They are ideal for creating spotlights or illuminating specific areas without affecting the rest of the scene.
Colored Gels
Colored gels are placed in front of flashes to tint the light any imaginable color, allowing for endless creativity. They are especially popular in fashion and fine art photography for creating unique atmospheres.
7. Color Temperature and White Balance
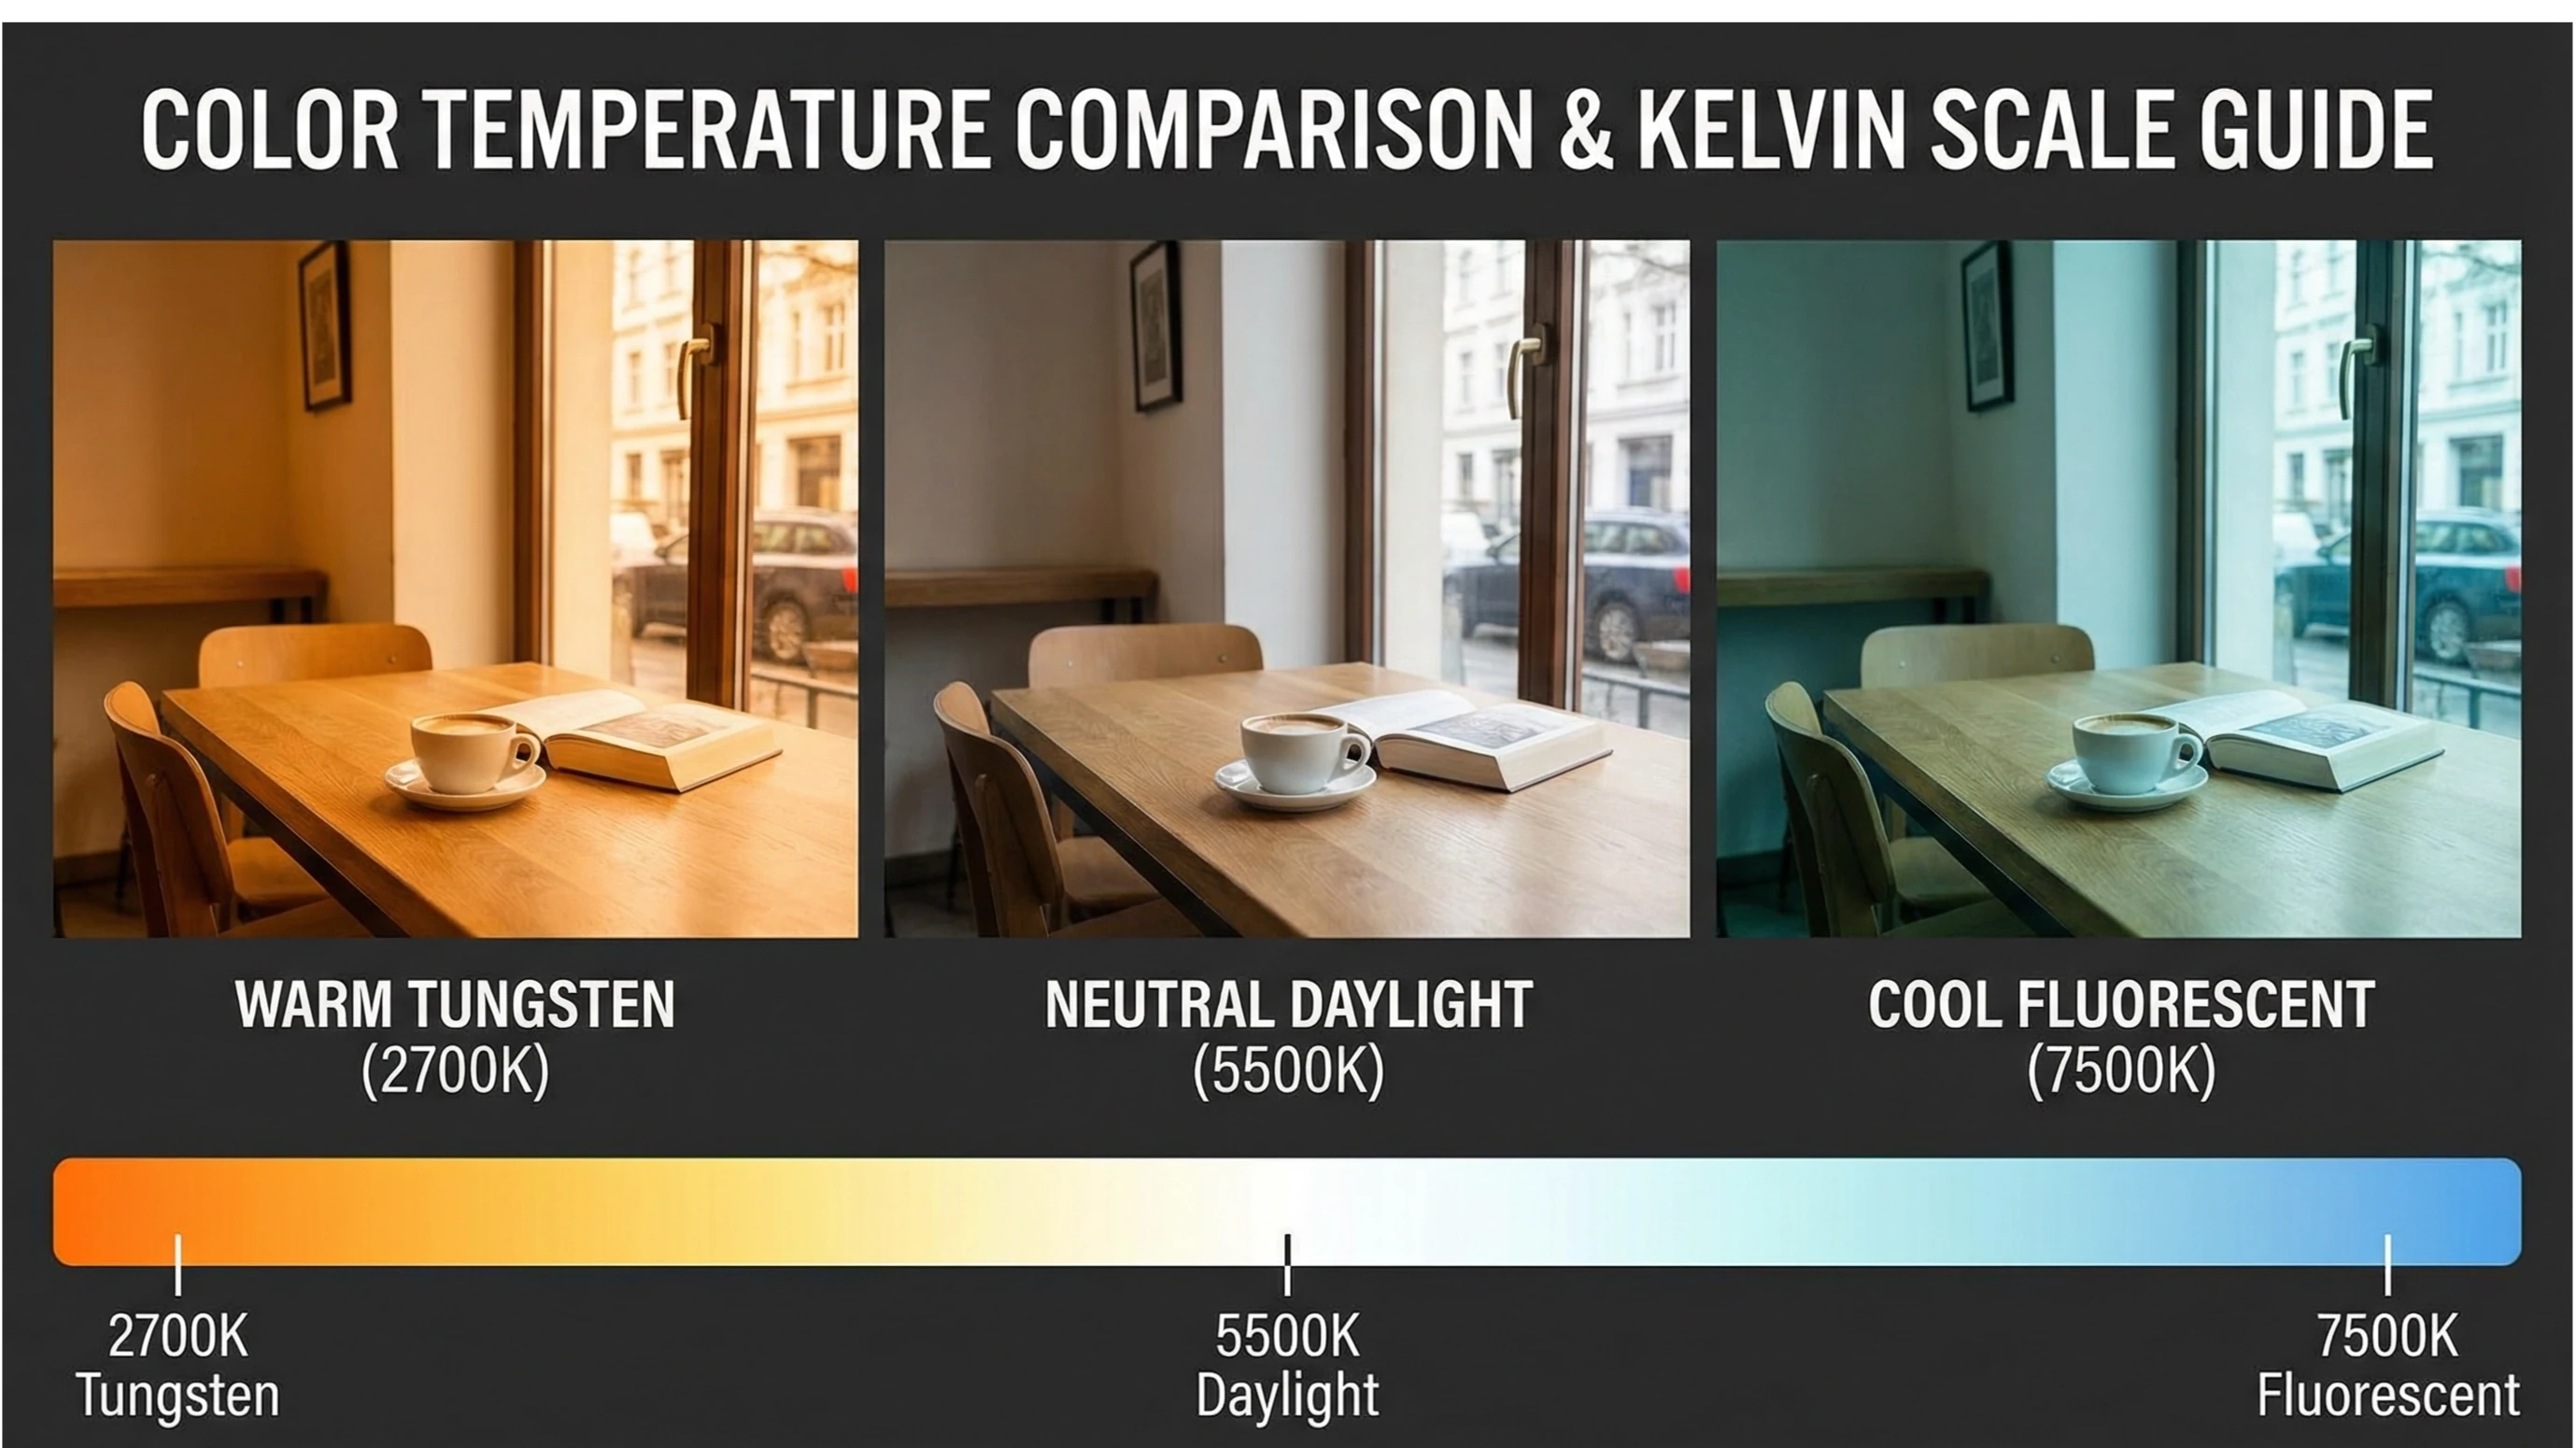
Color temperature comparison: warm tungsten, neutral daylight, and cool fluorescent
All light sources have an associated color temperature, measured in Kelvin. Warmer colors have a lower temperature than cooler colors. These come from candles and incandescent lights. The color temperature of natural sunlight falls somewhere in between. When sunlight is diffused on cloudy days, it generally becomes cooler. Fluorescent lights are very interesting, with an almost blue tint.
Color Temperature Scale
•1,000-2,000K: Candlelight (very warm, orange)
•2,700-3,000K: Incandescent light (warm, yellow)
•5,000-5,500K: Neutral daylight (white)
•6,500-7,500K: Cloudy light (cool, blue)
•8,000-10,000K: Shade light (very cool, intense blue)
White Balance
Your camera's white balance controls how it captures the color temperature of light. You can usually set the white balance in several ways, and there's almost always an automatic setting. However, once you start working with multiple different light sources, it becomes difficult for the camera to choose the color you want.
Pro Tip: Shoot in RAW mode. Files saved as JPEGs won't contain enough data to change the color temperature after the fact. A RAW file, on the other hand, will contain enough data to easily adjust the color temperature as if you were still there taking the photo. Lightroom and other RAW editors have a slider for experimenting with color temperature and adjusting it as needed.
8. Lighting for Different Photographic Styles
The choice of lighting technique in artistic photography depends intrinsically on the style and objective of the session.
Portrait Photography
Generally, photographers seek flattering lighting that highlights the subject's features. Lighting schemes like Rembrandt and Loop are very popular. Soft light is preferred to minimize skin imperfections and create a pleasing look.
Fashion Photography
It often uses more dramatic and contrasting lighting to highlight clothing and create a specific atmosphere. Harsh light and schemes like split lighting are common. The lighting can be more experimental and creative.
Beauty Photography
It requires flawless, soft lighting without harsh shadows to showcase the skin and makeup perfectly. Butterfly and Clamshell lighting schemes are the best in this category. The light must be extremely soft and enveloping.
Boudoir and Artistic Photography
This is where creativity shines. You can play with harsh light and deep shadows to sculpt the body, use backlighting to create sensual silhouettes, or employ colored gels for unique atmospheres. Lighting in artistic photography has no fixed rules, only creative limits.
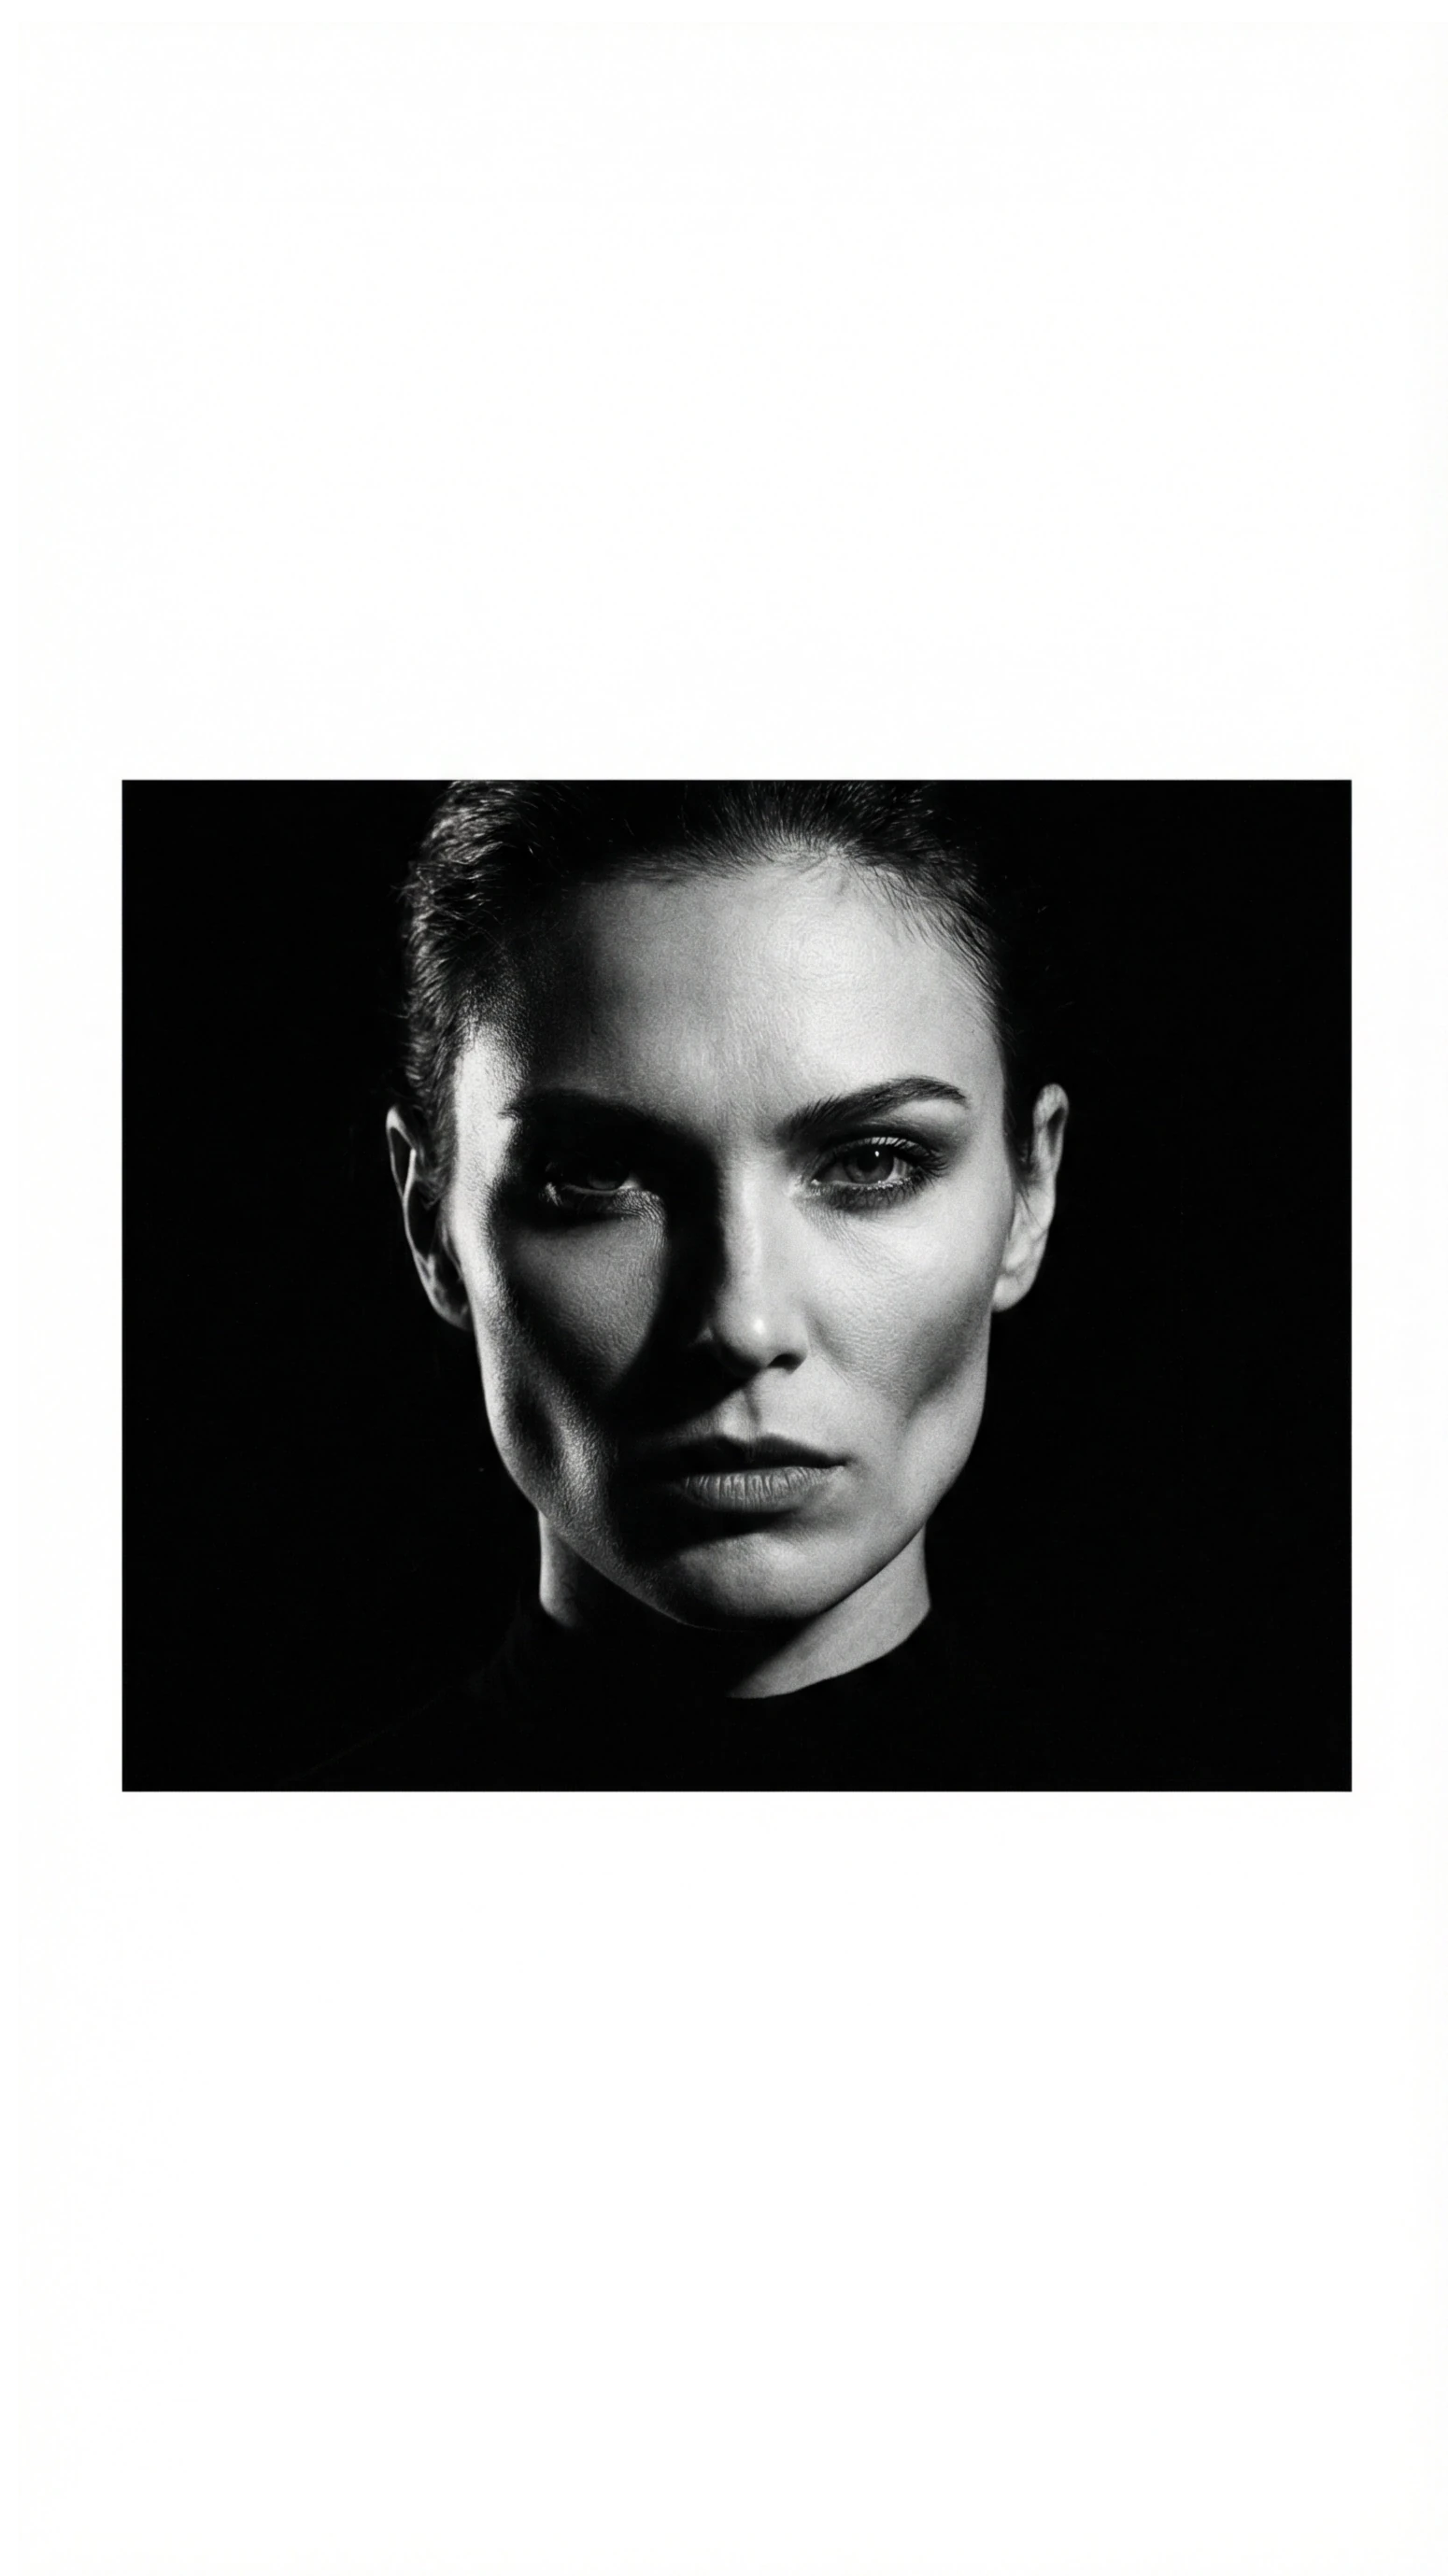
Dramatic portrait with harsh light and high contrast for maximum emotional impact
9. Professional Tips for Mastering Lighting
Start with Natural Light
By far, the best starting point is to use natural light to learn professional photographic lighting techniques. This eliminates one variable for the photographer: they can't move or control the light source itself. But what they can do is move around, change the time of day, filter the light through a window with blinds, and position the light behind or in front of the subject. By keeping it simple, you'll learn the fundamentals of lighting.
Observe the Light Constantly
Great photographers observe light all the time, even when they're not taking pictures. They notice how natural light changes throughout the day, how it interacts with different surfaces, and how it creates shadows. This constant observation trains your eye to see light like a photographer.
Experiment with One Light
Before adding multiple light sources, master using a single light. Move the light around your subject, change its height and angle, and observe how each small change affects the image. This practice will give you a deep understanding of how light works.
Use Simple Tools
You don't need expensive equipment to get started. A simple reflector (even a piece of white cardboard) can work wonders for filling in shadows. A large window makes a perfect soft light source. Creativity is more important than equipment.
Study the Work of Teachers
Look at the work of photographers you admire. Try to identify what lighting setups they're using. Where is the main light? Are they using fill light? What modifiers might they be using? This analysis will help you develop your own style.
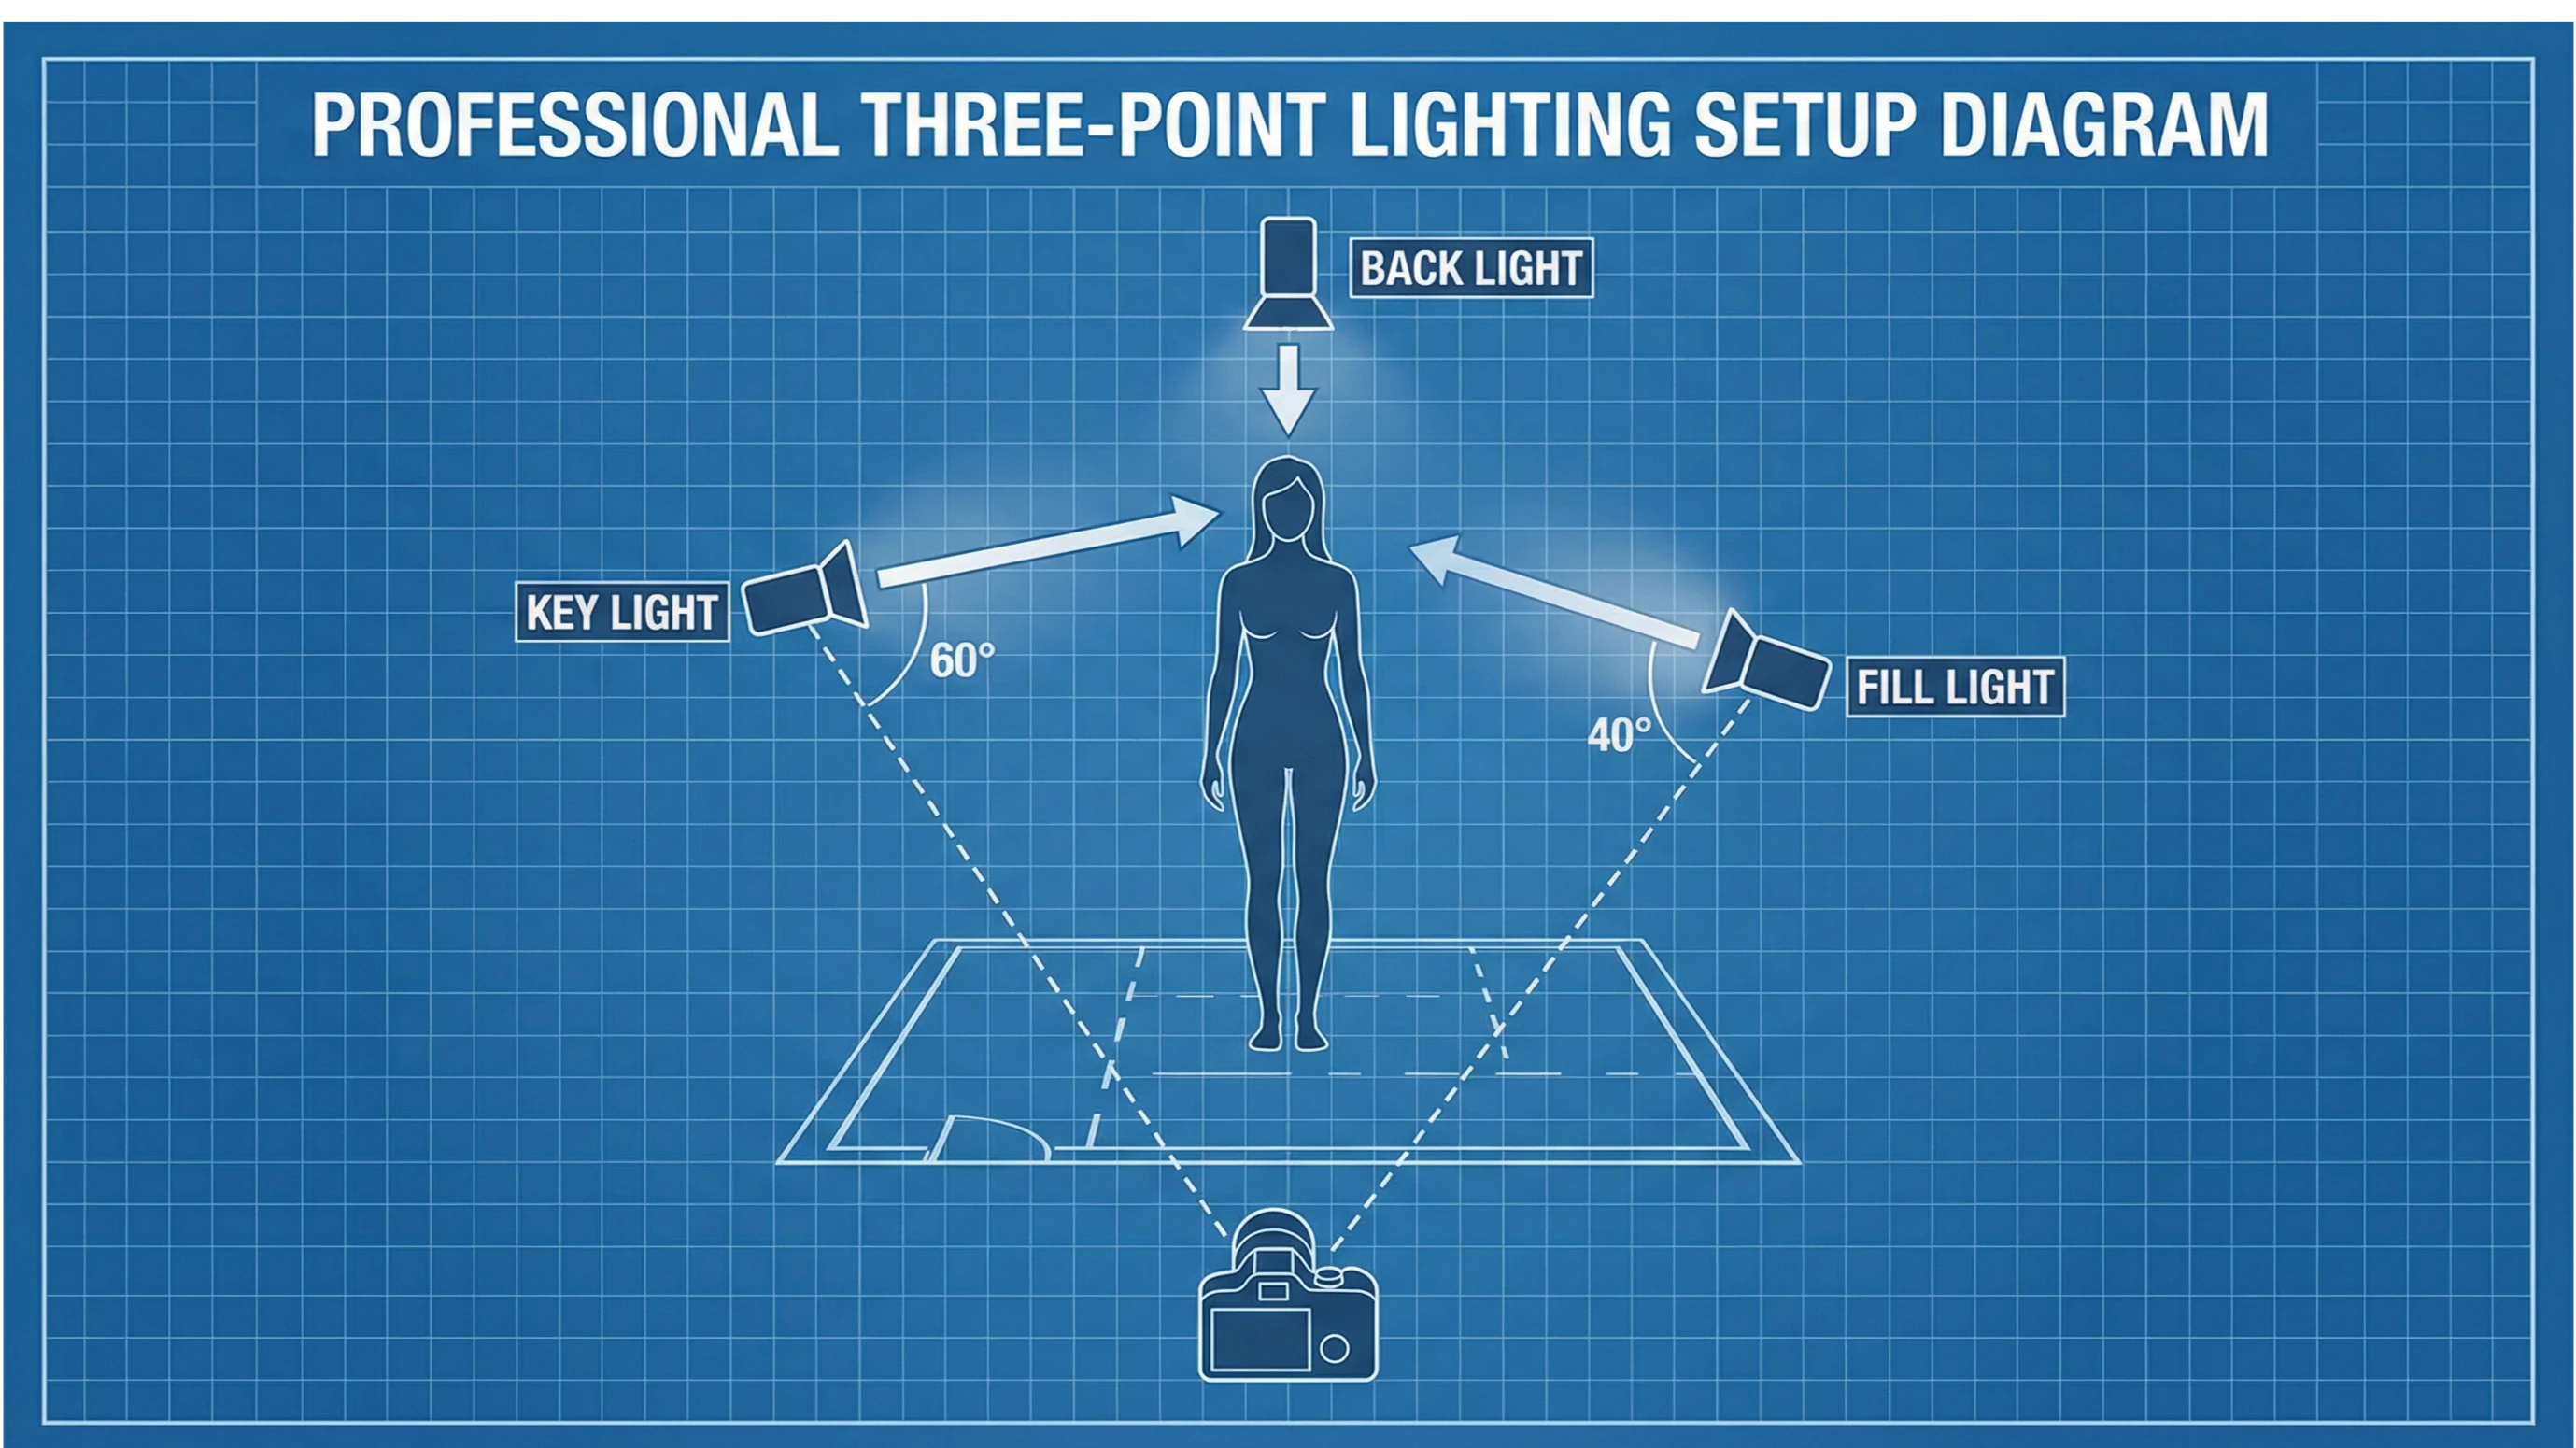
Professional three-point lighting configuration diagram
Conclusion: Consistent Practice is the Key
Mastering lighting in artistic photography isn't something you learn overnight. It requires study, observation, and above all, a lot of practice. Start by observing the natural light around you: how it changes throughout the day, how it interacts with different surfaces, how it creates shadows. Then, begin experimenting with a single artificial light source. Move the light, change its height and angle, and observe how it affects your subject.
Lighting is one of the most powerful and expressive tools in a photographer's arsenal. Learning to control it is the definitive step to taking your images to the next level and developing a unique and recognizable visual style. At Minettes, we apply these professional lighting principles to every shoot, creating images that not only capture beauty but also tell stories and evoke profound emotions.
Inspired to See Professional Lighting in Action?
Explore our exclusive galleries and discover a world of beauty, art, and sensuality masterfully captured. Each image is a testament to the transformative power of professional lighting.
Related Links:
• Alternatives to OnlyFans for Latina Models
• Posing Tips for Beginner Models
• Female Artistic Photography: Empowerment
And if you'd rather not build the studio
Mastering light is a craft: three-point setups, modifiers, measuring the ratio between key and fill. It's worth learning if photography is your path. But if what you want is to look good in the photos, you don't need to build anything.
At the Minettes VIP casting the light, the equipment and the direction come from the studio. You turn up, and the technical half of everything you've just read is our problem. No following required, and you decide what gets published. We reply within 48 to 72 hours.
Apply to the casting if you'd rather be in front of that light than behind it.